Accounts Overview
The Account Manager is where administrators can go to view, edit and add subscriber accounts to Ultra Commerce.
- Navigate to the Accounts Listing Page
- Create an Account
- Edit an Account
- Actions Menu
- Term Payment Details tab
- Contact Details tab
- Payment Methods tab
- Redeemed and Redeem New Gift Cards tab
- Price Groups tab
- Orders tab
- Order Templates tab
- Wish List tab
- Carts and Quotes tab
- Account Payments tab (Payments on Term Payment accounts)
- Account Loyalty Programs tab
- Product Reviews tab
- Subscription Usage tab
- Permission Groups tab
- Parent Accounts tab
- Child Accounts tab
- Account Settings tab
Navigate to the Accounts Listing Page
To access the Account Listing page:
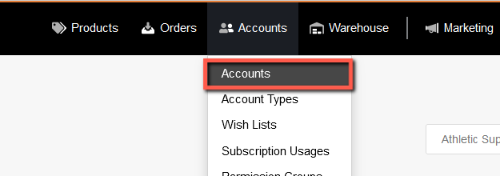
- Click on Accounts from the Ultra Commerce navigation toolbar, and
- Select Accounts from the drop-down.
The basic information of all the accounts in Ultra Commerce can be viewed on this page, including each subscriber's First Name, Last Name, and Email Address. Accounts can be searched, reports created, filters added through the personal collections bar at the top of the listing. Visit the Collections section of the user guide for an overview of how to create personal collection reports.

Create an Account
To create a new account:
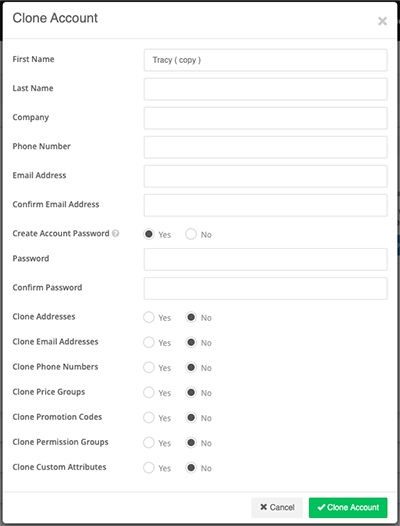
- Click the blue + Create Account button and the Create Account modal will appear.
.png)
- Fill in the First Name, Last Name, Company, Phone, Email Address fields. The required fields are First and Last Name and Email address.
- Account Created Site - If the account is associated with a Site added to Ultra Commerce, select from the drop-down.
- Create Account Password - Yes or No. If Yes is selected, fill in the password and confirm password fields.
- Organization - Yes or No.
- Parent Account - Begin typing in the type-ahead field and then select the parent account.
- After filling out the information, click Save.
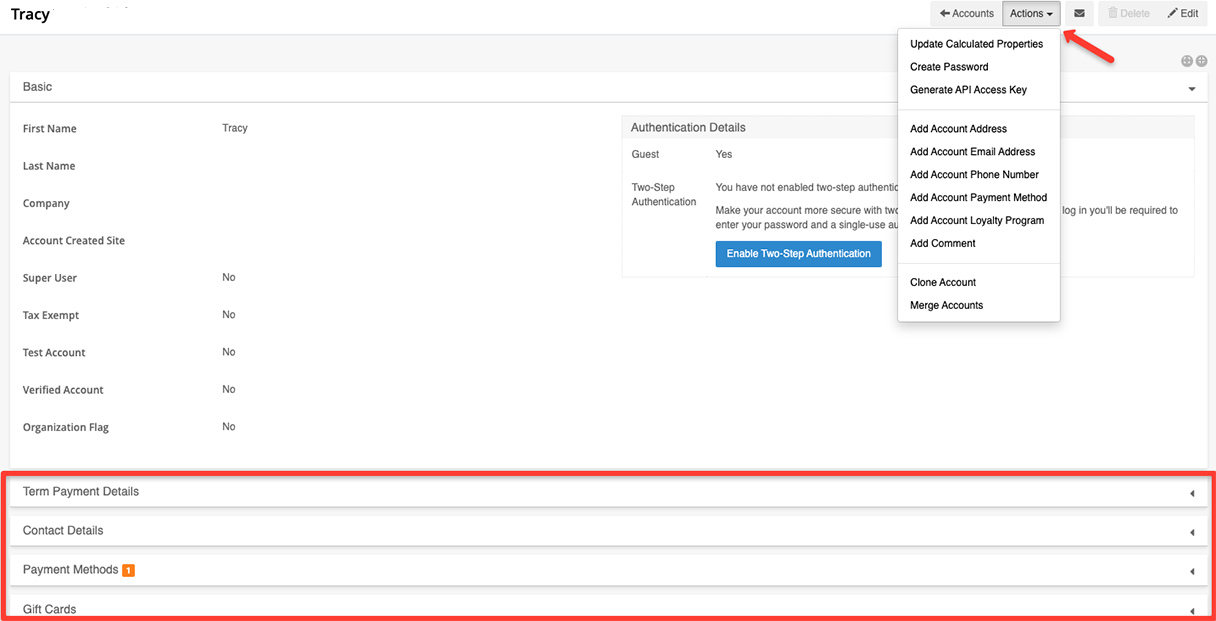
The account detail screen will display. Once the account has been created, there will be additional tabs below the Basic information that was saved, as well as an Actions menu that allows for changing or creating passwords, adding in account information, merging accounts, etc.
Edit Account
To open the Edit Account page from the Account listing page:
- Click on the pencil button
 located on the right-hand side of the account listing page.

If you are already on the Account detail page:
- click the pencil button on the top right-hand side of the page.

This will allow for the editing of the information on the Basic tab. Note that the actions menu and the other tabs can be edited without clicking the pencil icon.
Now the Basic fields will be in edit mode.
- Make any additions or corrections and
- then click Save.
Make an Account a Super User Account
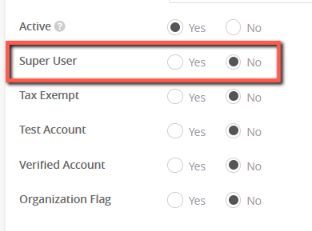
When an account is first created, by default the account does not have permissions to access the admin. The Super User setting on the account detail will default to No. If a user should have access to the admin area of Ultra Commerce once the account has been created, from the account detail:
- Set the Super User setting to Yes
- Click Save to save the changes.
The account will now have super user permissions.
Guest vs Non-Guest Accounts
Guest accounts are accounts that are created without a password.
Non-Guest accounts are accounts that are created with a password for logging in to a site. These could be non-admin accounts or admin accounts such as Super User accounts.
Enable Two-Step Authentication
You can also Enable Two-Step Authentication.
- Click the Enable Two-Step Authentication button.
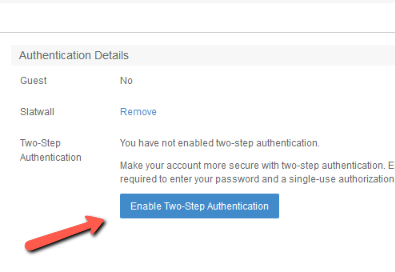
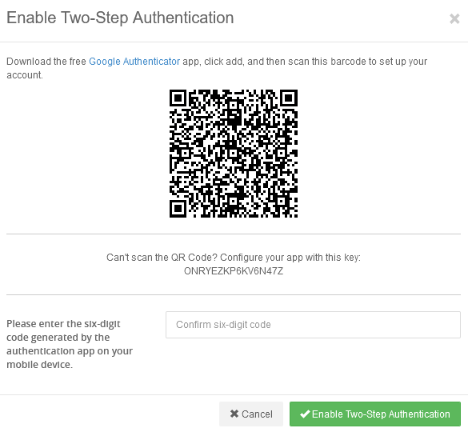
The Enable Two-Step Authentication modal will appear.
- Download the free Google Authenticator app, click add, and then scan this barcode to set up your account.
- Can't scan the QR Code? Configure your app with this key:
AJK7HZZRJJXHCRIF - Enter the 6 digit code generated. There are instructions on the modal to guide you.
- Click the Enable Two-Step Authentication green button.

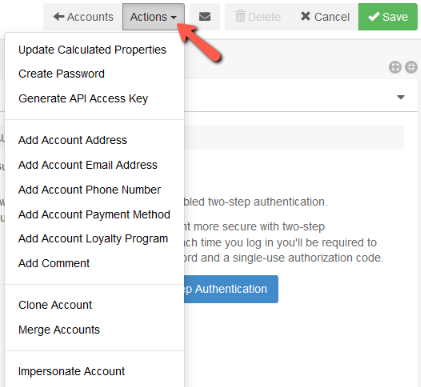
Actions Menu
The actions menu allows admins to quickly update accounts, generate api access keys, clone accounts and merge accounts. Select the desired option from the Actions drop-down list.
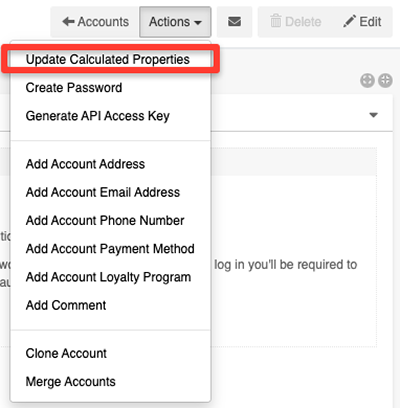
Update Calculated Properties
Selecting this option will update calculated properties for this account.
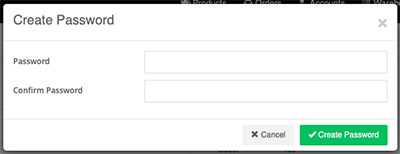
Create/Change Password
If a guest account was created without a password, click the Create Password option from the Actions drop-down to create one. If a non-guest account was created, this will say instead Change Password.
We recommend that you change your password on initial logon, password resets, routinely every 90 days or if you feel your password has been compromised.
Generate API Access Key
Select Generate an API access key from the Actions drop-down list to create one.

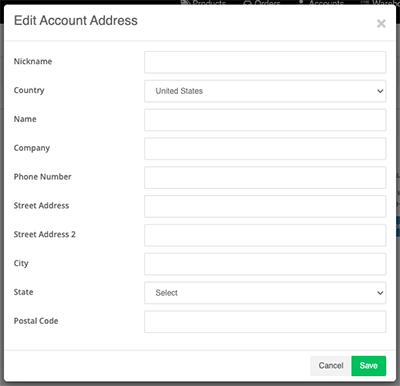
Add Account Address
Select this option from the Actions drop-down to add an account address here.
Add Email
Select this option from the Actions drop-down to add an email to an account here.
.png)
Add Phone Number
Select this option from the Actions drop-down to add a phone number here.

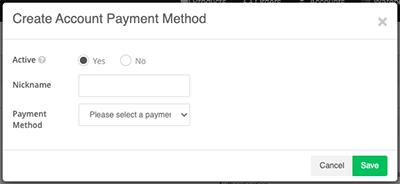
Add Account Payment Method
Select this option from the Actions drop-down to add an account payment method from available ones here.
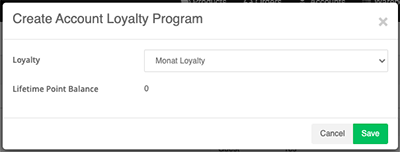
Add Account Loyalty Program
Select this option from the Actions drop-down to add an account loyalty program here from ones that have been added to Ultra Commerce.
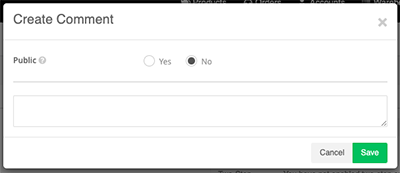
Add Comment
Select this option from the Actions drop-down to add a comment here that will be saved to the account.
Clone Account
Select this option from the Actions drop-down to clone an Account.
Merge Account
Data from one account can be merged to another account by selecting the option from the Actions drop-down. The From Account selected from the drop-down will be deleted and the data will be merged to the To Account selected.

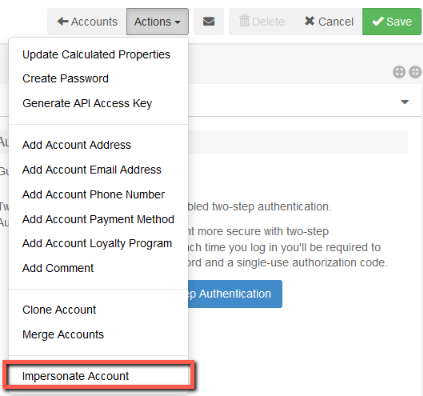
Impersonate Account
When an account is impersonated it allows the user to see what a user with certain account types and user permissions can see on a site. When you are done impersonating, there is a link to click to stop impersonating the account.
Other important details regarding the Account can be found on the tabs below the Basic tab fields and is detailed below.
Term Payment Details tab
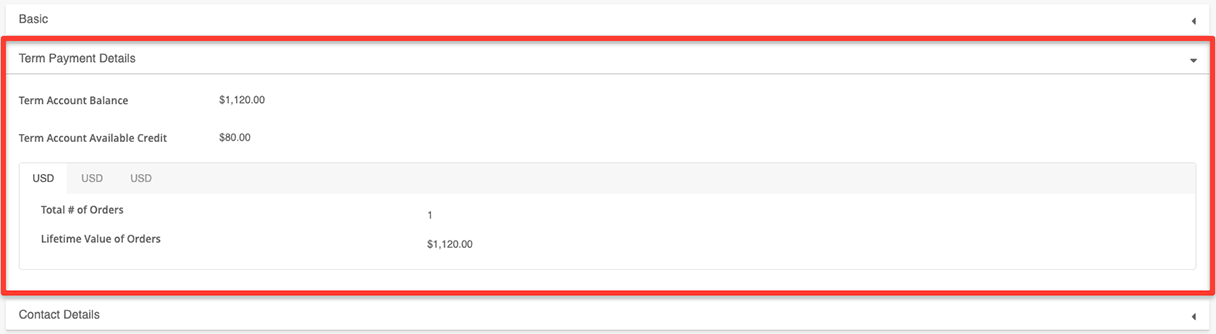
If an account - typically this would be an organization account - has term payment set up as an eligible payment method with a credit limit set as well as payment terms set up this tab is where the account balance and the available credit will display, as well as the lifetime value of the orders. Note: All of these are settings are in Account Settings tab of the accounts detail page or can be found on in the main toolbar Settings > Account Settings at the Global level. For example, below the account has a $1200 term credit limit, payable within 30 days. An order was placed for $1120 using the term payment method, so the term account balance is $1120 and the available credit is $80 since the credit limit is $1200. These amounts will update if the account sends a payment or places another order.
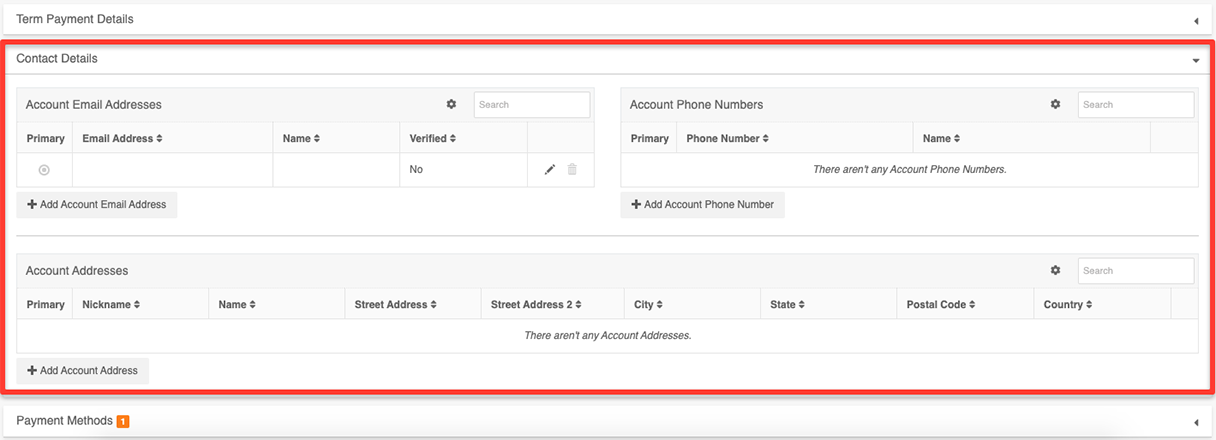
Contact Details tab
Displays any shipping and billing addresses for this account.
Clicking the + Add Account Address button allows you to fill in a nickname, country, name, company, street address (up to two lines), city, state, and postal code for this account. You can also add an +Account Email Address and add an +Account Phone Number.
* Note: These option can also be found under the "Actions" drop-down menu at the top of the page.
Payment Methods tab
Here is where any payment methods that have been added to the account can be viewed and new account methods can be added. Below the term payment method displays.

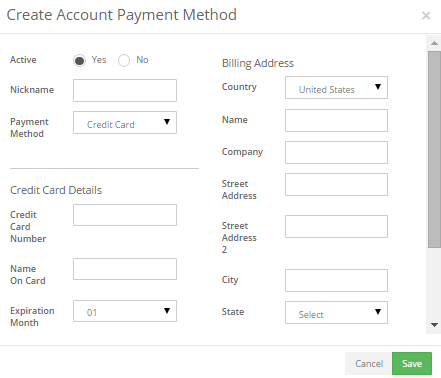
Clicking the + Add Account Payment Method button allows you to add new payment methods, depending on which payment method integrations have been set up (for more on this, view the Settings Manager portion of the guide). For example, if Credit Card has been set up as a payment method and is enabled for Accounts , then you would enter credit card information (name, number, expiration, etc.).
Fill in the details on the Create Account Payment Method modal and then click Save to save the payment method to the account.
Redeemed and Redeem Gift Cards tab
Gift cards that have been redeemed to an account will display here with all relevant information such as balance. Issued gift cards that have not been redeemed to an account can be redeemed here as well.
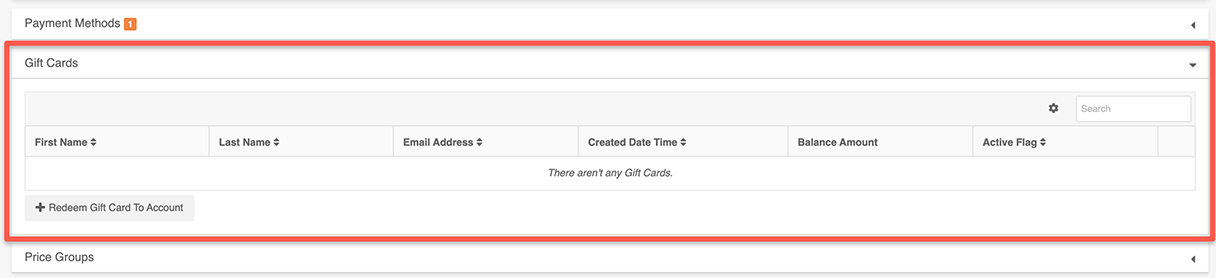
To Redeem a gift card to an account:
- Click the +Redeem Gift Card to Account button.
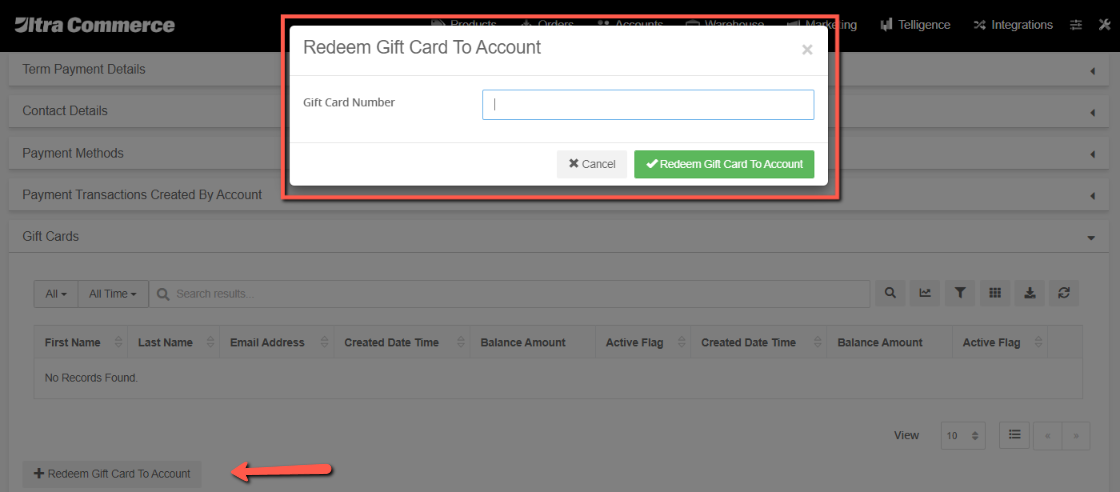
The gift card detail will now be visible as listing on this tab.
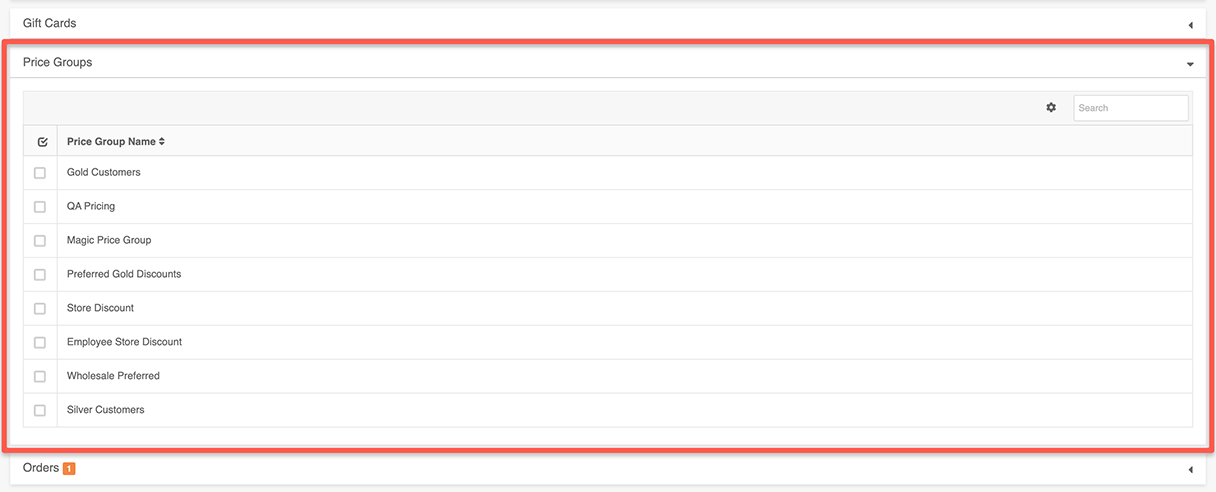
Price Groups tab
Displays all price groups to which the account can be (or has been) added; simply check the box next to a price group to add this account to the price group.
Orders tab
When the Orders tab is expanded, the orders placed by the account are listed here. Orders can also be created here.
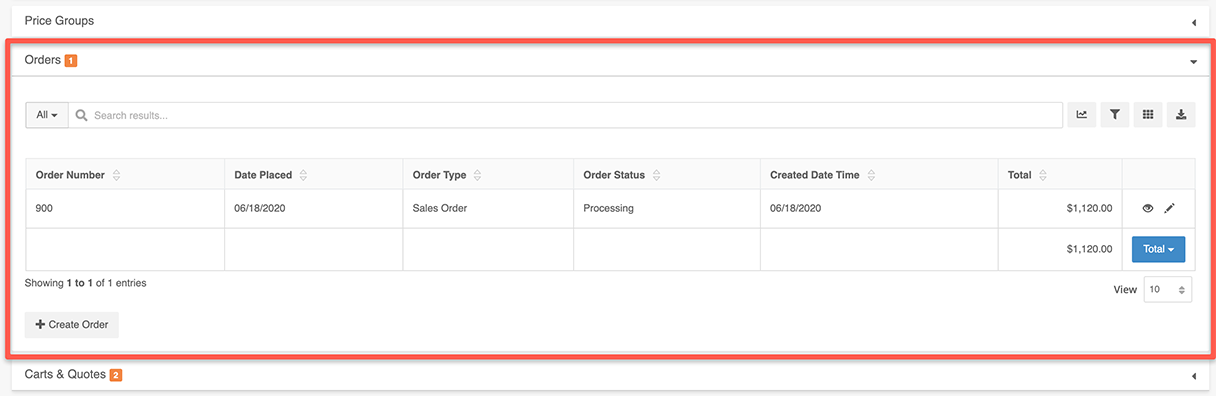
To create an order:
- Click the +Create Order button.
The Create Order modal will display.
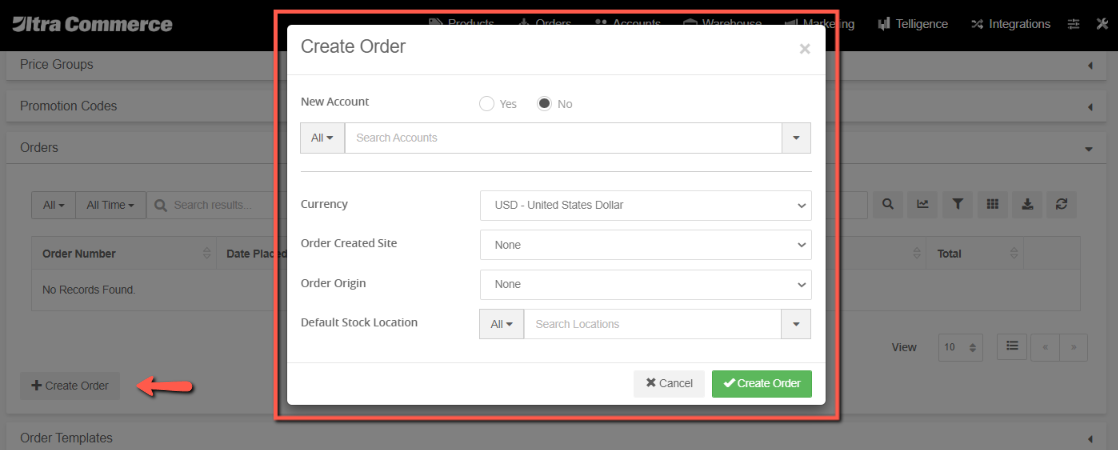
- Set the Order type, currency, order created site, order origin and default stock location (if any). Currency and order type are the only required fields.
- Click Create Order.
You will now be viewing the carts and quotes detail screen and able to select the items for the order. For more about creating orders from the admin check out the Orders section of the user guide.
Order Templates tab
This tab lists all Order Templates that have been created for the Account along with the ability to create another Order Template.
.png)
Wish Lists tab
This tab lists all Wish Lists that have been created for the account and there is the ability to create another Wish List.
.png)
Carts & Quotes tab
This section displays the items that have been selected and are in the cart before the order has been placed. Another order can also be created from this tab.

For more about creating orders from the admin check out the Orders section of the user guide.
Account Payments tab
If an Organization Account has Term Payment set-up as an eligible payment method, any account payments made on an account for orders will be listed here and Account Payments made toward the Payment Terms.
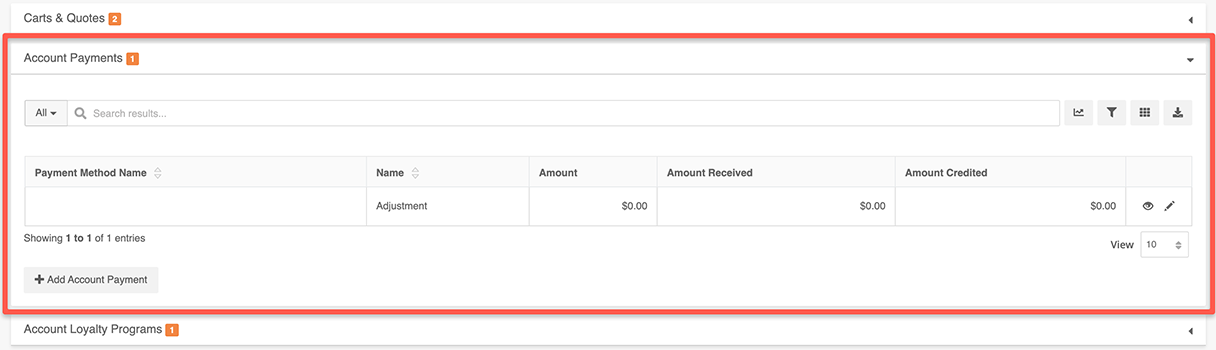
To make a payment towards a term account click the +Add Account Payment button.
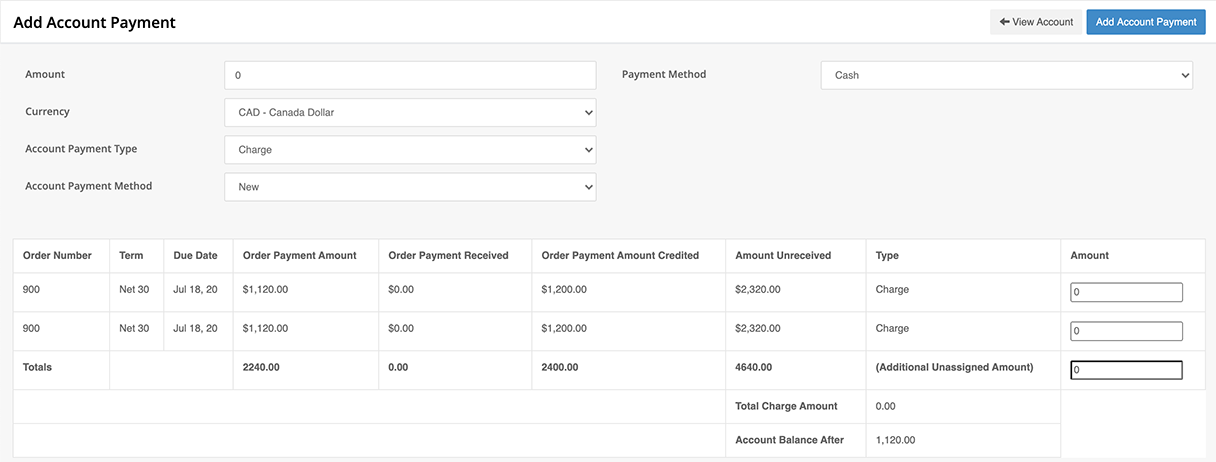
The Add Account Payment detail screen will appear. In the example, an order placed with Term credit and $1120 is due. A payment of $1120 using cash as the Payment Method is made on the account:
- Fill in the Amount field at the top of the screen.
- Select Cash as the Payment Method.
- The Additional Unassigned Amount will be filled by default for the total of the payment.
- Add the amount of the payment into the Amount field to the right of the desired Order, in this example, order 932"s amount field has a payment of $1120 added. But, that amount could be less or more than the total and the Additional unassigned Amount will adjust accordingly. In this case, it adjusts to $0 since the entire amount of the payment is applied to an order.
- The Account Balance After will reflect the net balance on the account after all orders and payments are applied. In this case it is $0 because one order and one payment have been received for $1120.
Account Loyalty Programs tab
Accounts can subscribe to loyalty programs that have been created in Ultra Commerce. Loyalty programs that the account has been added to will be listed here with the ability to +Add Account Loyalty Program.
.png)
To add a new loyalty program to the account:
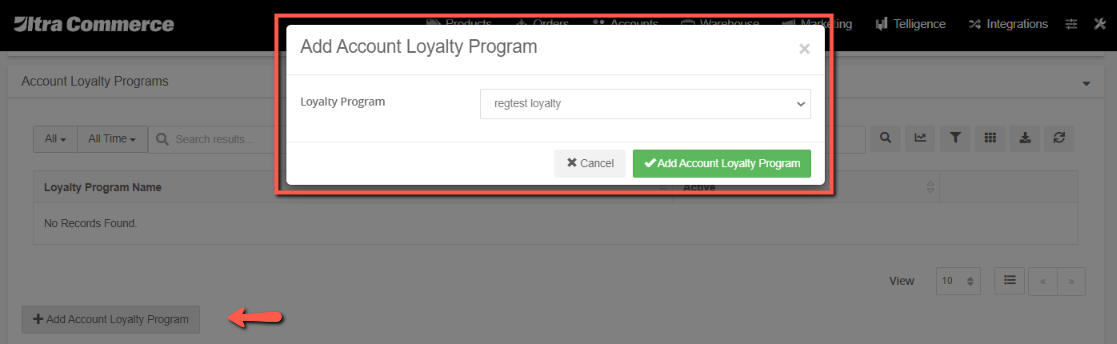
- Click +Add Account Loyalty Program on the tab.
The Add Account Loyalty Program modal will appear.
- Select the loyalty program from the drop-down on the modal
- Click Add Account Loyalty Program button at the bottom of the modal.
Product Reviews tab
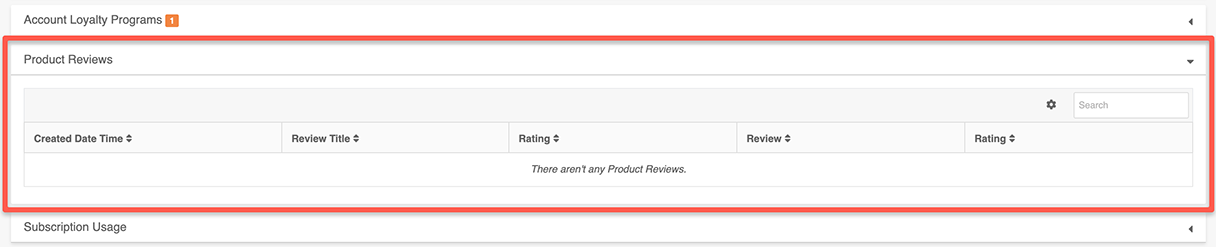
Displays the subscriber's reviews across the site, if they exist.
Subscription Usage tab
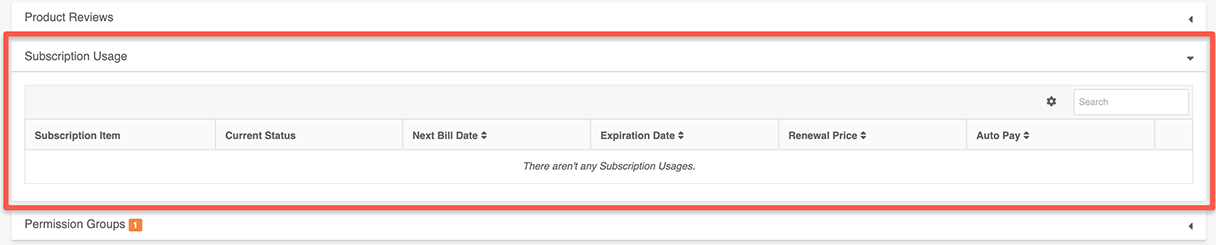
Displays current subscription usages for this account.
Permission Groups tab
This tab displays the permission groups to which the account has been added. If the account needs to be added to a new permission group, the account detail page must be in edit mode. Check to see if the pencil edit icon in the top right-hand part of the screen says Save. If it says Edit, click it and then all the available permission groups will appear as check box selections.

To add the account to a permission group:
- Check the check box next to a permission group to add this account to it.
- Click the Save button at the top of the account detail screen.

Parent Accounts tab
If an account is a sub-level account to another account, that account will display here. Parent accounts can also be assigned here.
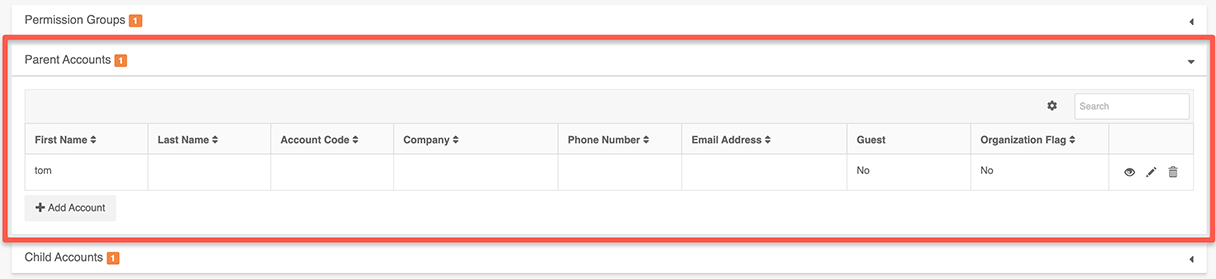
To assign a parent account:
- Click the +Add Account button.
The Add Account Relationship modal will appear.
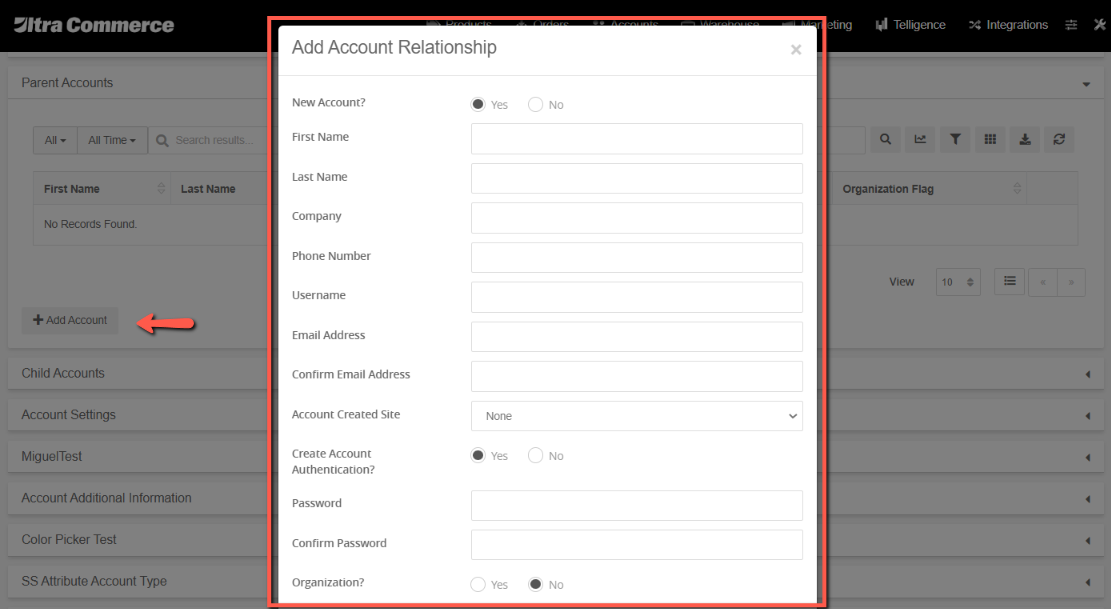
- Fill in the modal fields. Either add a new account to Ultra Commerce by selecting Yes for New Account?, or search existing accounts by selecting No and using the typeahead search box.
- Click the Add Account Relationship button at the bottom of the form.
The parent account will now appear as an entry on the tab..
If a relationship needs to be deleted, click the trash icon to the right of the entry. Admin can also view or edit the account listed by clicking the eye view icon or the pencil edit icon.

Child Accounts tab
Any accounts that are child accounts to the current account will be listed on this tab.
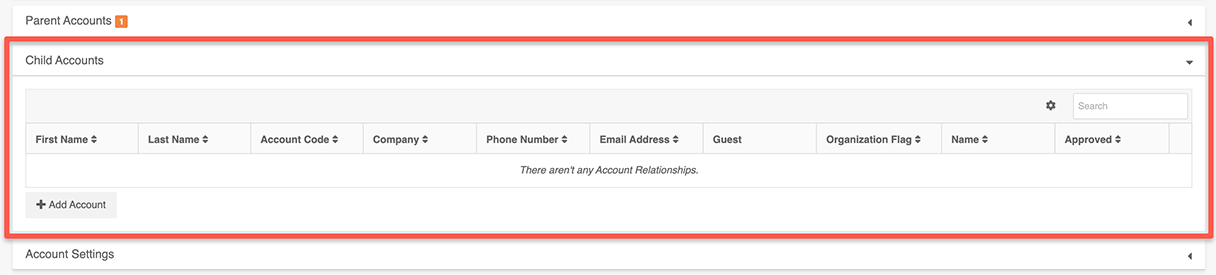
To add an account as a child account:
- Click the +Add Account.
The Add Account Relationship screen will appear.
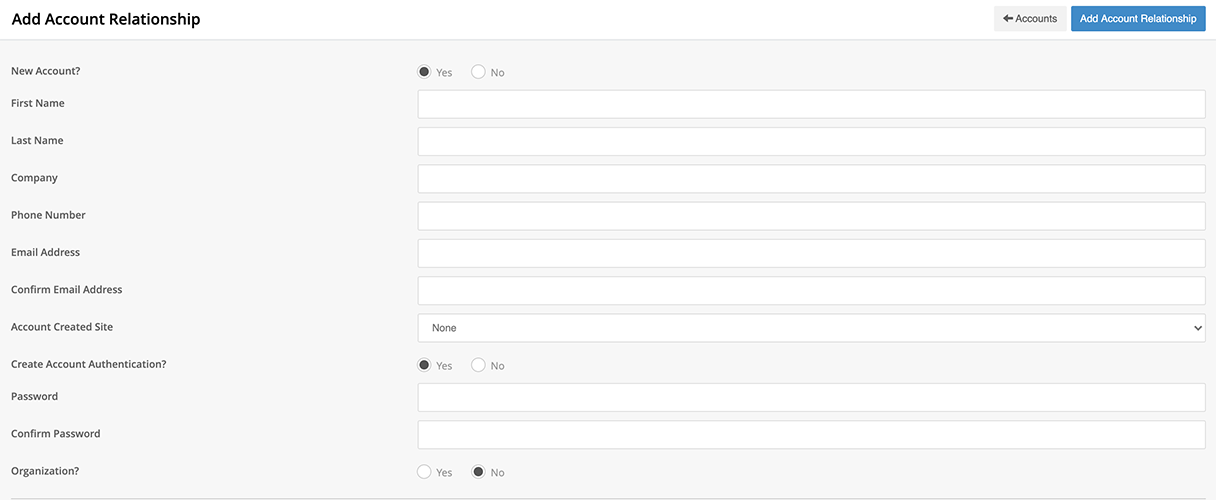
- Fill in the fields. Either add a new account to Ultra Commerce by selecting Yes for New Account?, or search existing accounts by selecting No and using the typeahead search box.
- Click the Add Account Relationship button at the top-right of the screen.
The child account will now appear as a child account on the tab with the ability to view, edit the child account or delete the account from the tab.
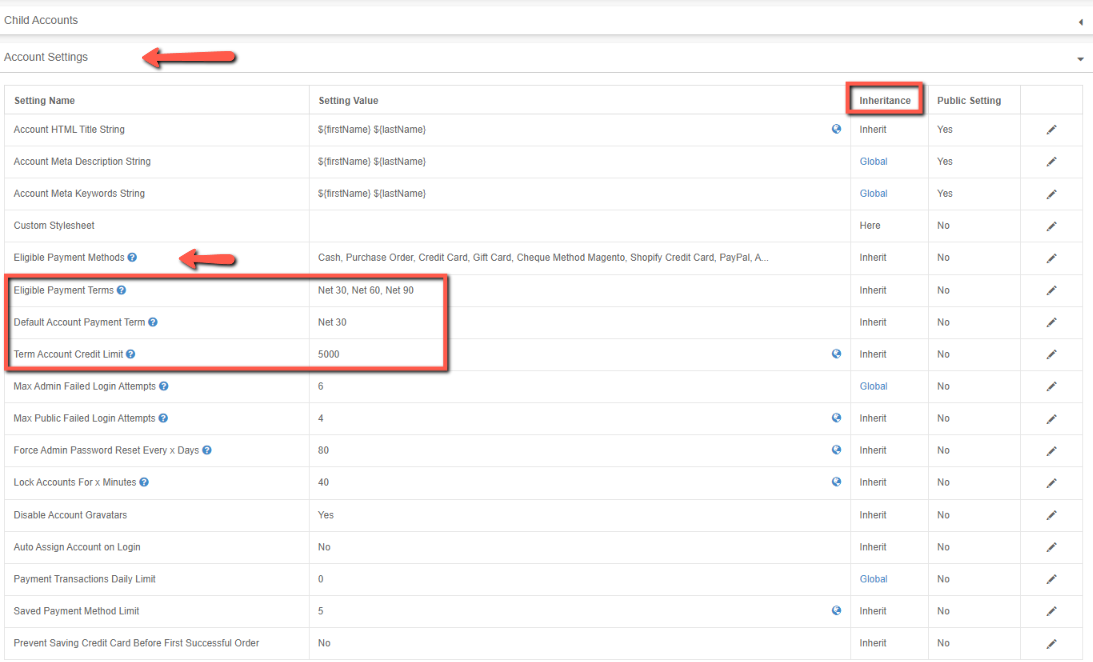
Account Settings tab
This tab has account settings for Eligible payment methods, eligible payment terms, default Account payment terms and Term account credit limits as well as other settings related to account login and security as shown in the screenshot below..
Eligible Payment Methods
These settings show all the eligible payment methods that can be used by the account. The account can use the Global default settings, or the account can have only certain payment methods set for the account by clicking the pencil icon to the right of the row and then clicking the checkbox next to the desired payment methods.
In the example below, Term Payment has not been checked off. It would need to be checked off in order for Term Payment to appear as an option when placing an order with this account.

Settings related to Term Payment payment method
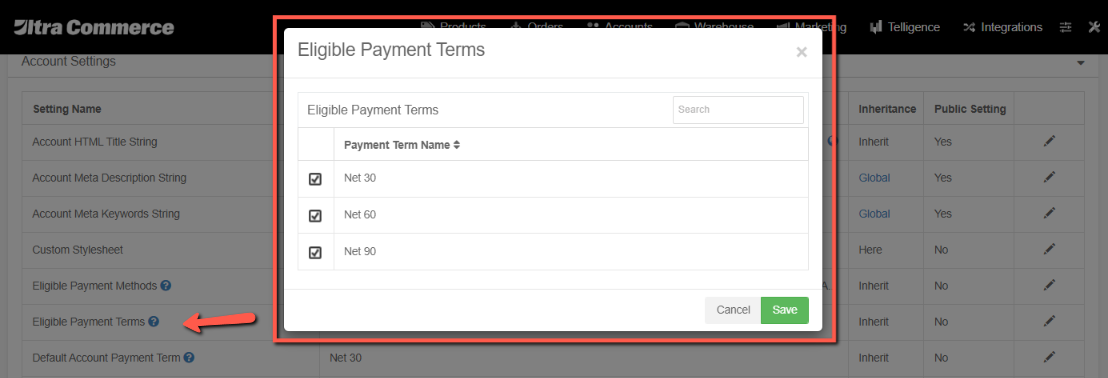
Eligible Payment Terms
This shows the eligible payment terms Net 30, Net 60, Net 90, that are available.
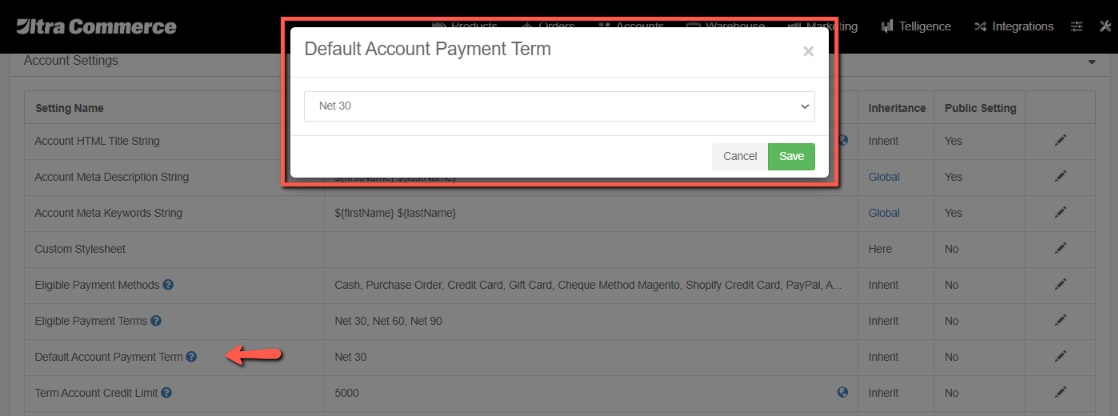
Default Account Payment Term
This is the Default Account Payment Term that is used for accounts. This can be changed by clicking the pencil icon on the right-hand side of the row in Account Settings and selecting and saving the payment term from the drop-down.
Term Account Credit Limit
The Credit Limit by default is $0 and must be manually set to the desired credit limit by clicking the pencil icon on the right-hand side of the row in Account Settings and then filling in the credit limit in the form and clicking save.
