Order Templates
The Order Templates section of Ultra Commerce allows for the creation and management of recurring orders all in one place. Billing and Shipping information, delivery frequency and next order delivery date can be selected and later edited. Order items can be added or removed. Orders are automatically created and an order history is viewable here.
Prior to using Order Templates there are some Settings that need to be set. Below is a quick overview of these settings.
- Enable Site Filtering on Add Order Item Listing via Global Settings
- Navigate to Order Template Settings
Once the settings have been selected here is an overview of how to use Order Templates for your business:
- Navigate to the Order Templates listing page
- Create a New Order Template
- Add or Update Order Template Shipping information
- Add or Update Order Template Billing information
- Edit the Frequency Term.
- Edit Next Scheduled Deliveries
- Push Out Next Delivery
- Add Order Template Items to the Order Template
- Add Promotional Items
- Add Promotion
- Add Gift Card
- Finalize Order
- Create and Place Order
- Cancel an Order Template
- View Order History
Enable Site Filtering
Before creating Order Templates or Wishlists and selecting order items for the lists there is a setting in the Ultra Commerce admin called Enable Site Filtering on Add Order Item Listing that needs to be set to Yes so that only items from the selected site display for selection. This setting is found under Gobal Settings. Otherwise items from all sites will display for selection on the Order Template or Wish List detail page.
You will know if this has not been set yet because there will be a blue validation message alerting you that it has not been set on the Order Template detail page. If it has been set, this message will not appear.

To Enable site Filtering on Add Order Item Listing:
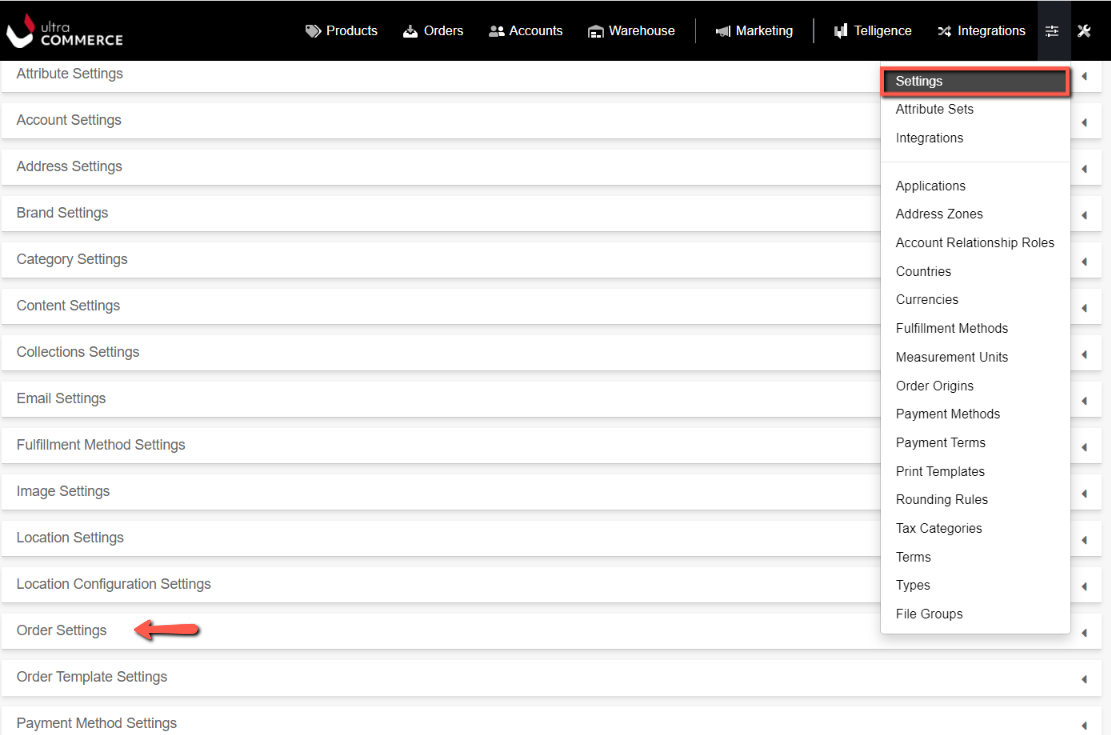
From the Ultra Commerce tool bar:
- Select the Config icon
- Select Settings from the drop-down

From the Settings page:
- Click the Global Settings tab to expand it.

From the expanded Global Settings tab scroll to the bottom and find the
.png)
Enable Site Filtering on Add Order Item Listing - This setting controls the order items that appear on the Wish List detail page when items are being added to the wish list.
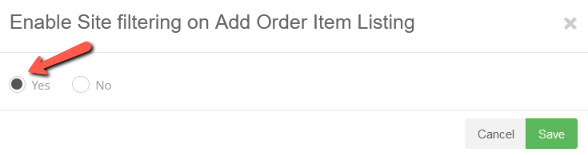
- Click the pencil icon to the right of the setting.
- Select Yes on the modal that appears.
- Click Save to save the setting.
Navigate to Order Templates Settings
To navigate to the Order Template Settings via the Ultra Commerce toolbar:
- Click on the Config icon on the right side of the toolbar.
- Select Settings from the drop down.
- Expand the Order Template Settings tab.
The expanded tab has several settings that can be set by clicking the pencil icon to the right of the desired setting. Below is a description of each setting.
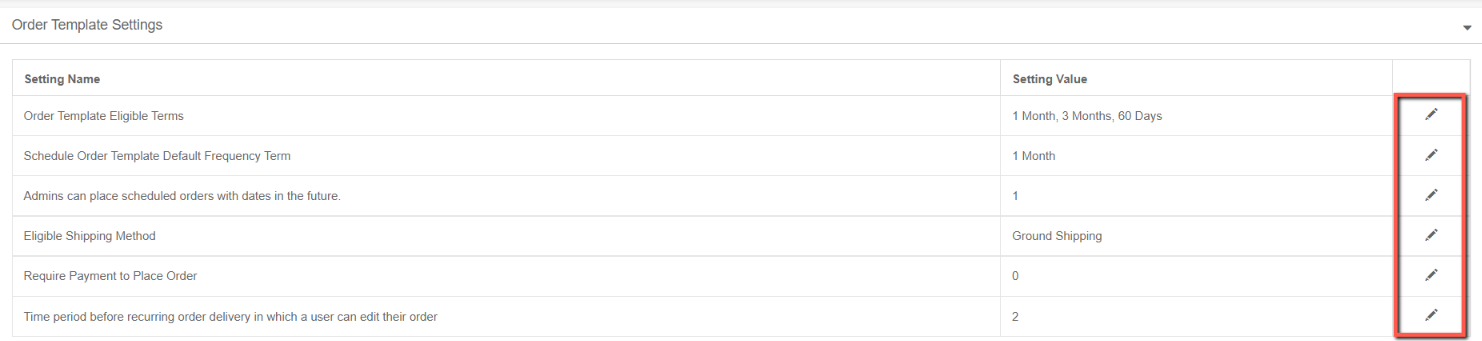
Order Template Eligible Frequency Terms
- Click the pencil icon for this setting and the Order Eligible Terms modal will appear.
- Check the checkbox to the left of the desired frequency terms.
- Click Save.

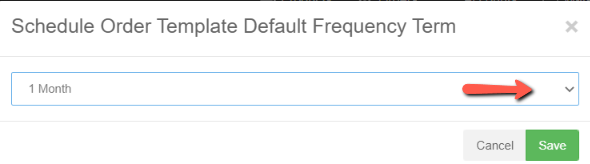
Schedule Order Template Default Frequency Term
This setting determines which frequency term is pre-selected. To change this:
- Click the drop down.
- Select the desired frequency term.
- Click Save.
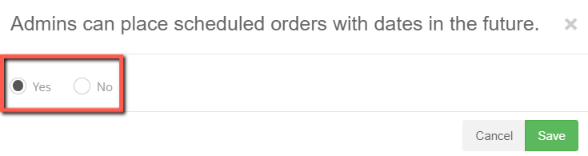
Admins can place scheduled orders with dates in the future
This setting determines whether or not orders can be scheduled with future dates versus placing the order immediately.
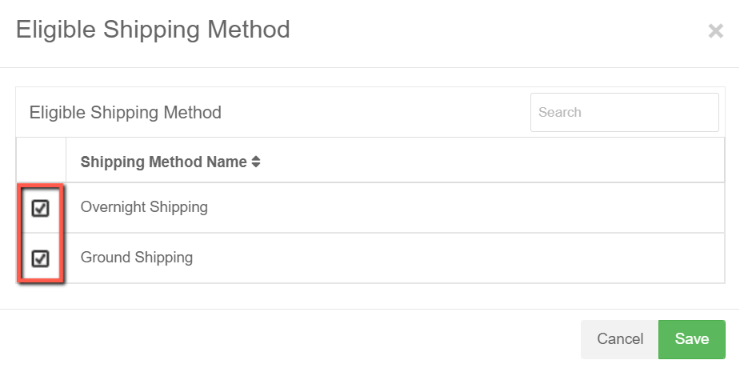
Eligible Shipping Method
This setting is where the eligible shipping methods are selected.
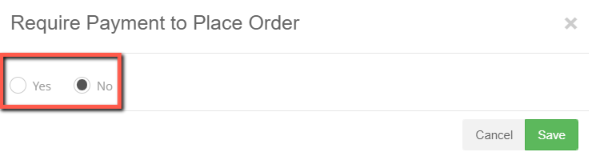
Require Payment to Place Order
This setting determines whether a payment is necessary in order to place an order.
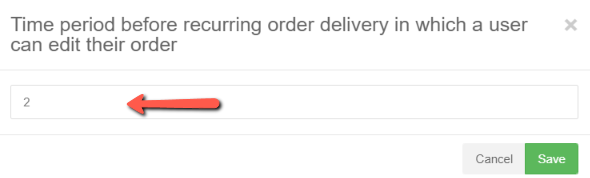
Time period before recurring order delivery in which a user can edit their order
This setting determines how many days before an order is set to be delivered that a user can edit the order.
Navigate to Order Templates
You can view the Order Templates listing page:
.png)
- Click Orders on the Ultra Commerce toolbar and
- Select Order Templates from the drop-down.
From the Order Template listing page you can either view or edit by clicking on the pencil or eye icon to the right of the desired existing template or create a new one by clicking on the create button.

Create a New Order Template
- Click +Create Order in the upper right hand corner of the screen.
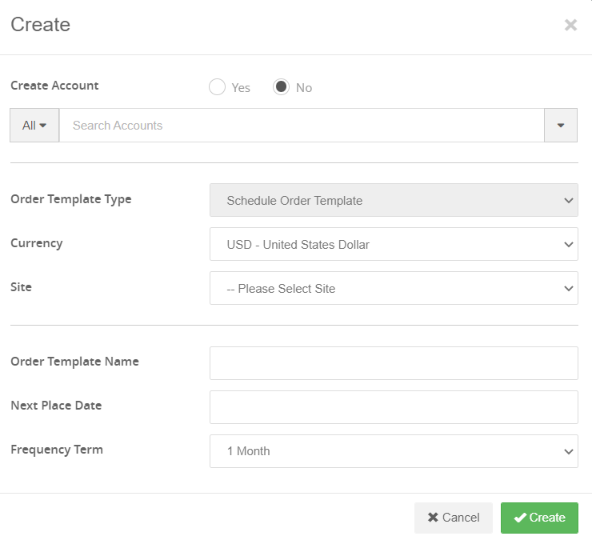
- Select an existing account for the order template by using the Search Accounts field and keeping Create Account set to No or:
- Set Create Account to Yes if you would like to create a new account when you create a new order template.
- Order Template Type - this field is set to Schedule Order Template.
- Currency - select a currency from the available ones in the dropdown for the order template.
- Site - select a site from the ones available for the order template. Sites that appear here are created in the Site section of Ultra Commerce.
- Order Template Name - give the order template a name.
- Next Place Date - select a next place date using the date picker which will schedule the very next order and delivery date.
- Frequency Term - set this to the desired recurring frequency.
- Click Create.
The Order Template detail screen will display.
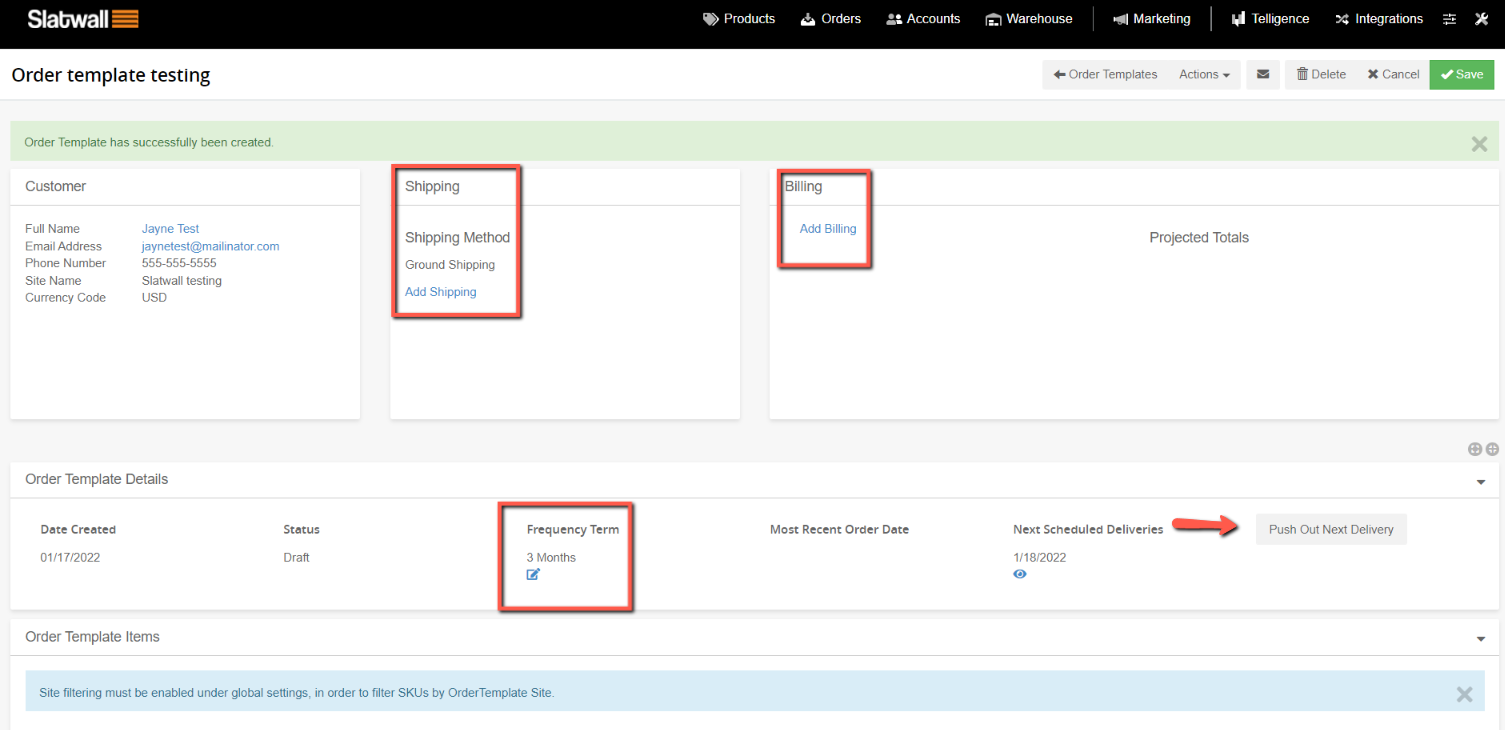
Add or Update Order Template Shipping Information
Add Shipping
You can Add Shipping addresses in the Customer section of the detail screen if there is no shipping address associated with the account on the order template:
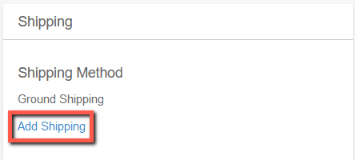
- Click the Add Shipping link and the Edit Shipping Information modal will appear.
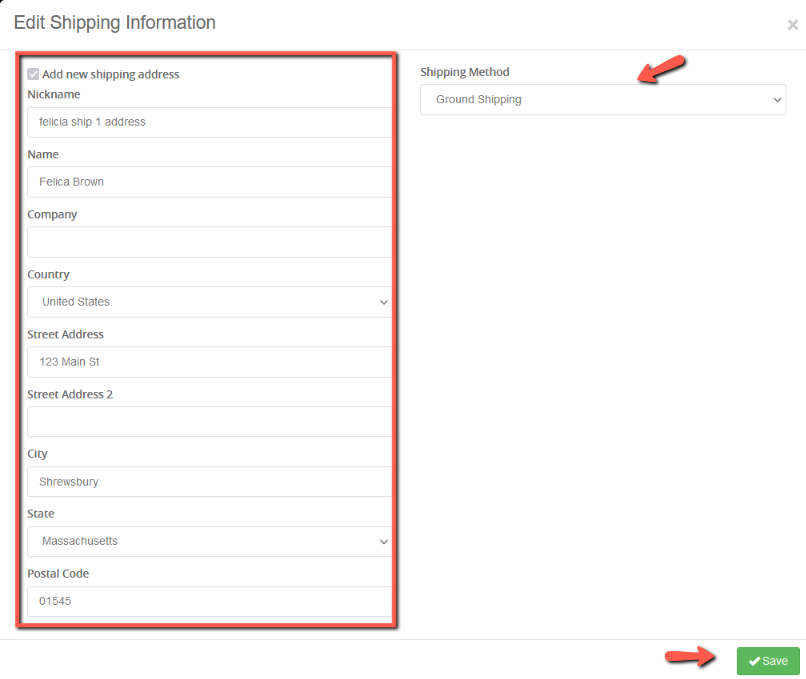
- Fill in the shipping form to add in a shipping account address.
- Select an available Shipping method from the drop down.
- Click Save and the Shipping address will now appear in the Customer Section.
Update Shipping
You can Update Shipping information if this is an existing account that already has a shipping address associated with it. You can select from existing addresses or add in another Shipping address from this screen.
Note: If you want to edit an account address, you must do this in the Accounts section of Ultra Commerce admin.
From the Customer Shipping section of the Order Template detail:
- Click the Update Shipping link
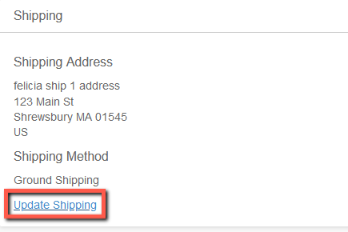
The Edit Shipping Information modal will appear.
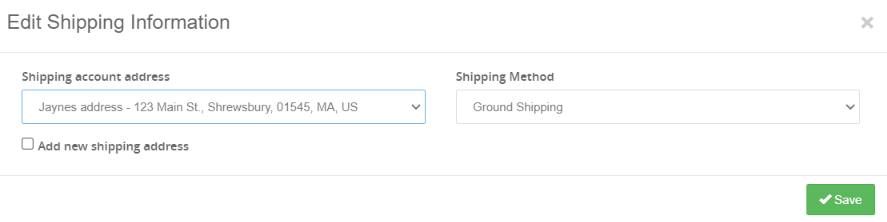
- If you would like to select an existing Shipping account address for the Order template, then select the address desired from the Shipping Account Address drop down.
- Put a check in the box for Add New Shipping Address if you would like to add an additional shipping address.
- Fill in the shipping form that appears if you put a check in add new shipping address.
- Select the Shipping Method desired from the drop down.
- Click Save and the Shipping address and billing method will appear in the Customer section of the order template.
Add Order Template Billing Information
Add Billing Information
If this is a new or existing account that does not have a billing information added for the account:
Note: If you want to edit an account address or payment method, you must do this in the Accounts section of Ultra Commerce admin.
- Click the Add Billing link and the Edit Billing Information modal will appear.

- If this is a new account fill in the billing address fields.
- If this is an existing account, select the desired billing address from the Select Billing Address drop down - this could be the shipping address.
- If you want to add a new address, put a check in the Add new address checkbox and then add the new address in the fields.
- Add a New Payment Method in the fields if this is an account without any payment methods.
- You can add additional Payment Methods if desired by add a check to Add a New Payment Method.
- After the billing address and payment method have been added and the desired ones selected, click Save.
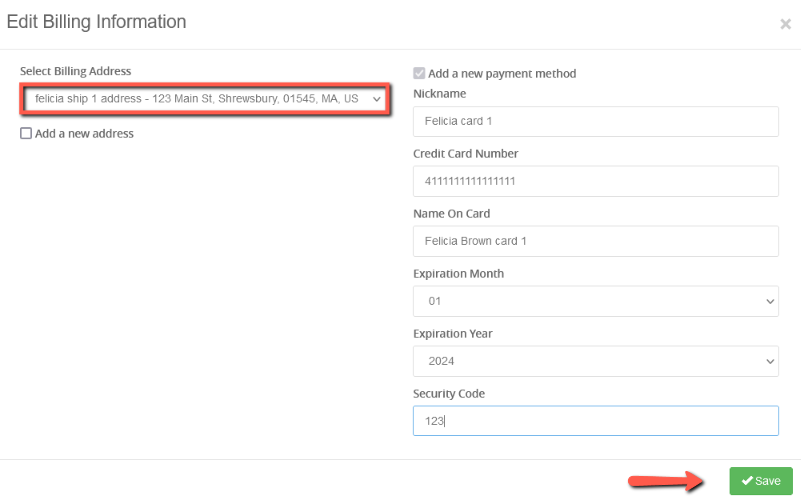
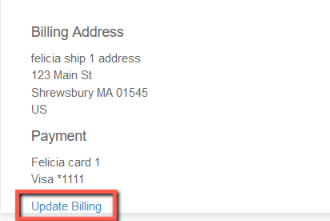
Update Billing for accounts with existing billing information
If the account on the order template already has billing information, additional payment methods and billing addresses can be added, or the selected billing information can be changed.
Note: If you want to edit an account address or payment method, you must do this in the Accounts section of Ultra Commerce admin.
To Update Billing for an order template:
- Click the Update Billing link in the Customer Billing section of the order template detail.
The Edit Billing Information modal will appear.
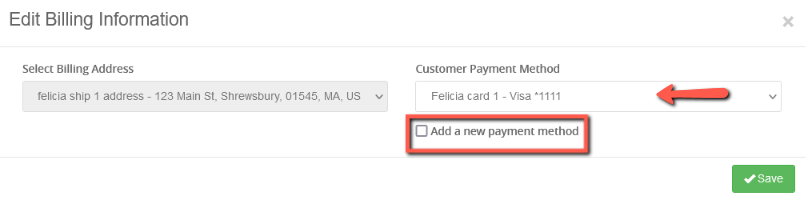
Since this order template/account already has billing information, the Customer Payment Method and the associated Billing Address will already be selected.
- If you would like to change the payment method, select a different one from the drop down. You can't select a billing address because these addresses are tied to specific payment methods. If you would like to edit the billing address associated with a payment method, this must be done in the Accounts section of the admin.
You can also add in new payment methods and billing address associated with the the new payment method.

- To add a new payment method, put a check in the Add a new payment method checkbox. Fields will appear so you can add it in. If the payment method uses an existing billing address, keep it selected.
- Put a check in the Add a New Address box if the payment method has a different billing address.
- After the billing address and payment method have been selected, click Save
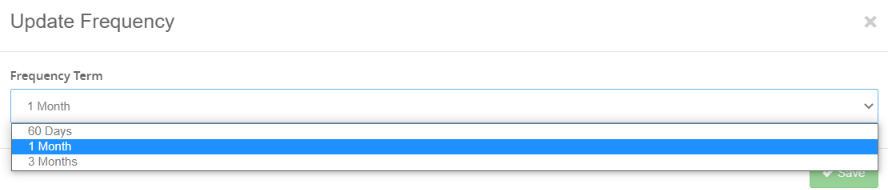
Edit Order Template Frequency Term
You can edit the order template Frequency Term that was chosen in the Order Template Details section of the detail screen.

- Click the Frequency Term box and the Update Frequency modal will appear.
- Select the desired Frequency Term from the drop-down.
- Click Save.
Add Frequency Terms as choices for Order Templates in Settings
The frequency terms that appear as choices for Order Templates are chosen in the Settings section of Ultra Commerce. To add/remove frequency terms:
- Navigate to Settings by clicking the Config icon on the Ultra Commerce toolbar.
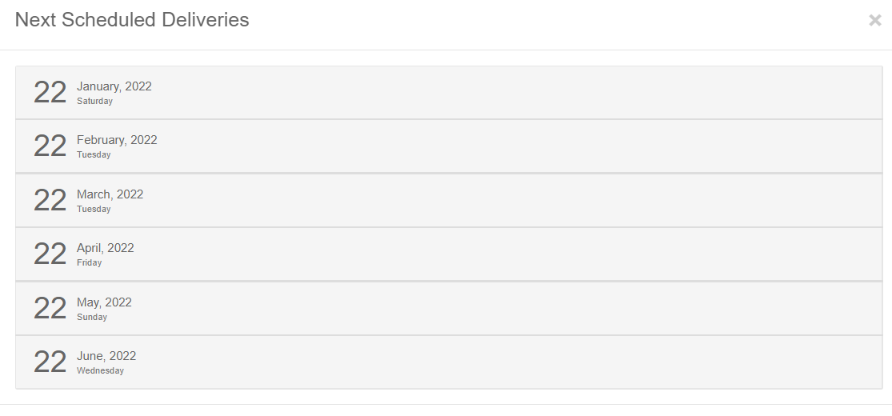
View or Edit Next Scheduled Deliveries
You can view or edit the Next Scheduled Deliveries in the Order Template Details section of the detail screen.

- Click the eye icon below Next Scheduled Deliveries and the modal will display.
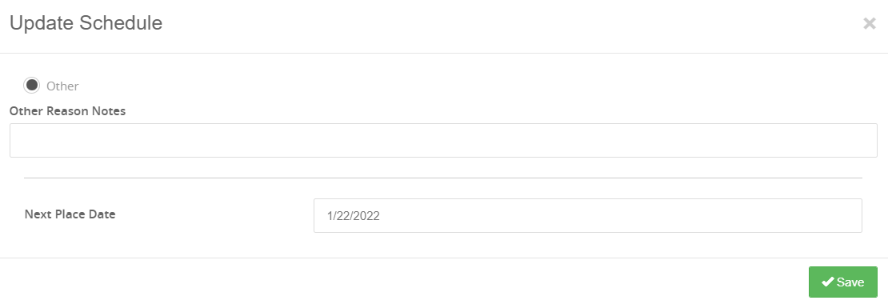
Push Out Next Delivery
You can Push Out Next Delivery date in the Order Template Details section of the detail screen.
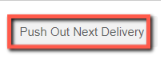
- Click the Push Out Next Delivery button and the Update Schedule modal will appear.
- Select the Other radio button on the modal and a couple additional fields will appear
- Add notes in Other Reason Notes field.
- Click into the Next Place Date field and the date picker will appear.
- Select the desired Next Place Date.
- Click Save.
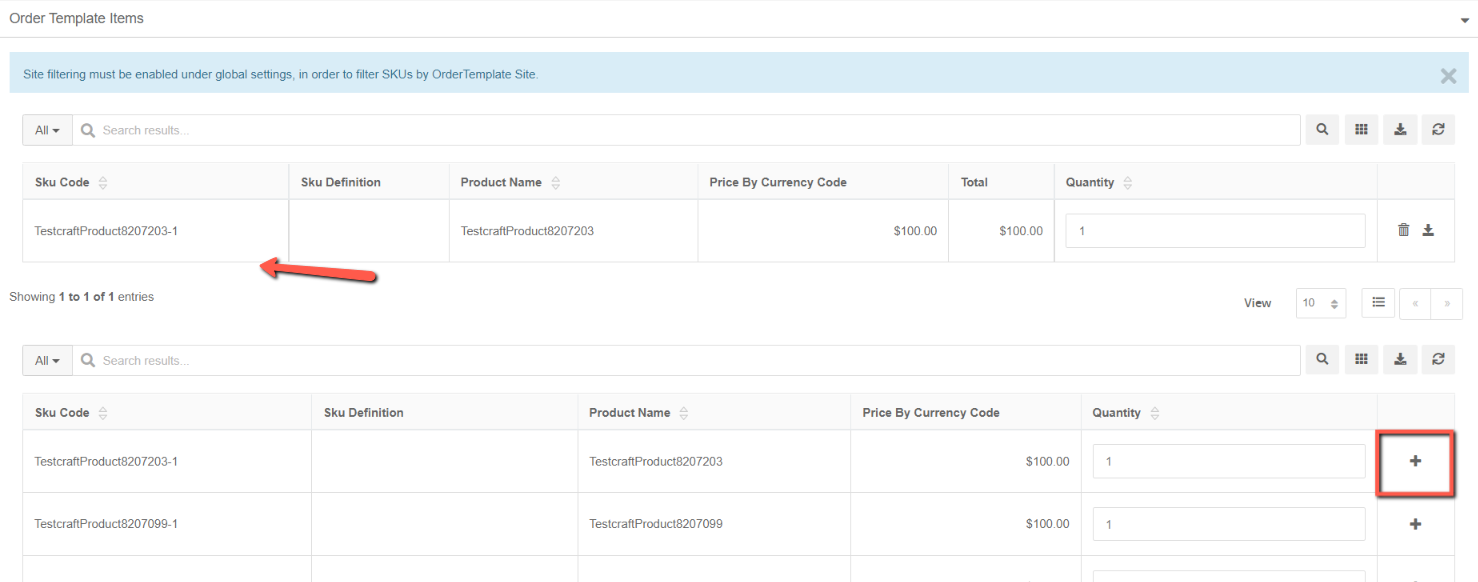
Add Order Template Items
You can add order items to the Order Template from the Order Template Items tab:
- Click the plus + sign to the right of the desired order item after adjusting the quantity using the Quantity field.
- The items you add to an order template are listed at the top of the Order Template items tab.
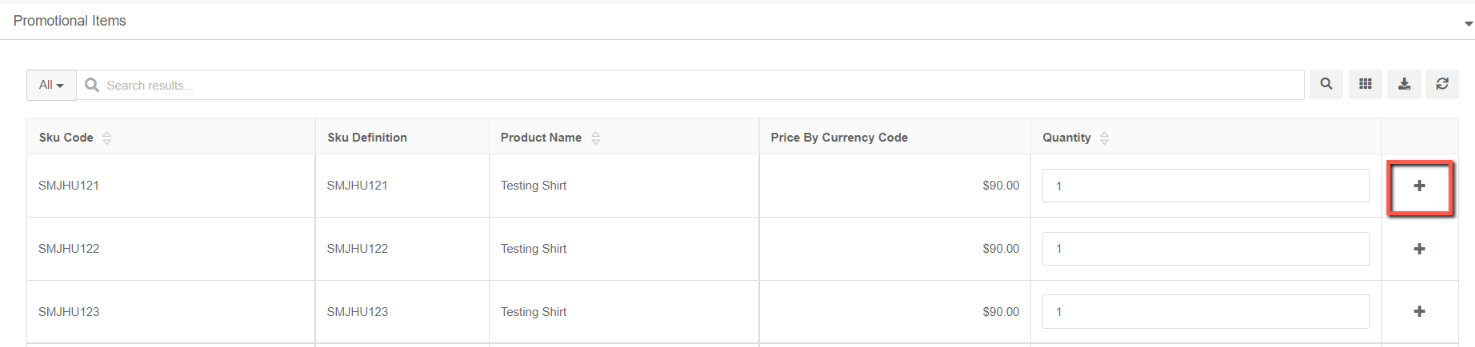
Add Promotional Items
From the Promotional Items tab you can add promotional items to the order template.
- Click on the plus sign to the right of the desired promotional item after adjusting the Quantity in the quantity field. The added promotional items will display on the Order Template Items tab above.
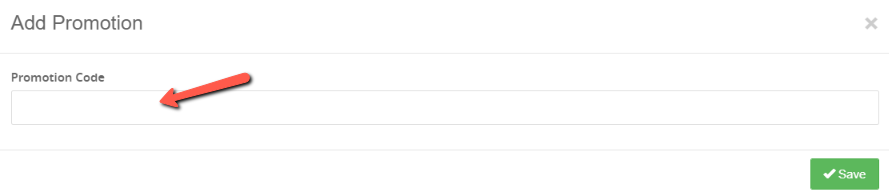
Add Promotion
If there is a special promotion that can be added to the entire order it can be added on the Promotions tab. To add a Promotion:
- Click the Add Promotions button.
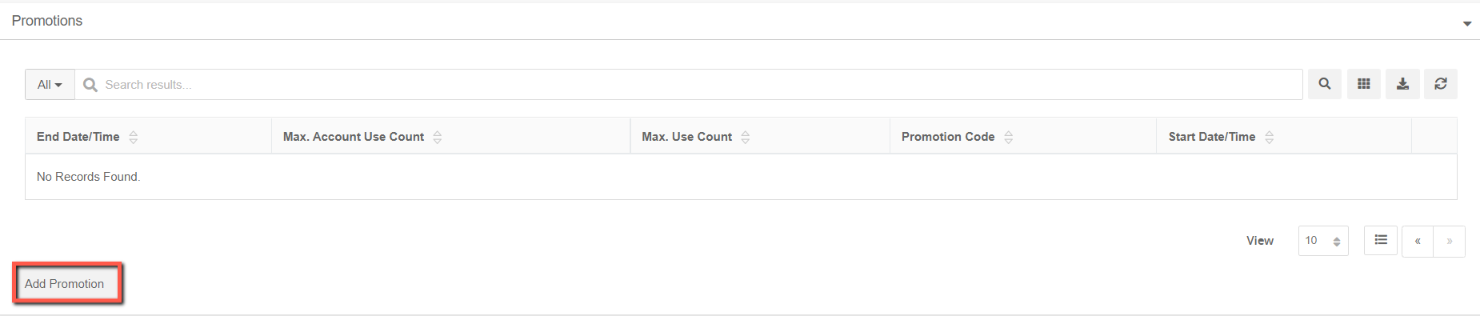
- Add the Promotion Code to the field.
- Click Save.
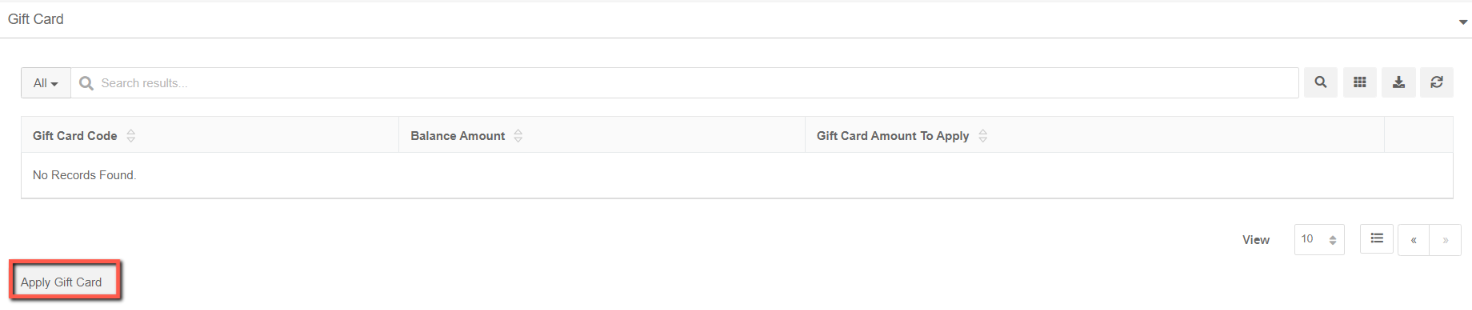
Add Gift Card
If there is an available gift card associated with the account that is tied to the Order Template, it can be added to the order template on the Gift Card tab.
- Click the Apply Gift Card button.
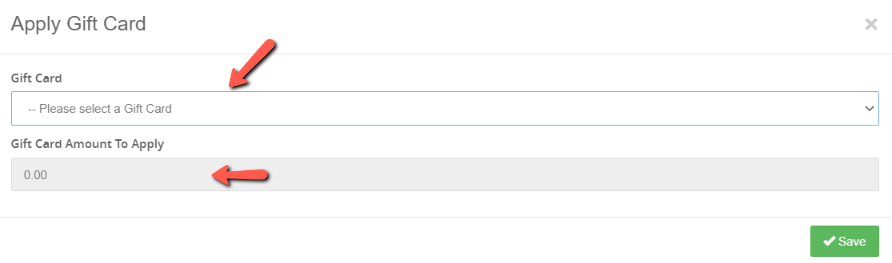
- Select the Gift Card from the dropdown.
- Indicate the Gift Card Amount To Apply by adding an amount to the field.
- Click Save.
Finalize Order
Once you are satisfied with the order template it is time to finalize the order. This is only done once when your order template is still in Draft mode.
From the Actions menu:
- Click Finalize Order Template from the dropdown. The order template will now have an Active status.
.png)
Create and Place Order
Once the order template has been finalized, an order can be created and placed.
From the Actions menu:
- Click Create and Place Order. An order will be created and placed automatically and will appear on the Order History tab of the Order Template.
.png)
Cancel an Order Template
You can cancel the order template at any step in the its' creation.
From the Actions menu:
- Click Cancel.
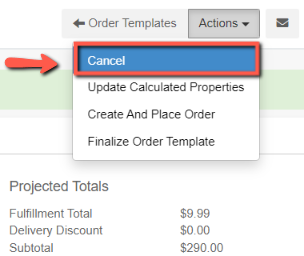
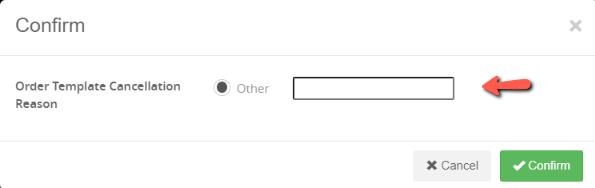
The Confirm modal will appear.
- If desired, add a reason to the Order Template Cancellation Reason, this field is optional.
- Click Confirm and the Order Template will be cancelled.
View Order History
Once an order has been created and placed it can be viewed on the Order History tab of the Order Template.
