Event Product
If you need to create a product and tickets or event registration are a requirement, you can set up products that are defined by when and where. The when part of an event product can be either a single date and time, or any type of recurring schedule. The where can be any location, either physical, or virtual. You can even combine locations and their capacities when needed. Manage everything, from the event set-up, all the way down to things like the capacities and wait lists.
Remember to set up the Locations and configurations defined for your event in Ultra Commerce before creating your event product.
Once the event is set up check out the Event Registrations Manager section of the user guide. This is where registrations across all event products will display once people start registering for events.
- Create Event Products
- Edit the Event Product Basic fields
- Event Product accordion tabs on product detail
Create Event Products
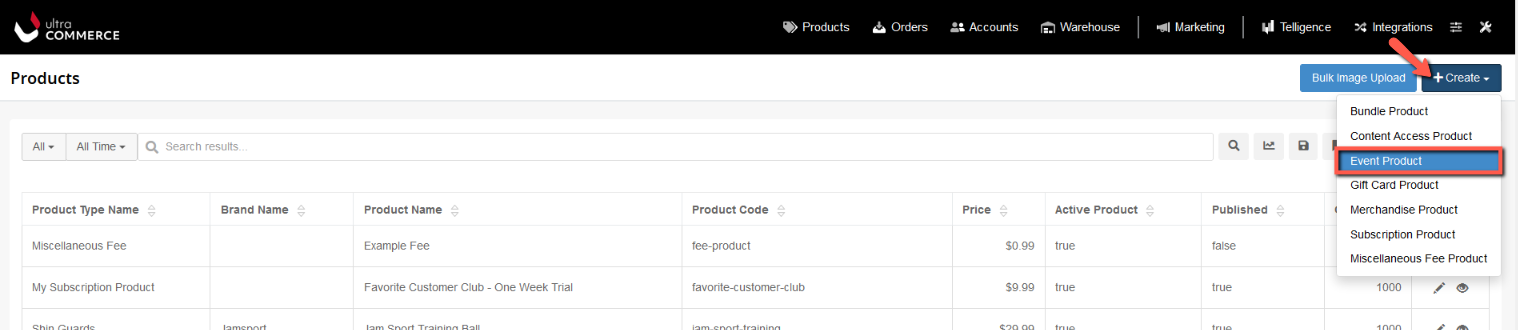
From the Products listing screen:
- Click the +Create button at the top right of the screen.
- Select Event Product from the drop-down.
The Event Create Product screen will appear.
Fill in the Create Event Product Basic Fields
.png)
- Product Type - Select from this drop-down. If there is only one type of Event, it will be chosen by default.
- Event Name - Fill in the event name in this field.
- Event Code - Fill in the Event code in this field, a unique alphanumeric string with no spaces.
- Price - Fill in the price in this field.>
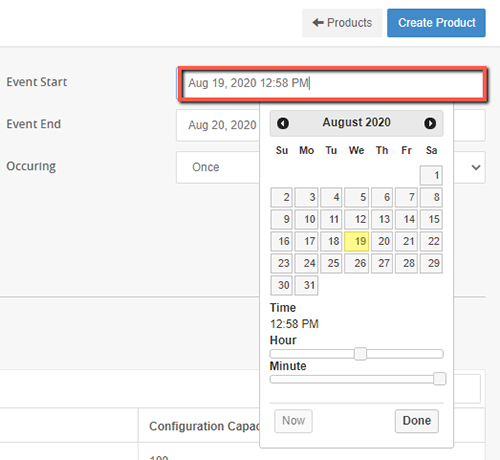
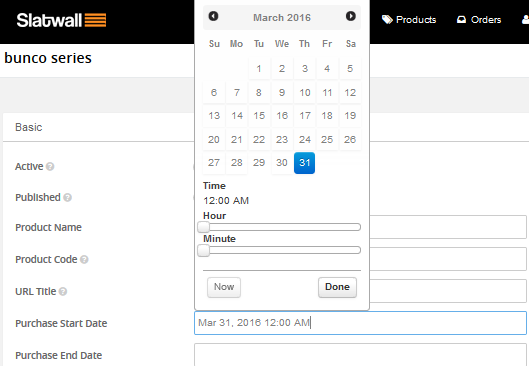
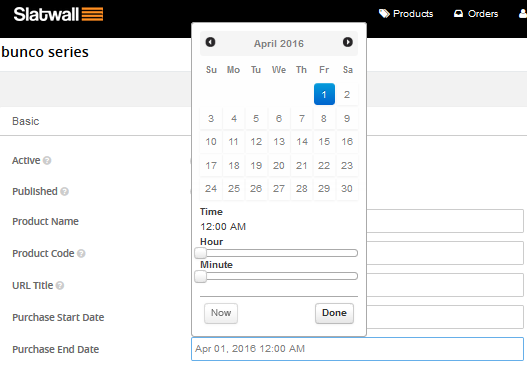
Click in this field and a calendar will appear. Set the start date of the event including the hour and minute that the event starts and then click Done.
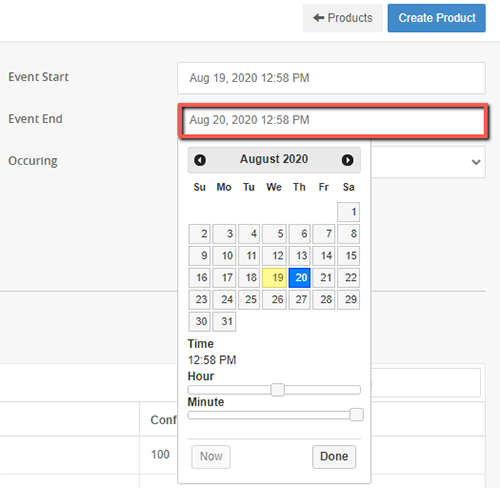
Set the Event End
Click in this field and a calendar will appear. Set the end date of the event remembering to indicate the hour and minute that the event ends and click Done.
Set Event Occurring field Once or Recurring
Once: If the event is a single time occurrence, select Once from the drop-down
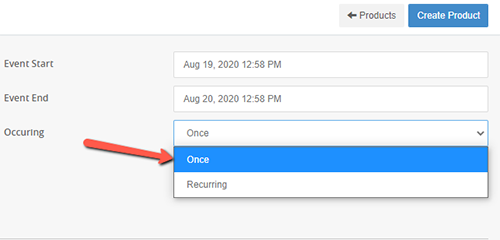
Recurring: If the event should recur more than once, select Recurring from the drop-down.
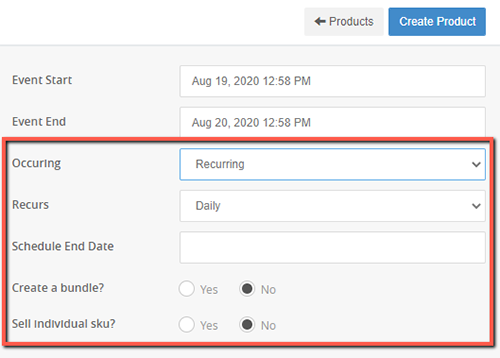
Additional fields will appear.
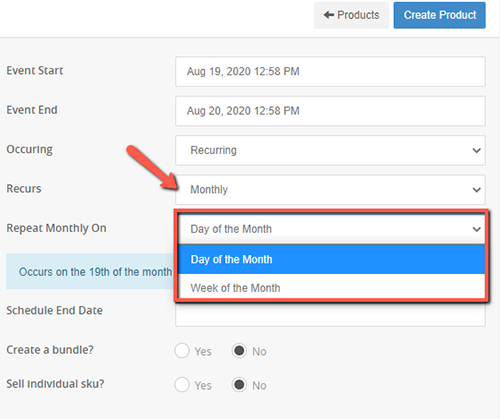
- Recurs - Set how often the event will recur.
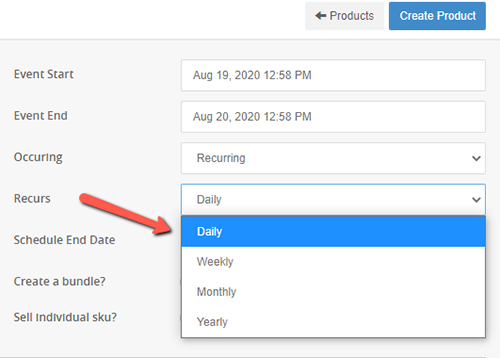
You will have different selections depending on what you choose from this drop-down. If you select monthly, you can then set whether it recurs on a specific day of the month or the same week of the month.
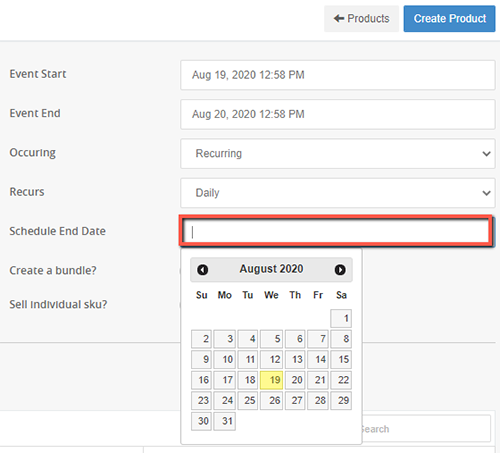
- Schedule End Date - For recurring events, set when the event will stop recurring by clicking the date for the event to end.
Create a bundle? setting
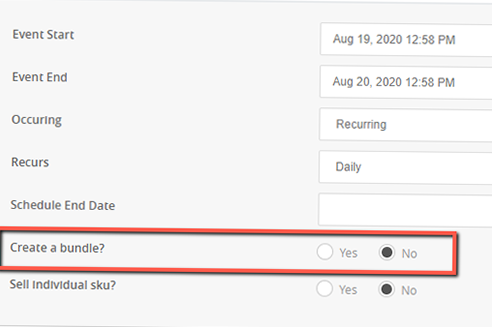
For recurring events, set this to Yes if you would like to bundle of all the sub-skus of recurring events of different dates and sell them as a single purchasable sku. Set to No if you don't want to bundle the skus.
Sell Individual Sku? setting
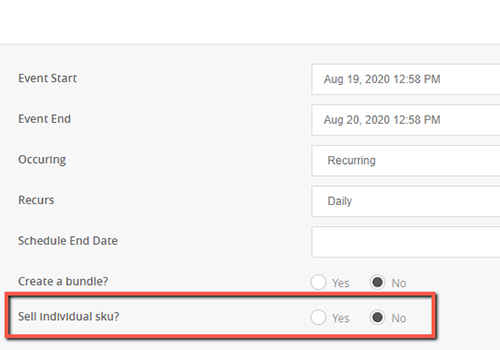
For recurring events, set this to Yes if you would like each recurrence of the event to have an individual sku that can be purchased. Note, that recurring events automatically create individual skus, this just allows people to register for these individual skus. If you set this to No, then the individual recurring events will be set to Published=False so that people can't register for the individual skus.

If you select Yes, all of the confirguations selected will be joined into a single sku that one can register for. For example, if you are holding an event that is held in 3 different locations (Rooms A, B & C) selecting single registration will allow you a single sku that combines the capacities of all three locations. If you would like people to select which location configuration they are registering for select No.
Location selection
Select where the event will be held by putting a check in the checkbox to the left of the desired location. Information on adding Locations to Ultra Commerce can be found in the locations section of the user guide.

Once you have selected the location:
- Click the blue +Create button in the upper right corner of the screen to save the event product.
Edit the Event Product Basic Fields
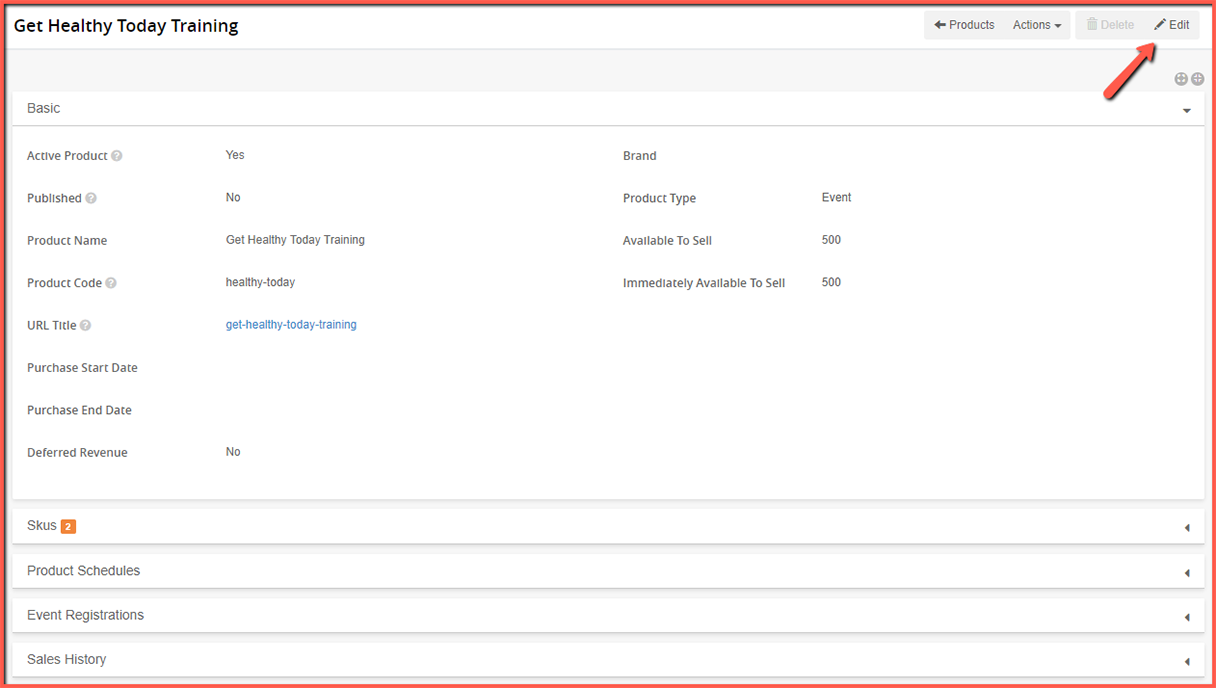
The Event product detail screen will appear along with additional fields such as Purchase Start Date and Purchase End Date and accordions that give more information about the product. The screen will be in "view" mode as indicated by the pencil icon in the upper right-hand corner. It needs to be in edit mode to edit any of the basic fields.
In order to edit the Basic fields
- Click the pencil icon in the top right corner to open up the product detail screen into edit mode.
You will notice two fields unique to Event products Purchase Start Date and Purchase End Date.
Add in a Purchase Start Date to the event product
Add a date to this field and then click Done to determine the earliest date that people can register for an event.
Add a Purchase End Date to the event product
Add a date to this field and then click Done to determine the latest date that people can register for an event.
Once the dates have been set and any other basic fields have been edited
- Click Save in the upper right hand corner to save the changes.
Event Product Accordions on Product detail
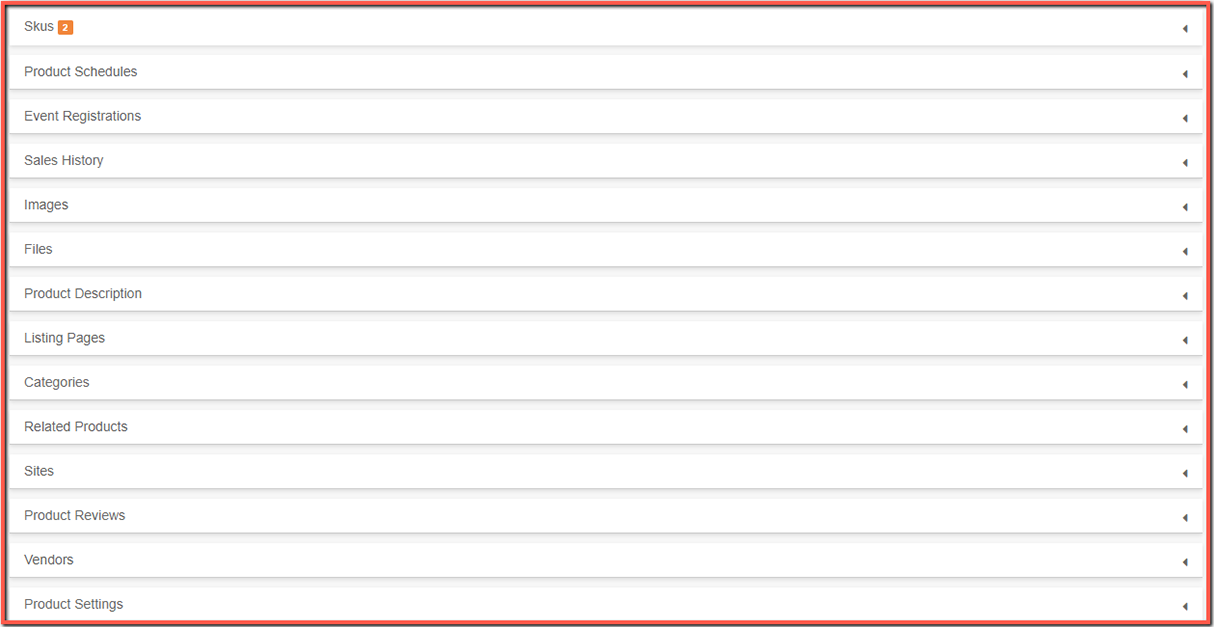
Below the Basic fields are accordions with additional information about the product Below are the accordions that contain information unique to Event Products: Skus, Product Schedules and Event Registrations. For more information on the other accordions that event products share with other product types check out the Product Manager section of the user guide.
Skus Accordion Product detail
Expand the Skus accordion to view the sku created. From here you can Add an Event Schedule and Add a Registration via the Sku Detail.

Add Event Schedule from Skus accordion on product detail
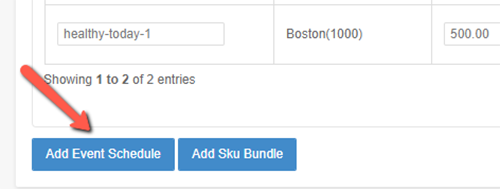
If you would like to add an Event Schedule:
- Click the Add Event Schedule button.
You will be brought to the Add Event Schedule create screen. The process of adding in the Event Schedule is the same as when you added in the initial product. Add in a Sku Name, price, set the Event Start and End dates and determine if it occurs once or recurs. Decide if it is a single registrations and if not, select the location then click Add Event Schedule.
.png)
View Sku Detail and Accordions on product detail
If you would like to view the details of a particular sku:
- Cick the eye icon to the right of the sku on the skus accordion.

The Sku detail screen will display. There are some additional fields and accordions that display additional information about the event sku.
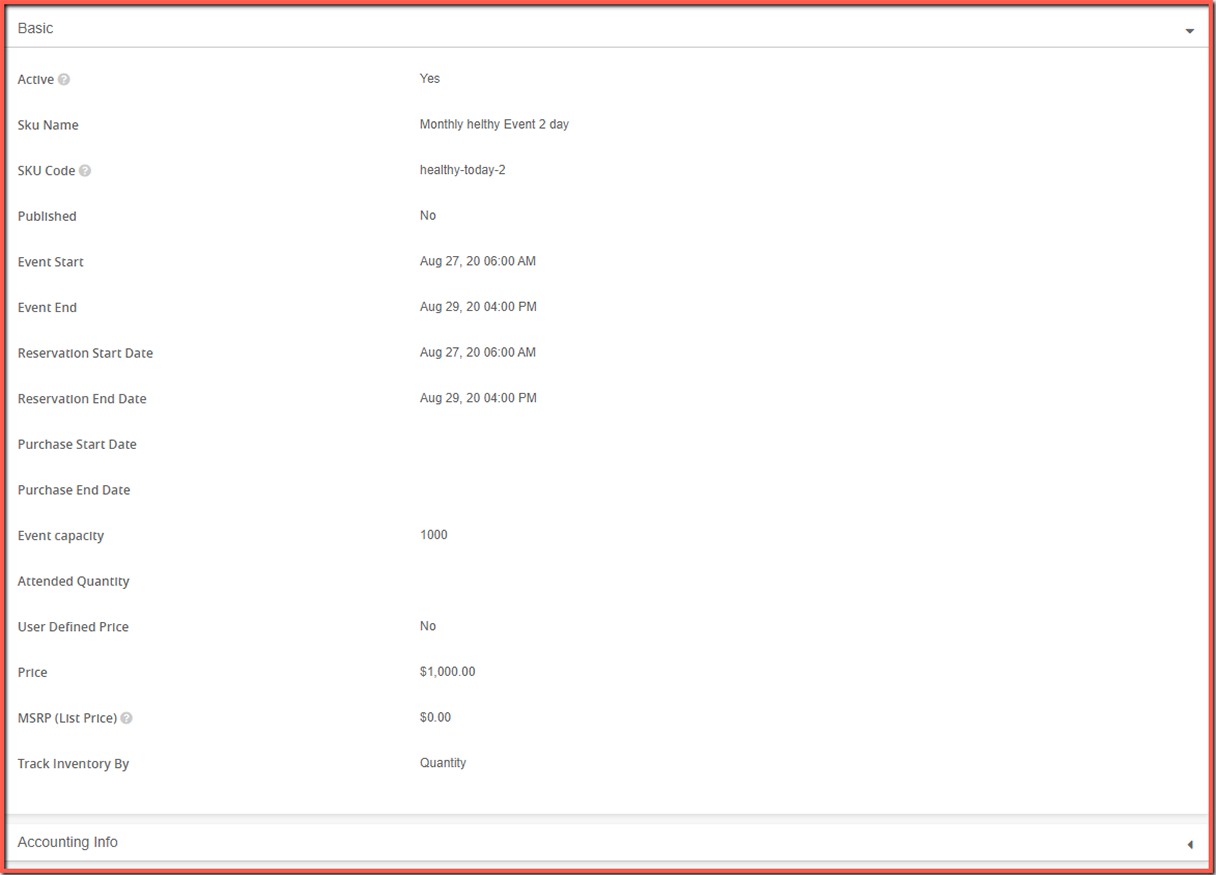
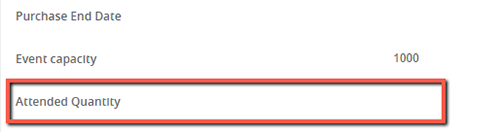
Attended Quantity on Sku detail- This field gives a tally of the participants that actually attended the particular event. It is helpful for event planning and set-up if that a venue has a large capacity but the actual projected attendance differs significantly. No need to set up 1000 seats if the attendance is going to be 50.
Inventory Accordion on sku detail
This accordion shows the inventory of skus available to be sold. It based on the location configurations capacity.

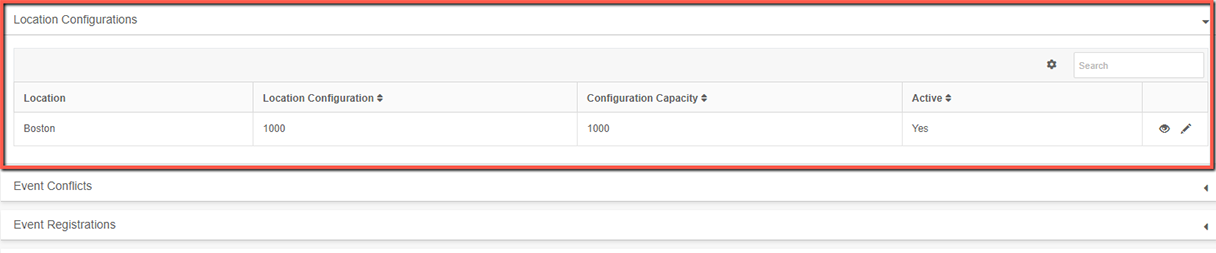
Location Configurations Accordion on sku detail
This accordion displays the location configurations for the specific event sku. From here you can edit a location configuration directly by clicking the pencil icon to the right of the location.
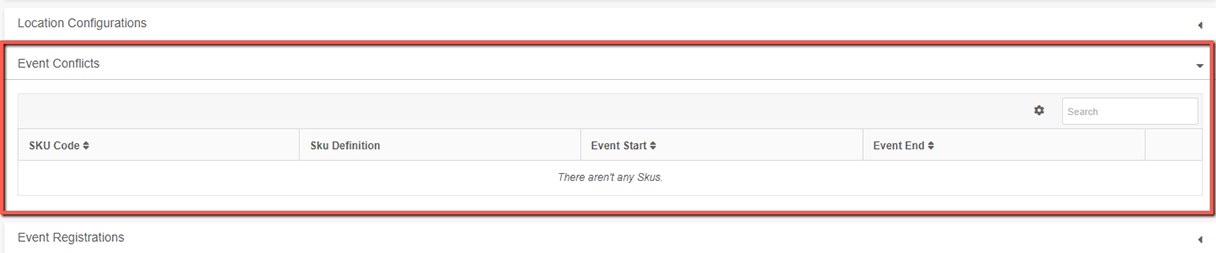
Event Conflicts Accordion on sku detail
If an event sku is using a location configuration on a particular date and it conflicts with another event sku that is also using the same location configuration, the conflict will be shown here.
Event Registrations Accordion on sku detail
This is where you will find the listing of Event Registrations for an event sku. And where you can Add Event Registrations.
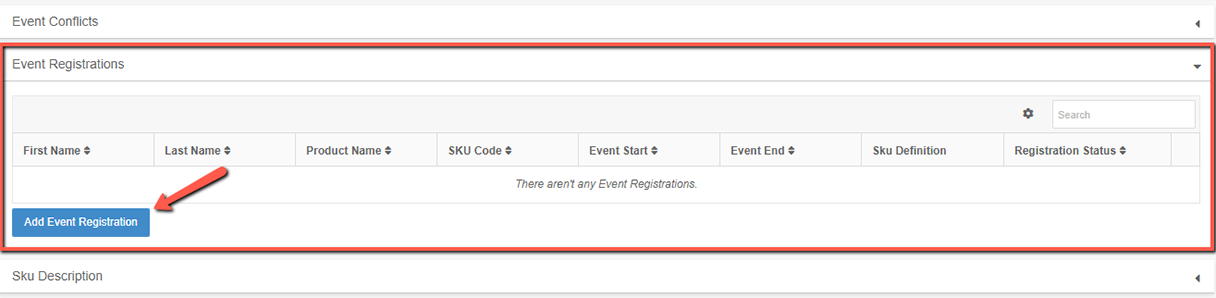
Add Event Registration
If event participants need help with registration they can be added through Ultra Commerce.
From the Sku detail screen :
- Expand the Event Registrations accordion.
The Add Event Registration modal will appear.
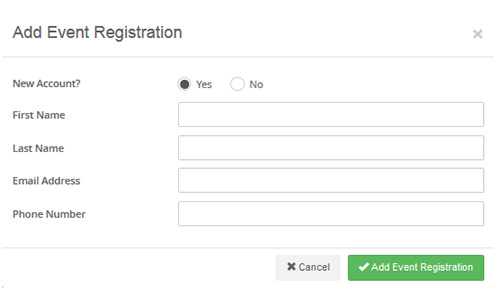
Fill in the modal and then click Add Event Registration. The registration will now display on the product's Event Registration accordion and on the Sku's Event Registration accordion.
Product Schedules Accordion on product detail
This accordion is where you will find the product schedule. Additional schedules can be created from the Sku accordion.

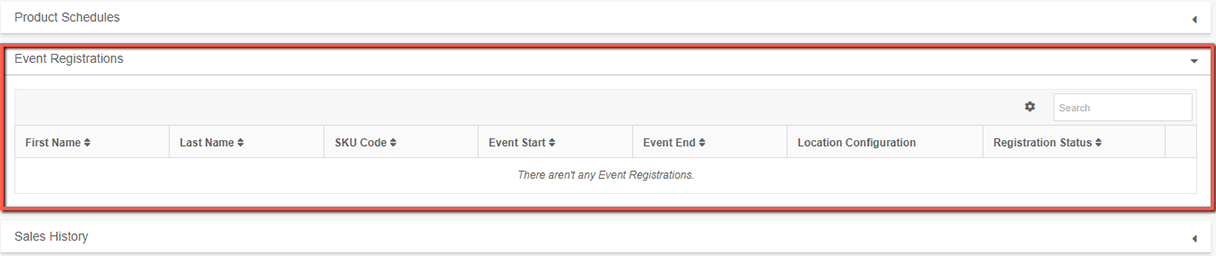
Event Registrations Accordion on product detail
This is where you will find the listing of Event Registrations for an event. You can't add a registration directly from here, this just lists the registrations. Registrations must be added through the Event Registration accordion of the sku detail screen as explained in the previous section.
Sku Settings of Event Product Detail
Sku settings can be set at the product level or inherit the global settings in Settings > Sku Settings area Ultra Commerce. See the Settings section of the User Guide for more information about global settings.
To view the Sku Settings for Events:
- Expand the Sku Settings tab.

Allow Waitlisting If this is set to Yes, if an event fills up this will allow registrants to get on a list in case space opens up.
Registration Approval Required An Administrator will approve a registration if this is set to Yes.

Enforce Conflicts for event products If this is set to Yes, then if a location configuration is being used for an event another event can not be created that utilizes the same location configuration.