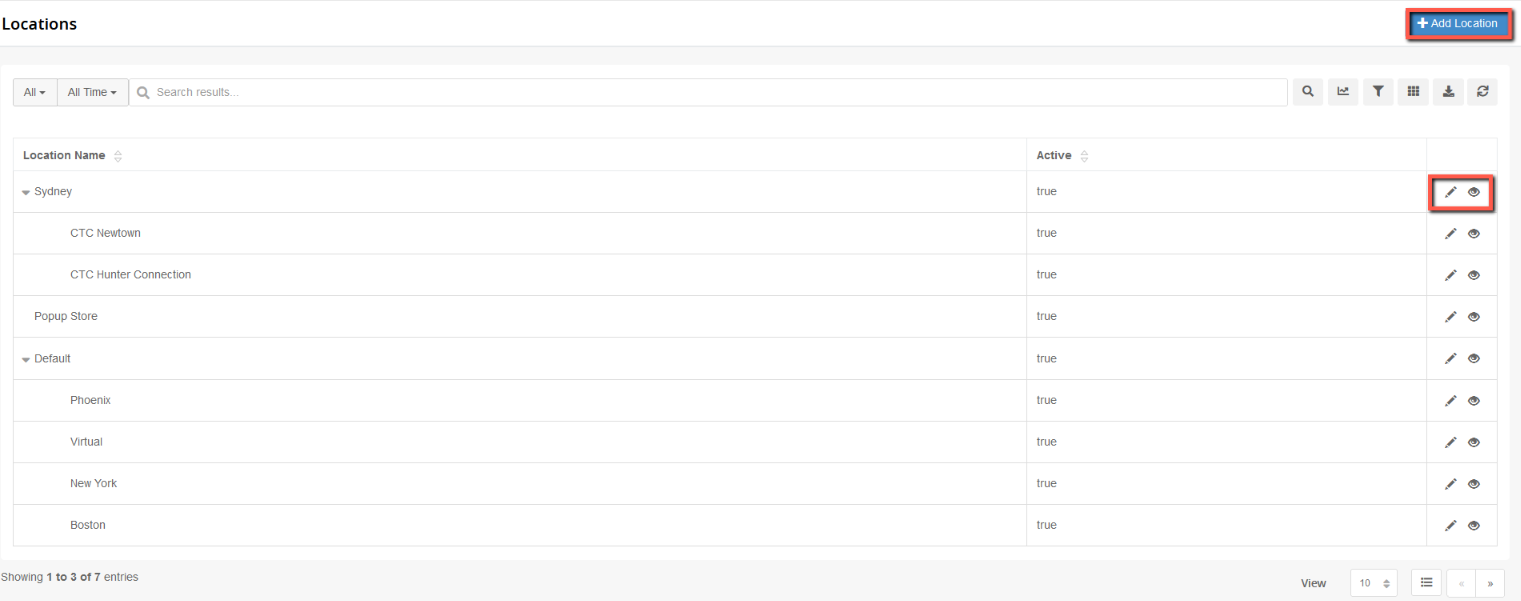
Locations
Location is a concept in Ultra Commerce that refers to any physical address where your products or services are handled, stored, shipped from, or sold or the location and configurations for your events are held.
Navigate to the Location Listing
To access the Location Listing:
- Select Warehouse from the Ultra Commerce toolbar
- Select Locations from the drop-down.
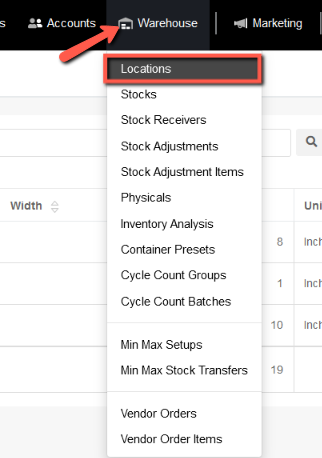
The Locations listing screen will display.
Create a new Location
- Click the blue + Add Location button on the Location listing page.
The Create Location modal will appear.
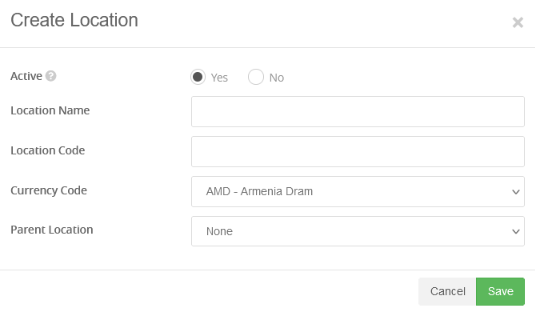
- Set Active to Yes or No.
- Select a Location Name
- Create a unique Location Code
- Set the Currency Code from the drop-down
- Indicate if there is / select a parent location from the drop-down
- Click Save.
The location detail screen will display along with some tabs for adding in additional information about the location.
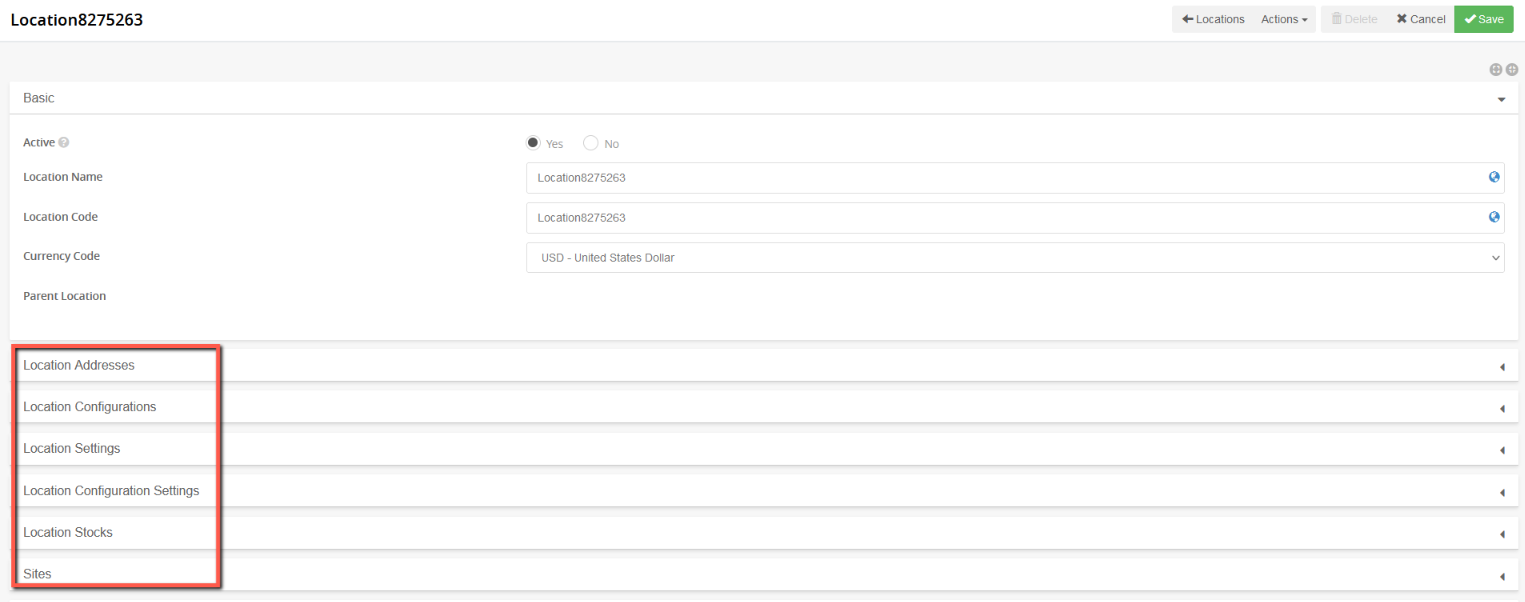
Location Addresses tab
This tab is where location addresses can be added for a location.
Set the Primary address: Select the radio button next to the address that is considered the primary address for a location.
Edit an existing Address by clicking the pencil icon to the right of the address.
.png)
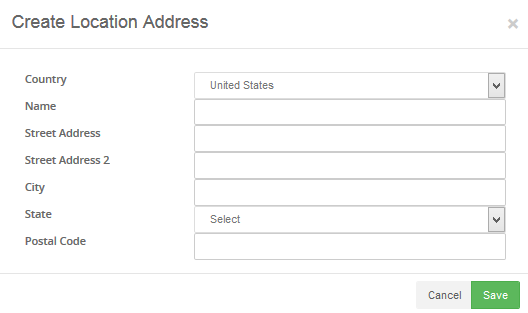
If you would like to add a Location Address:
- Click the+ Add Location Address and the Create Location Address modal will appear.
- Fill in the address fields.
- Click Save.
Location Configurations tab
This is where all the configurations for a location are added. This is useful when using locations for Events and seating attendee capacity is needed.

To add a Location Configuration:
- Click the +Add Location Configuration button.
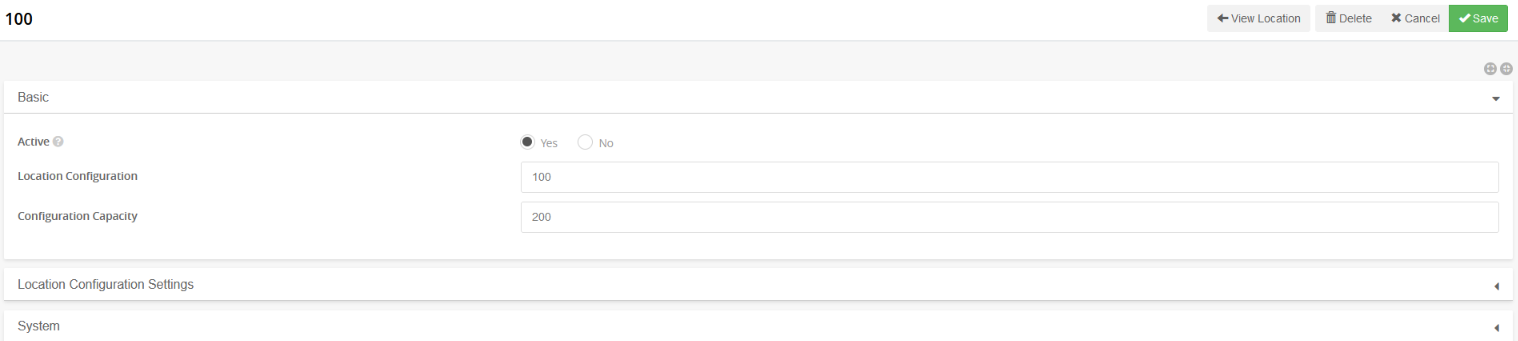
The Create Location Configuration screen will appear.

- Name the Location Configuration.
- Fill in the Configuration Capacity.
- Save.
The location configuration detail page will appear with fields for the location configuration as well as a Location Configurations Settings tab. This tab is explained below.
Location Settings tab
This settings is where you can determine whether you need QATS at the location for ordering. and whether or not to exclude a location from QATS.

Location Configuration Settings tab
This is where the Pre Event and Post Event Reservation minutes can be set.
Pre Event Reservation Minutes - is the amount of time that can be added to a reservation to allow for setting up the event.
Post Event Reservation Minutes - is the amount of time that can be added to a reservation to allow for winding down / break-down of the event.

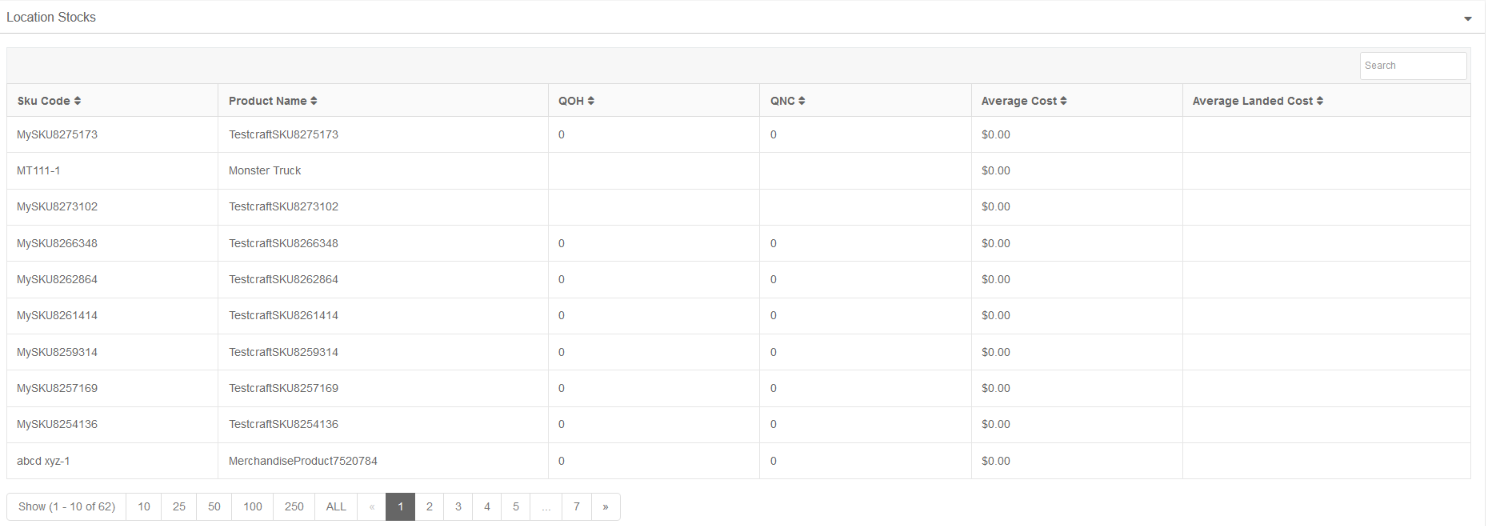
Location Stocks tab
Sites tab
This tab is where the location can be assigned to a particular site. If there no selections are made here, by default the location will be available across all sites.
To see the sites that can be selected and saved:
- Make sure that the detail page is in edit mode by clicking the pencil icon in the top right of the location detail page. You will then see the Sites with check boxes to the left of each Site.
- Check off the desired sites and
- Click Save in the upper right hand corner.
If selections have been made, they will appear on this tab in view mode.
