Physicals
Managing your inventory, both on and offline, is a key aspect of running many eCommerce organizations.
To verify the quantities in Ultra Commerce, a business should conduct one or more counts of the actual items in a given location and update the system with any discrepancies. To aid in this process, Ultra Commerce provides some tools to help you process physical counts without disrupting the business.
Running Your First Physical
- Select Warehouse from the Ultra Commerce toolbar.
- Click on Physicals from the drop-down.
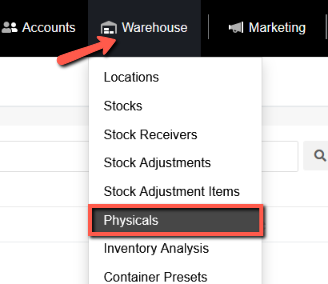
This will bring you to the Physicals listing page.
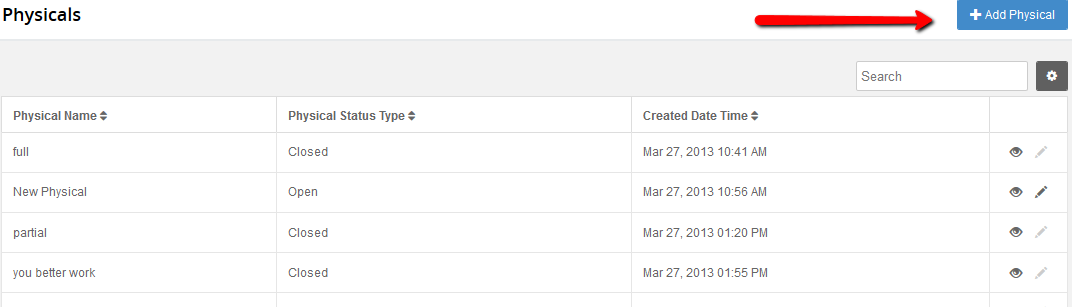
To create a new Physical:
- Click

The Create Physical dialog will appear.
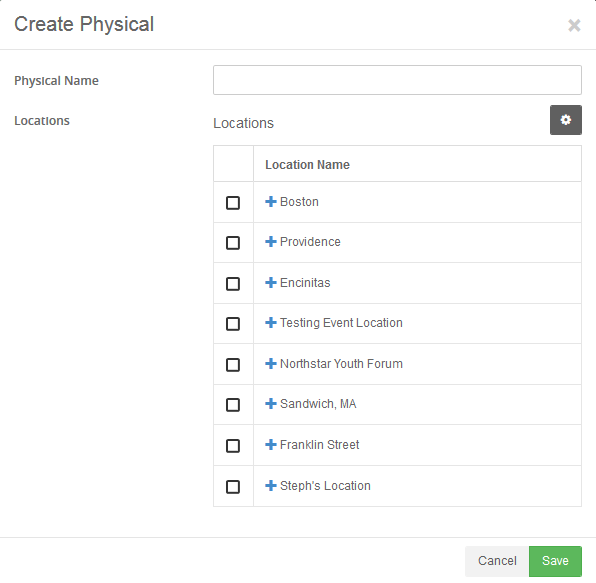
- Add in a Physical Name.
- Select the Location for the physical by putting a checkmark in the appropriate box.
- Click Save.
The Physical detail page will display.
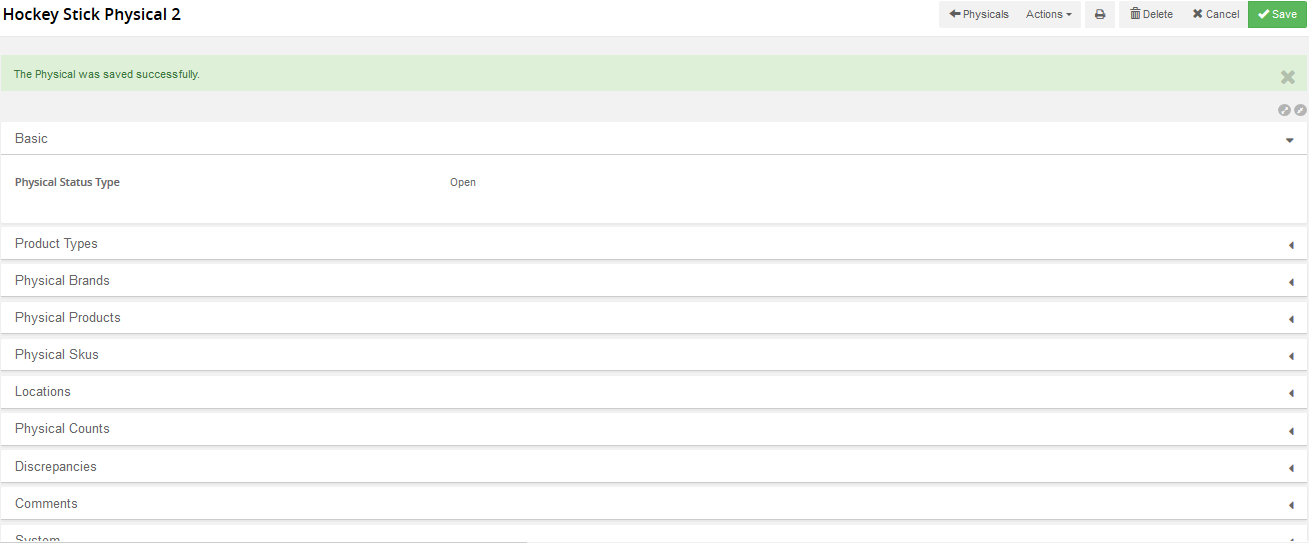
Selecting What You Are Counting
When doing a physical, it is important to tell the system not only what location you are in as you did when you first created the physical, but also what it is that you are counting. You can do this by switching through the tabs on the physical detail page, and checking off either the Product Types, Physical Products, Physical Brands, or Physical Skus that will be counted. You must select something to let the system know what you plan to be counting.
Note: If you are only counting a few skus, but select an entire Product Type, if you don't count all the skus in the product type, by default, anything that you don't count will automatically be zero'd out by the system when the physical is committed. So if you plan to only count a few skus, make sure to only select those skus on the Physical Skus tab.
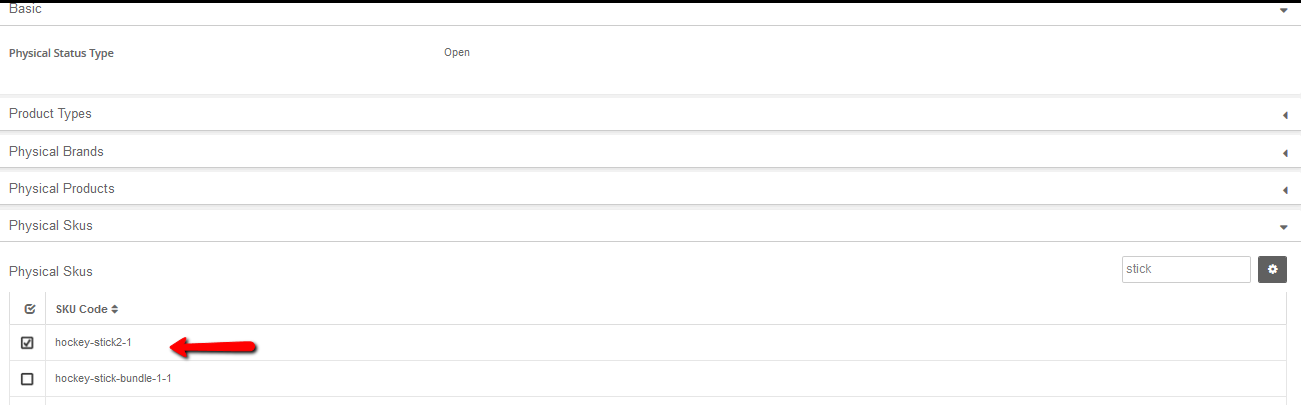
Below is a screenshot of a physical count of one specific hockey stick in the Boston location, note that one physical sku has been checked off. Once the selection of product types, brands or skus has been selected, press Save in the upper right corner of the screen.
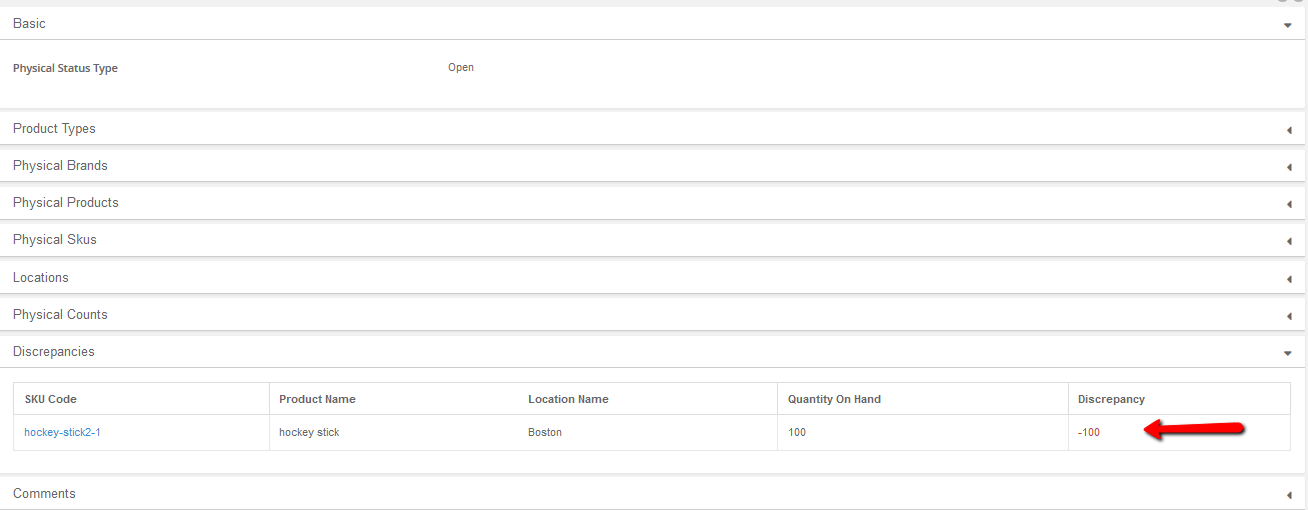
After you have told the system what you plan to count and saved it, click on the Discrepancies tab. Here you will see the skus that will be included in the count. Note the Discrepancy column in this screenshot shows a discrepency of -100. This is because the count has not been yet uploaded to the system. If the physical was committed at this point, this sku would be zero'd out.
Adding Physical Counts
After a physical has been created, one or more counts can be added to it.
Imagine counts like you walking through the warehouse with a scanner and scanning barcodes. After the scan, you update the inventory counts with the latest numbers. If you had 2 warehouses, one in San Diego and one in New York, someone from each office could log in and upload their respective count.
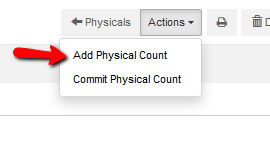
- In the upper right corner on the action bar, select the action drop-down and then "Add Physical Count".
When you select this, the Add Physical Count dialog will open.
- Specify the location of your count. While a physical can be for multiple locations, each count can only be for 1 of those locations.
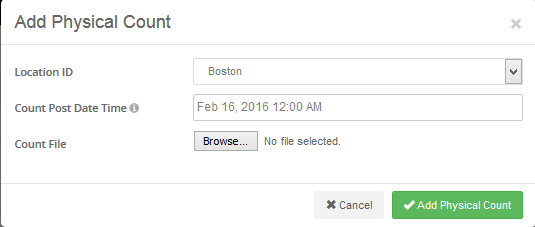
- Select a Count Post Date Time. In a future step, when you view discrepencies or commit this physical, the Date Time you specify will be used so that any inventory moving in or out after the count commit date/time will be accounted for, and automatically adjusted accordingly. In summary, "this is how many there were in the location at this particular Date/Time".
- Next you will need to select a Count File by clicking the Browse button and locating a comma separated text file with a .txt or .csv extension from your computer. The file should be formatted as: skuCode,quantity. Example:
100000929,3Optionally your your file can be formatted as skuCode,quantity,countPostDateTime so that each record has it's own post date time that will be used for discrepancies. Example100000929,3,3/13/2013 2:23:47 PM - Click Add Physical Count.
Note: You can also add the physical count without uploading a Count File and just clicking Add Physical Count. Below explains how to add the count manually. This is something useful when counting small numbers of items.
To add a physical count manually, after you have clicked Add Physical Count in step 3 above, without adding a text file in step 2, and you have saved the count by clicking Add Physical Count:
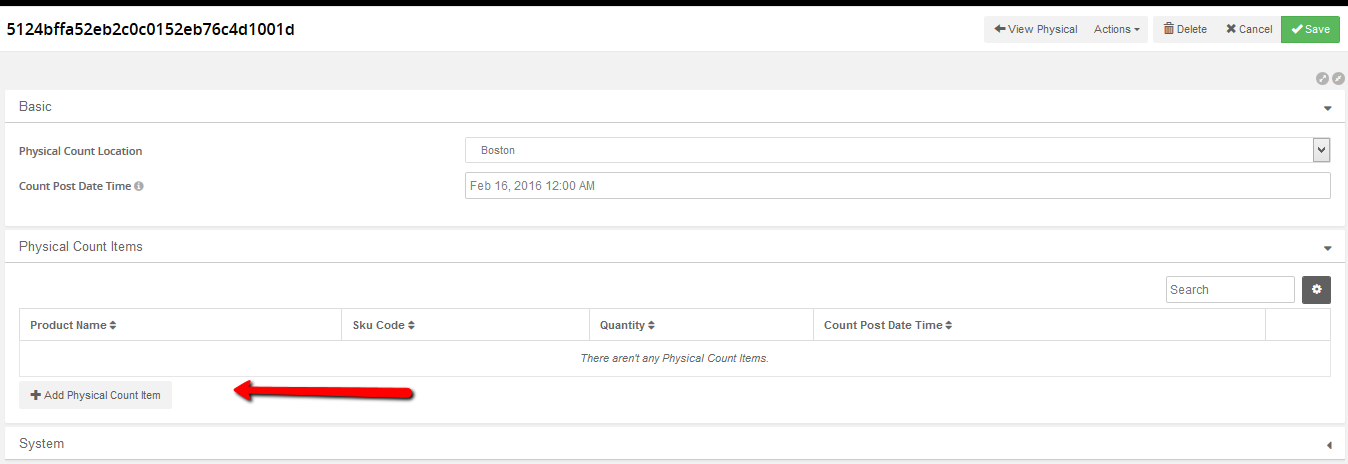
- Expand the Physicals Counts tab of the physical. Find the Physical Count just created. See the screenshot below.

- Click the
 icon to open up the new physical count without an uploaded count.
 - The Physical Ccount detail page will open, as shown in the screenshot below.
- Click on +Add Physical Count Item button.
The Add Items dialog will appear.
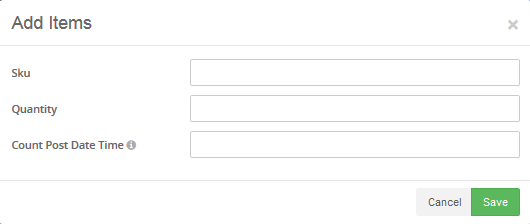
- Fill in the Sku field with the sku code of the item.
- Fill in the Quantity field.
- Add a Count Post Date Time.
- Save the item. The items will now appear and will be reflected on the Discrepancies tab.
If you look on the Physical Counts tab now, the physical count just created is listed and on the Discrepancies tab, the Discrepancy column will now reflect the imported or manually added count. In the case of the hockey stick import, the counted quantity was 200, so the discrepancy tab shows +100.

If you had a number of physical counts being done by different people in the same warehouse, the counts would be aggregated on the Discrepancies tab.
Now it is time to commit the counts.
Discrepancies & Committing
Once all of the counts are complete, it's time to review the discrepencies and commit.
- Select the Discrepancies tab on the Physical detail page.
- You will see a list of everything that will be positivly or negativly adjusted.
- Verify that everything looks OK and makes sense because once the physical is committed, it can't be undone.
- On the Action drop-down, select Commit Physical. (this action cannot be undone) This will automatically create a stock adjustment & stock receiver for all discrepencies, and set the physical status to Closed.

- If you need to make additional changes you will need to start a new physical and add more physical counts to it.