Fulfillment Batches
Fulfillment Batches are a handy way of grouping together orders that can be managed through the fulfillment process in one place rather than fulfilling each order individually through the order. Orders that would ship from a specific warehouse can be batched together and be assigned to an individual account.
The Fulfillment Batches listing is the place where fulfillment batches that have been created through the Order Fulfillments listing area of the Ultra Commerce admin will appear. An overview of how to create the fulfillment batch is found in the Order Fulfillments section of the user guide.
This section explains how to find and manage a created fulfillment batch.
Navigate to the Fulfillment Batch Listing
To navigate to the Fulfillment Batch listing::
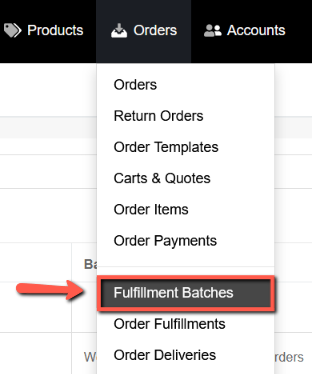
- Click on the Orders from the Ultra Commerce navigation toolbar.
- Select Fulfillment Batches from the drop down.
The Fulfillment Batches listing will appear. From here you can manage the fulfillment batches that have been created by clicking on the view icon to the right of the desired fulfillment batch.
.png)
View and Manage a Fulfillment Batch
- Click the view icon to the right of the desired Fulfillment Batch on the Fulfillment Batch listing screen.
The Fulfillment Batch detail will appear.
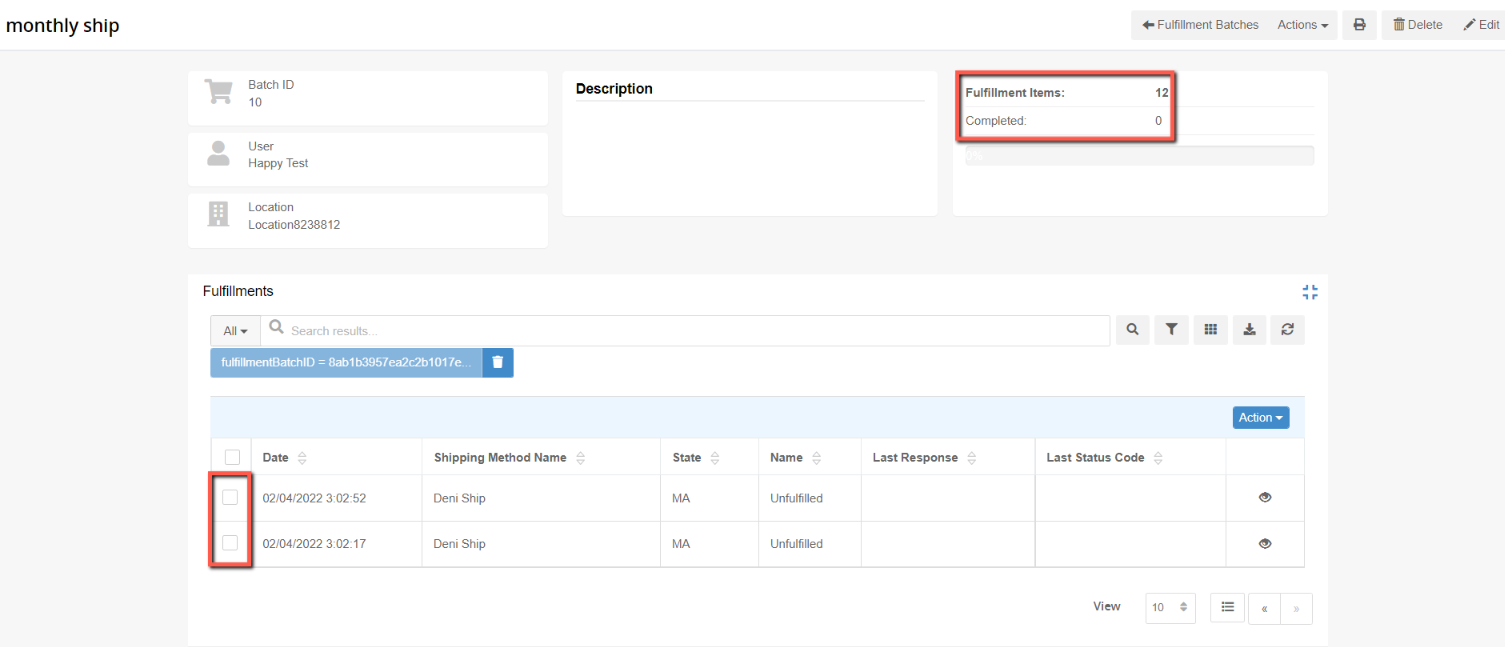
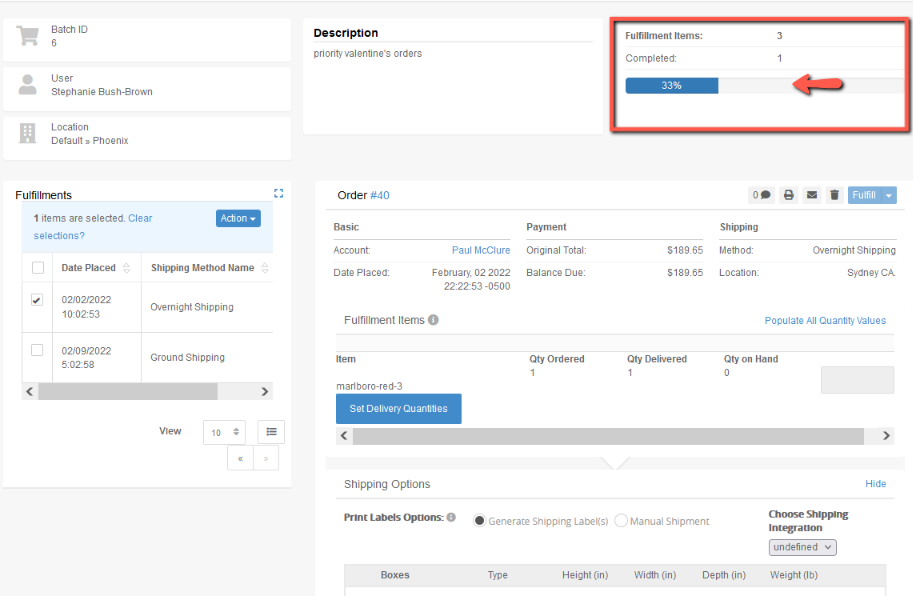
The Fulfillment Batch Detail displays the batch ID the user account that is assigned to manage the batch and the location for the batch. It indicates the total number of Fulfillment Items in the batch and the Completed number of items that have been fulfilled.
Edit Location and Description of a Batch
There are a couple things that can be edited on the batch
- Click the pencil icon in the upper right hand corner of the fulfillment batch detail (it is in edit mode if the green Save button is there).
- Edit the Location and the Description fields.
- Click Save.

Fulfill Items of an Order in a Batch
From the Fulfillment Batch detail:
- Put a check in the box to the left of one of the orders in the batch.
A modal will appear that includes the Order and Shipping details. If there are multiple orders, if you place a check in the box for an order, the order selected will populate to the right. Only one order populates at a time.
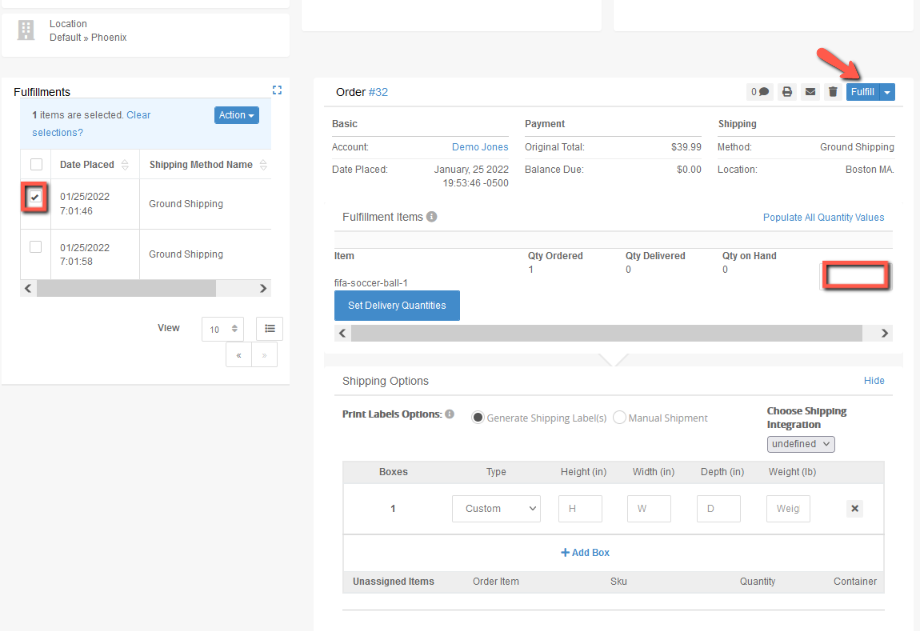
In the Order section:
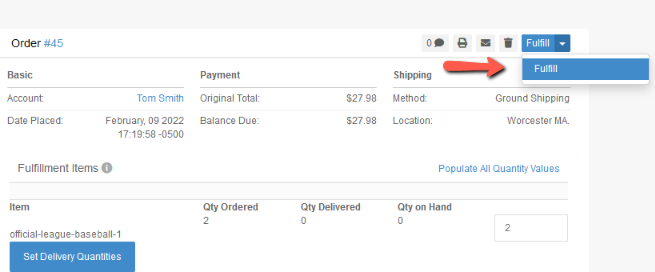
- Click Populate All Quantity Values and the quantity field for all order items will be filled with the total items on the order.
- If you are fulfilling less than the total order items fill in the quantity field manually with the desired number of items.
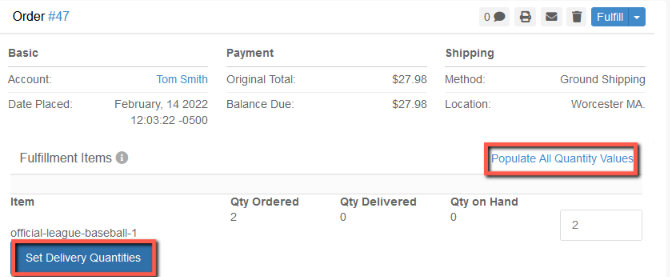
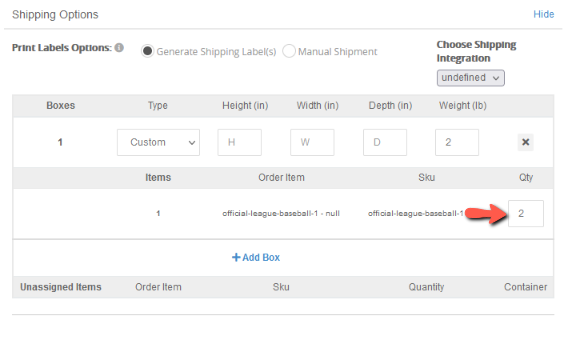
- Click the Set Delivery Quantities button to fill in the quantity for the Shipping Options section - this will populate the shipping options section with the order items and number of items that were set above in the order items section.
In the Shipping Options section there are fields to print labels and define the dimensions and weight of the boxes for the shipment. You can also add in additional boxes if the you need additional boxes to handle to quantity of items.
Print Label Options selection:
- Select Generate Shipping Label if you have an integration tied to shipping.
- Select integration from the Choose Shipping Integration drop down - these are integrations that you have integrated with Ultra Commerce.
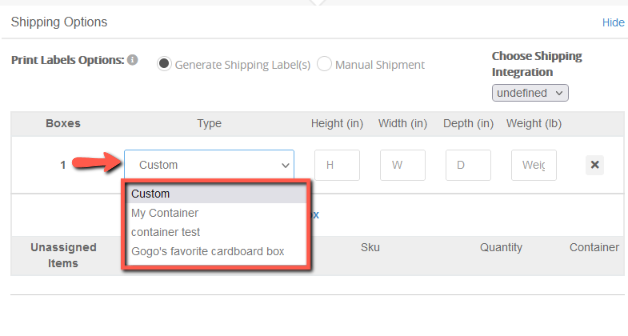
- Select from the Custom drop-down a Container Preset if you added one in the Container Presets section of the admin.
- If you do not have container preset defined, Select Custom the dimensions of the box(es) Height, Width, Depth and Weight in the fields.
- Click +Add Box to add an additional box if needed. You can then adjust the quantity of items in each box and each of the dimensions H/W/D/W of each box.
- Select Manual Shipment if you don't have integrations tied to shipping set up or you are going to manually ship the item.
- Select from the Custom drop-down a Container Preset if you added one in the Container Presets section of the admin.
- If you do not have container preset defined, Select Custom the dimensions of the box(es) Height, Width, Depth and Weight in the fields.
- Click +Add Box if you need additional boxes for the order items if needed. You can then adjust the quantity of items in each box and each of the dimensions H/W/D/W of each box.
- Add in a Tracking Number to the field.
Once the order items to be fulfilled and the shipping for the items has been set it is time to start the fulfillment process.
From the Fulfill drop down:
- Click Fulfill.
The Completion status section of the batch will now indicate how much of the Fulfillment Batch has been completed.
You will now be able to complete the next Order in the Fulfillment Batch. It will automatically move to the next order in the batch. Just follow the previous steps to fulfill the items on that batch.
You can also view the status of each order on the Fulfillment Batch detail if you Clear selections on the batch detail.
![]()
Once you have cleared you can view each order on the batch and that status of the order. If an order has only had some items fulfilled on it the status will be Partially Fulfilled.
I 
If you would like to finish fulfilling the Partially Fulfilled order, just put a check in the box to the left of the order that is not fully fulfilled and repeat the steps.
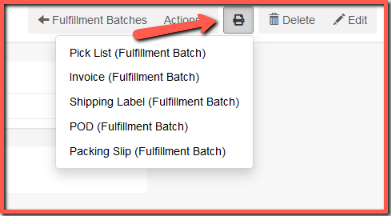
Print Templates
There are a number of print templates out of the box such as Pick List, Invoice, Shipping Label, POD and Packing Slip. The following is just a quick overview of these available templates.
To access the print templates available for the Fulfillment Batch:
- Click the printer icon at the top of the fulfillment batch detail and a menu of different templates you can choose will display.
Pick List
The pick list will allow the items on the batch that to be located in the warehouse and prepared for boxing and shipping.
.png)
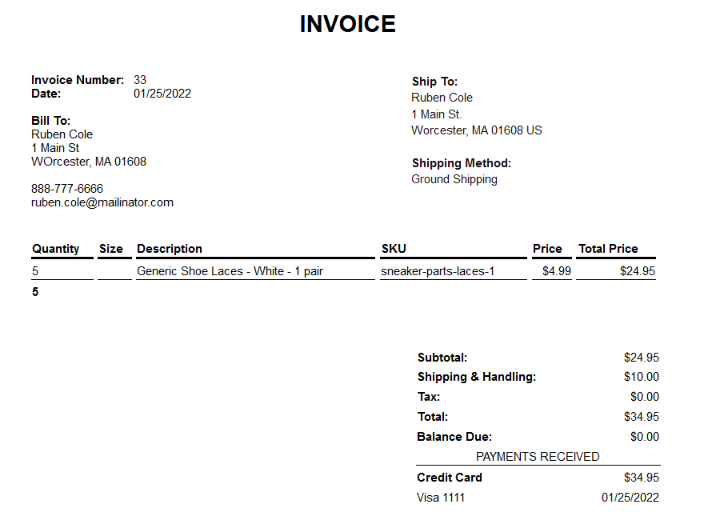
Invoice
Shipping Label
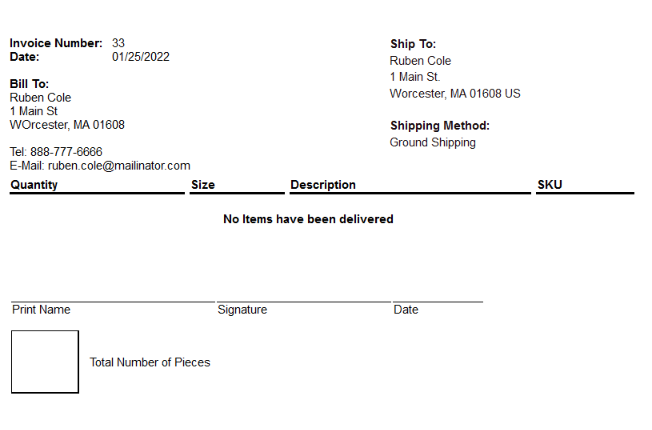
POD
Packing Slip