Content
The Content area of Ultra Commerce is where the built-in Ultra Commerce CMS pages (CMS stands for Content Management System) can be set up and managed from the back-end. Sites that you have added via the Sites section of Ultra Commerce will appear in the drop-down in the upper right corner of the Content listing page.
If you choose to use another third party CMS software program alone or in conjunction with the built in CMS, Ultra Commerce will dynamically pull content pages from these integrated programs, that have been marked for product listing, and list them here on the Content Listing page.
- Navigate to the Content Listing Page
- View a Site's Content
- Editing or Adding Content to a Site
- Assign Products to a Site's Product Listing page
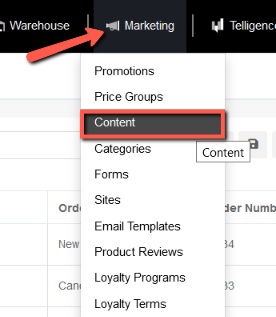
Navigating to the Content Listing Page
To navigate to the Content section of the site:
- Click Marketing on the Ultra Commerce toolbar.
- Select Content from the drop-down
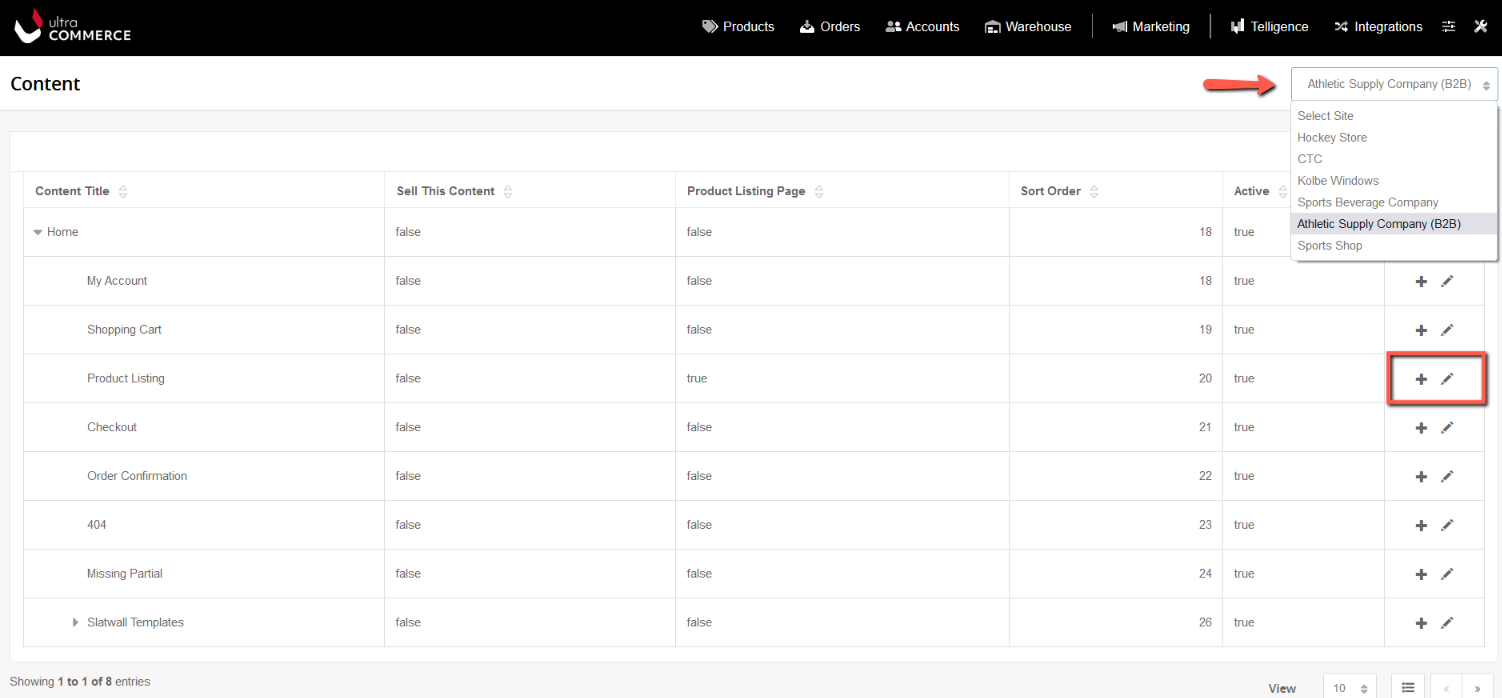
The Content listing screen will appear. Here you will see all the pages of content for the different Sites that have been created in the admin.
View a Site's Content
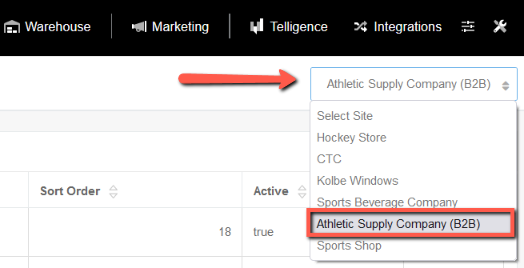
In the upper right hand corner of the screen is a drop-down to select the Site to view the Content for that site.
- Click on the drop-down and select the Site that you would like to view or edit.
The CMS page hierarchy specific for that site will appear. The content that appears here for a newly added site is out of the box content.
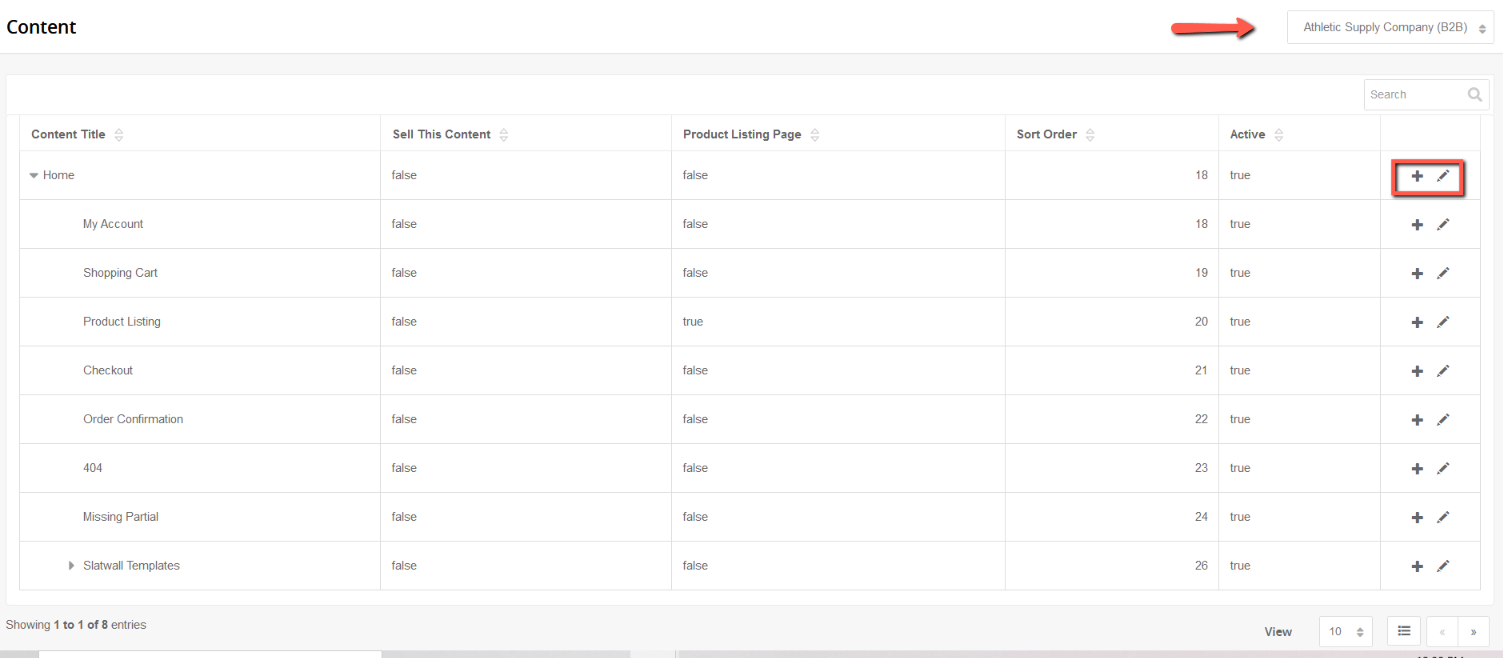
Each entry on the Content listing screen displays the Content Title, Sell This Content, whether the content is a Product Listing Page and if it is Active.
Editing or Adding Ultra Commerce CMS pages in Content
- Select the Ultra Commerce CMS site from the drop-down on the Content listing screen. The pages for that site will display.
If you would like to add a Content:
- Click on the + sign to the right of the content that you would like to be the parent content. So, if you want the page to be directly below Home, click on the + sign to the right of Home.
The Create Content form will display.

- Fill in the Title and URL Title.
- Set it to Active yes or no. It determines if it is available for use on the back-end.
- Select Yes or No if it is a Page. It determines if it is a page or other type of content other than a product listing page.
- Select Yes or No whether it is a Product Listing page. By selecting Yes this page will show up in the ultra commerce admin for a product under the Product Pages so that individual products can be added to this page to build out a list or grid.
- Select Yes or No if you will be selling this content. If yes, this content will be available to be sold as a content access product.
- Then click Create.
The detail page for the content will appear with additional tabs for adding more information.
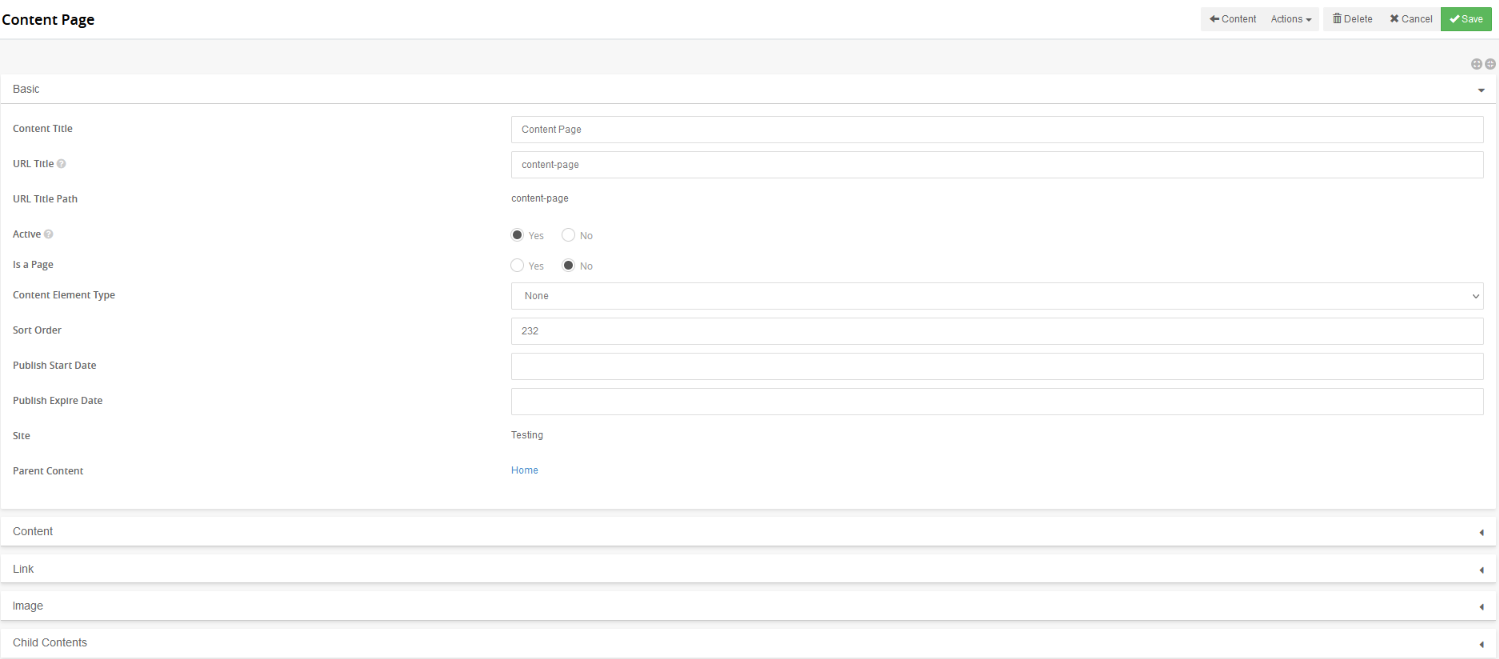
Basic fields that can be edited:
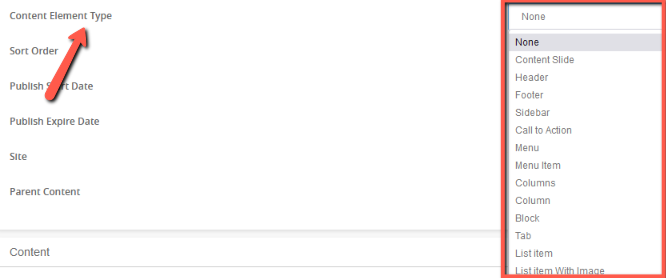
- Set Content Element Type
If the Content has Page set to No (false), then you will have options where you can select the Content Element Type from the drop-down on the the right as shown in the image below.
- Set the Content Page Type
If Page is set to Yes (true) you can set the Content Page Type from the drop-down on the right as shown in the image below.

- Page Sort Order - the way that the page falls in the page hierarchy
- Publish Start Date - If the page a publish date put it here.
- Publish Expire Date - If the page has a publish end date put it here.
Tabs for adding additional information:
Note: Some of the tabs only exist for certain content types. For example, content that has Page set to yes will also have Categories and Settings tabs and content with Product Listing set to yes will have a Products tab.
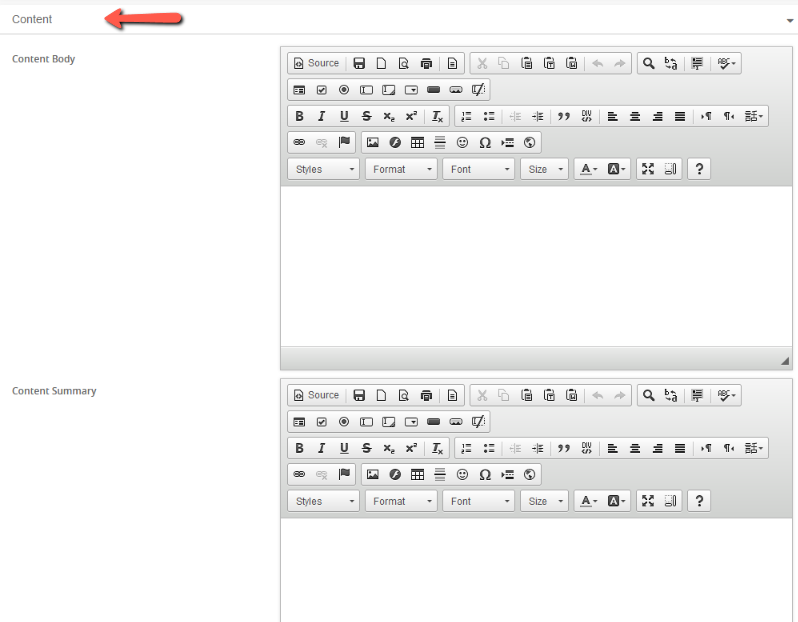
Contents tab:
On the Contents tab, which is included only on Ultra Commerce CMS sites, there is a WYSIWYG editor to add in the Content Body and the Content Summary for the page.
Add Link to content tab
This tab is only available to content where Page is set to No (false).

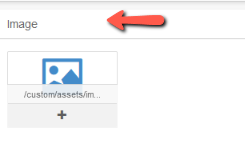
Add Image to content tab
This is where you add images for the page.
View Child Contents tab
This is where you will see the content that nests below the current content. So, for Home, all content below home would display here. You can quickly add child content from here without having to navigate back to the site's listing of content.

Settings tab:
This tab is only viewable on content type detail that have Page set to Yes.
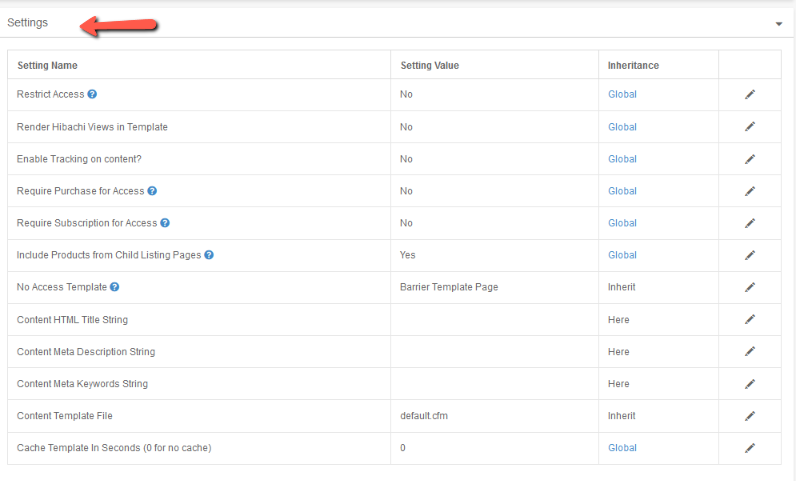
- Restrict access. Determines whether this content is restricted through subscription and/or purchase. A page cannot be restricted and a product listing page simultaneously.
- Render Hibachi Views in Template
- Enable Tracking on Content?
- Require Purchase for Access. If access is restricted, determines whether restricted through purchase.
- Require Subscription for Access. If access is restricted, determines whether restricted through subscription.
- Include Products from Child Listing Pages. Determines whether products from child listing pages will be included.
- No Access Template. If content is restricted, determines which template is used until either a purchase or subscription has granted access to the remainder of the page's content; typically a barrier template is used, such as a Pay Wall or Protected Content template. Click on the pencil icon to select.
- Content HTML Title String. Click on the edit icon to edit or add.
- Content Meta Description String. Click on the edit icon to edit or add.
- Content Meta Keywords String. Click on the edit icon to edit or add.
- Content Template File. Click on the edit icon to edit.
- Cache Template in Seconds (0 for no cache)
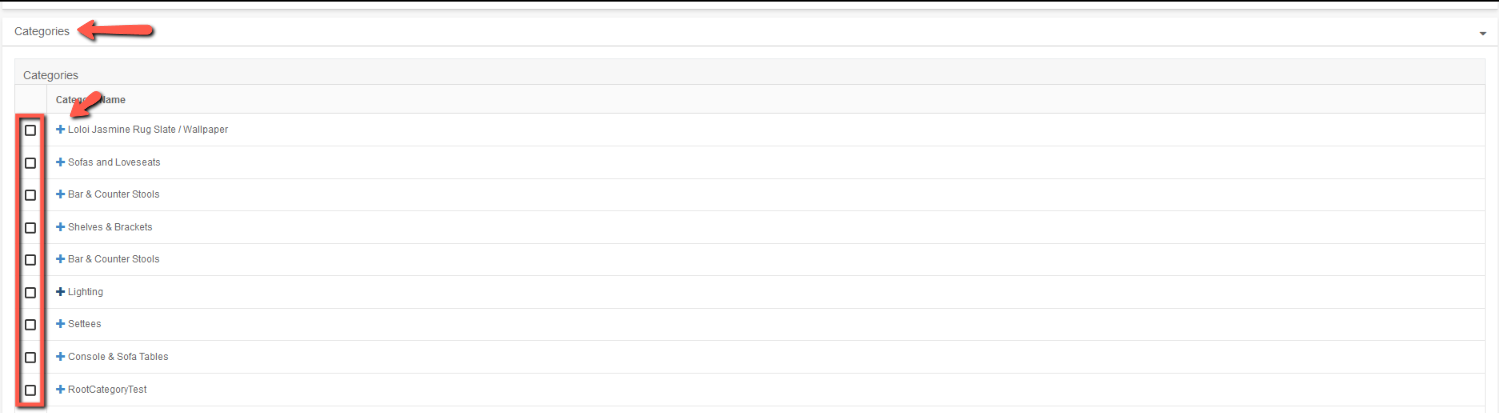
Add Categories to a Site's Page
If a content has Page set to Yes, this tab will be available to select categories. Categories are added in the Categories section of the admin. See the Categories section of the user guide for information on adding them so they can be assigned to pages.
If you would like to add categories to a site's page:
- Select the desired site from drop-down on the Content listing page.
- Find the Page in the page hierarchy.
- Click the pencil icon to the right of the page.
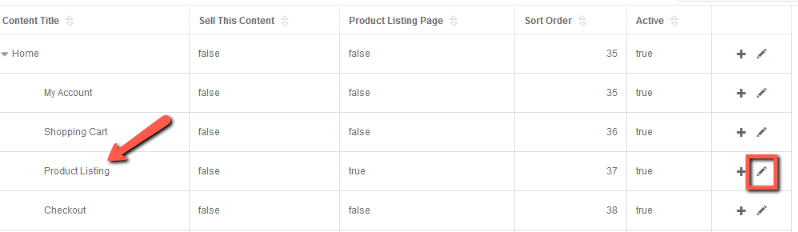
Assigning a Product to a Site's Product Listing Page
If you would like to assign products that are in the ultra commerce admin to a Site's content:
- Select the desired site from drop-down on the Content listing page.
- Find the Product Listing page in the page hierarchy - or another page that was created - "product listing" is generic out of the box and more can be created..
- Click the pencil icon to the right of the Product Listing page.
The Product Listing content page will display.
Make sure:
- Is Active is set to Yes
- Is a Page is set to Yes
- Content Page Type drop down is set to Product Listing
- Product Listing Page is Set to Yes
Because it is a Product Listing type page, there will be a an additional tab called Products.
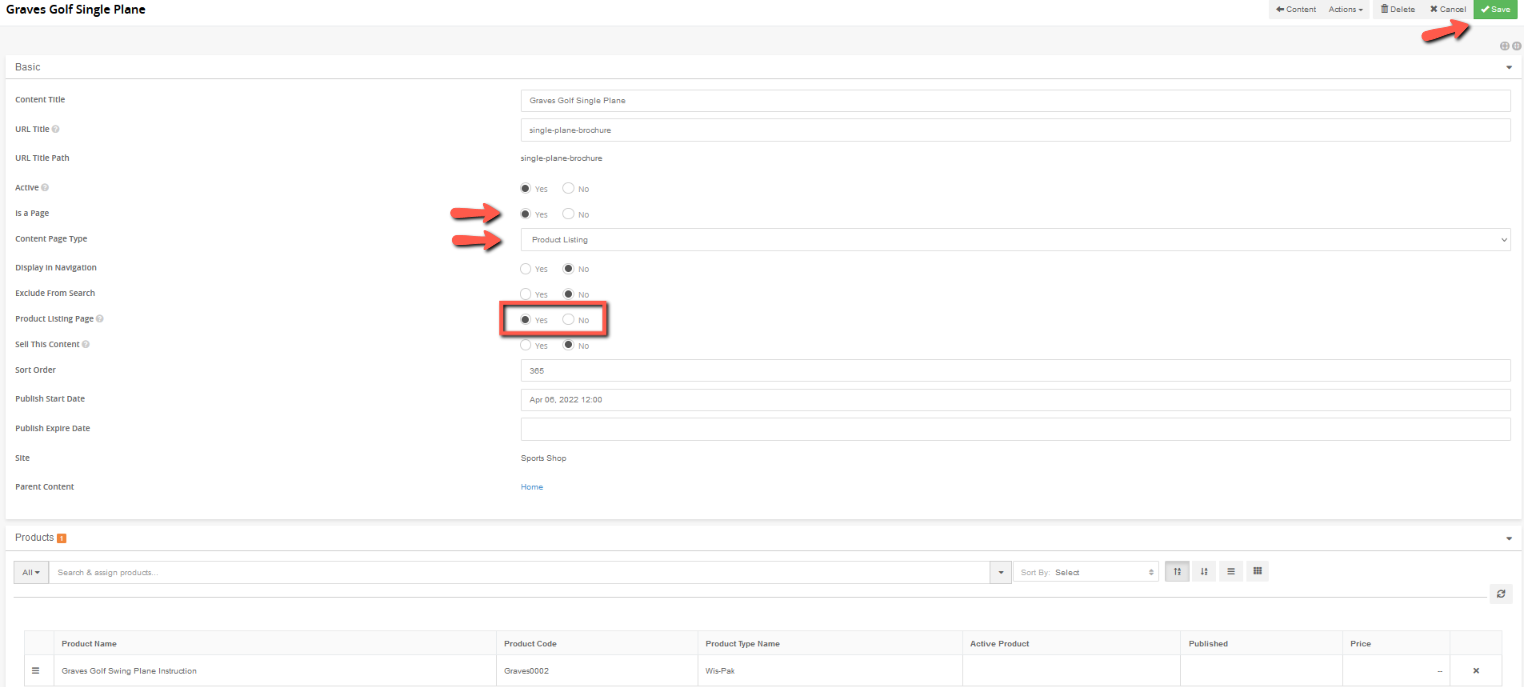
- Expand the Products tab.
You will see a search field and filters for searching and setting desired products for the Product Listing page.
- Type in the product desired in the search field.
- Click the + sign to add it to the Products Tab.
- The product will appear as an entry. You will see see the product listed and a little tally next to the Products tab title that indicates products have been added to the content page.
Anything selected will display here and be available for use by the site's front-end.
Anything selected here can also be removed by clicking the x to the right of the product entry.

To save your changes:
- Click the green Save button at the top right of the page and you will see a success message once the page has saved.