Payment Integration
To give you a better idea of how Payment Integrations work, let's look at Payflow Pro, which you can find in the Integration Listing. Click the  icon to get started.
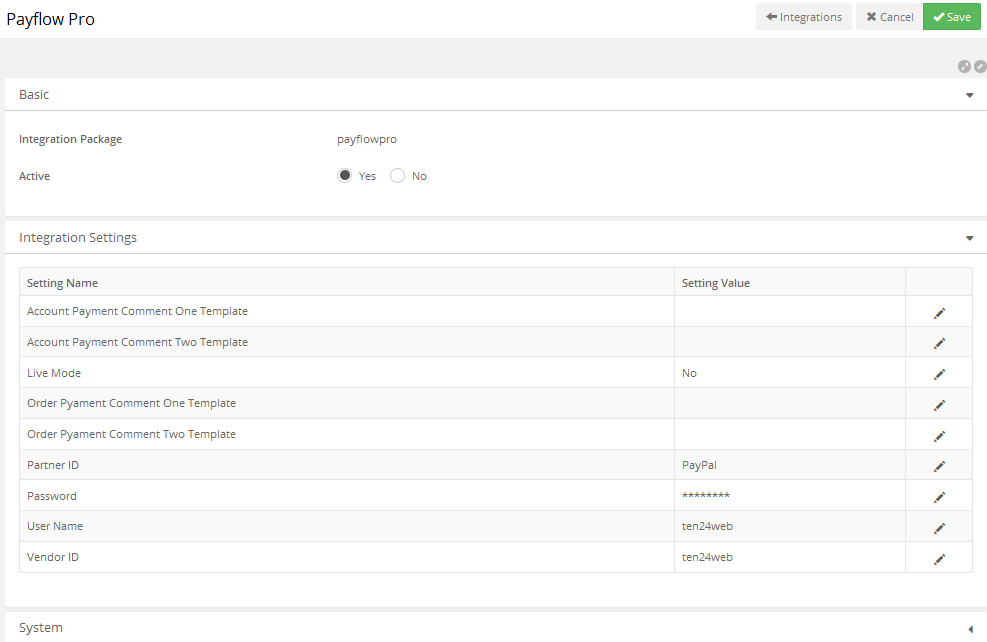
The first thing you may notice is the Payment Integration Active radio buttons underneath the integration name. These determine whether this particular payment method will be available for customers to use.
If you have a Payflow Pro account, simply enter the IDs, User Name, and Password to link the accounts.
Live Mode determines whether this integration is functioning "in the real world." In other words, before going live you'll want to have run tests on the entire checkout process to ensure that everything goes smoothly without actually charging any accounts or sending out shipments. When you are ready to actually begin sending charges to (in this case) PayPal, go ahead and change the Live Mode setting value to Yes.
Each integration will have different parameters as determined by the nature of the integration and the partner or client with which it is associated. In general, however, your relationship with a given service should clarify which information you have and how to use it here in Ultra Commerce.
For example, here is the page for another Payment Integration, Authorize.Net:
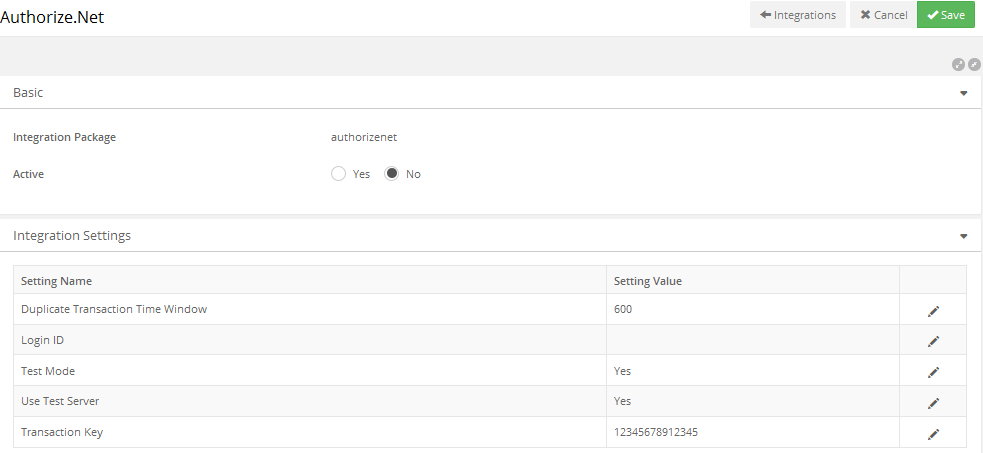
Notice that there are fewer fields to fill out (just Duplicate Transaction Time Window, Login ID, Test Mode, Use, Test Serveer and Transaction Key), information which you would possess if you have an account with Authorize.Net. Instead of "Live Mode," which is toggled to "No" when testing, this integration features "Test Mode," which is toggled to "Yes" when testing. The principle remains the same for both integrations, but the specifics differ from one to the next.
For further information on payment integrations, consult the Payment Methods portion of the Settings Manager guide.