Vendor Orders
The Vendor Order Manager is used to quickly create, edit, and process vendor shipments. Before creating a Vendor Order, you must first make sure that you have entered the Vendor into Ultra Commerce. For instructions on adding Vendors to Ultra Commerce, visit the Vendors section of Ultra Commerce.
- Navigate to the Vendor Orders Listing
- Create a new Purchase Vendor Order
- Create a Return Vendor Order
Navigate to the Vendor Orders Listing
To access the Vendor Orders listing page:
.png)
- Click Warehouse on the Ultra Commerce toolbar
- Select Vendor Orders from the drop-down.
The Vendor Orders listing will display.
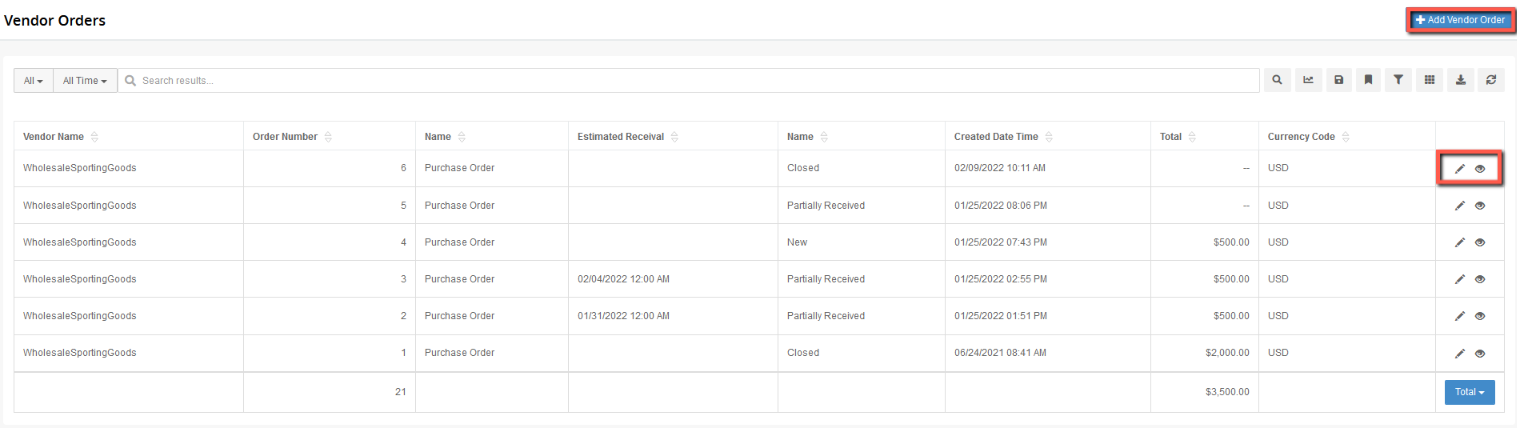
On the Vendor Order page, an administrator can view all vendor orders, past and present, and surface-level details regarding each order. To view details regarding a particular order, click the eye icon next to the desired order. To edit, click the edit icon.
Create a new Purchase Vendor Order
To create a new vendor order:
- Click the blue + Add Vendor Order button.
The Create Vendor Order dialog will appear.
.png)
- Select the Currency Code from the drop-down.
- Choose the Order Type - Purchase
- Start typing in the Vendor text field and select the correct auto-prompted vendor.
- Select Estimated Receival date and time, if known, from the calendar.
- Add in the S & H Cost in the field.
- Choose the Cost Distribution Type: Quantity, Cost or Weight
- Choose the Bill to Location from the drop-down.
- Click Save.
Once an order is saved the Vendor Order detail page will display with an important tab called Vendor Order Items.
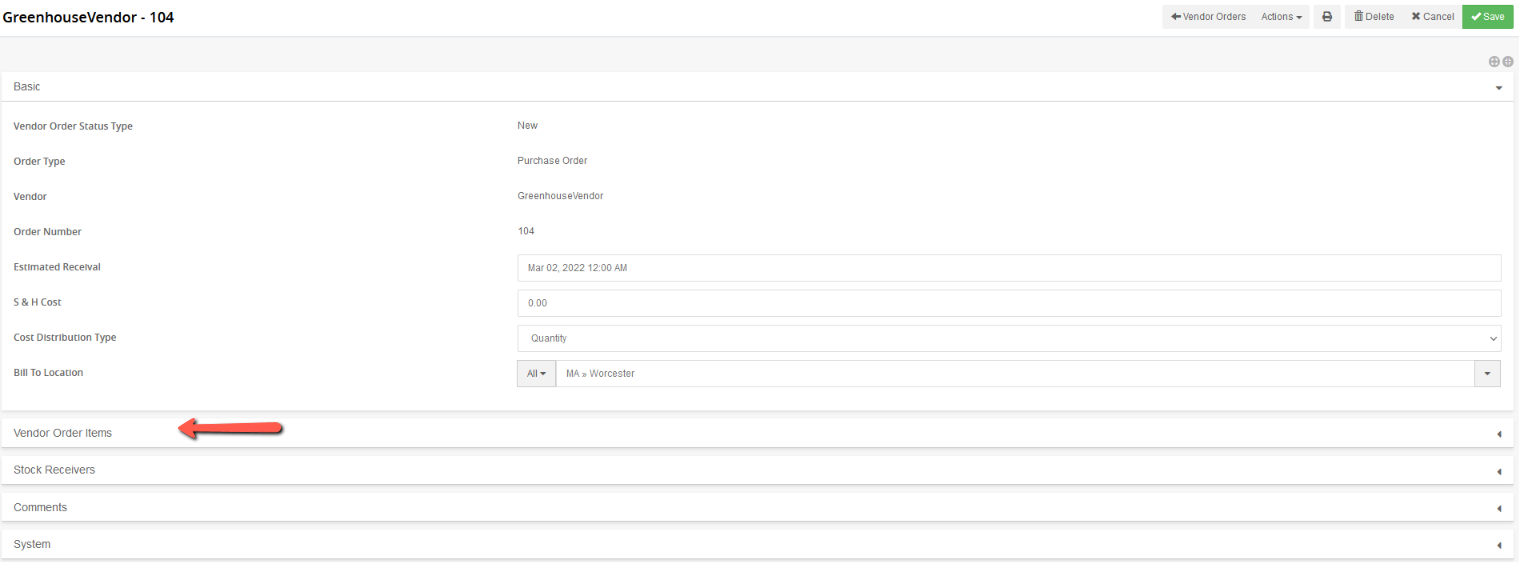
To select which products are going to ship and from which location,
- Select the Vendor Order Items tab and expand it.
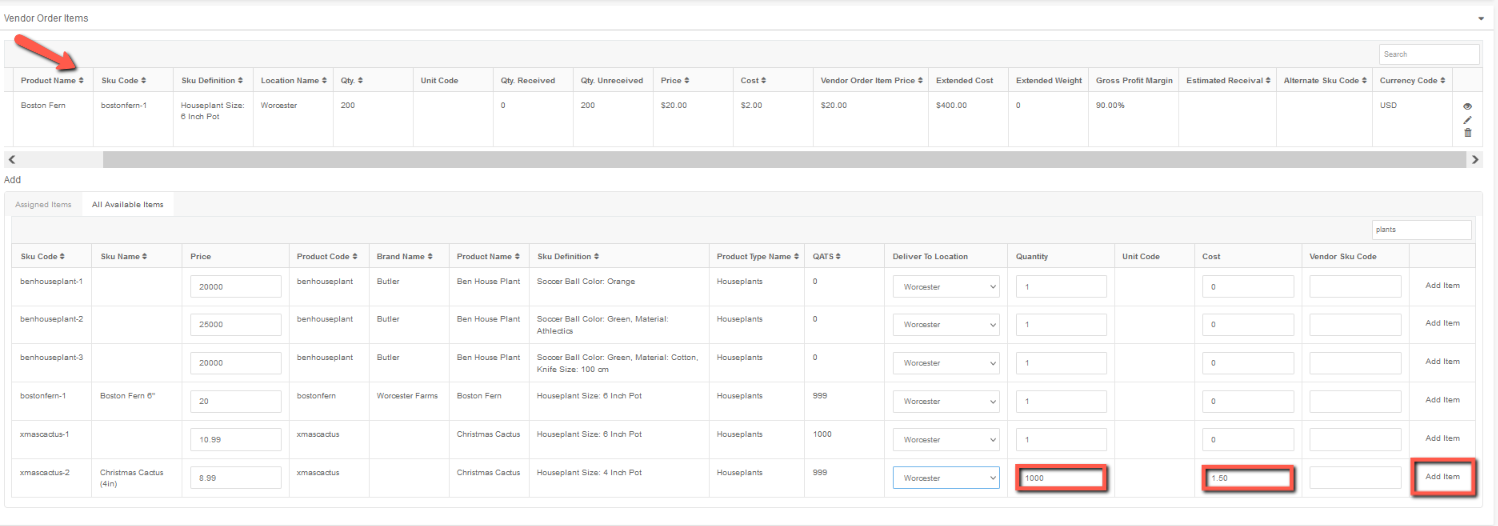
You will find a listing of products that are available to add to the Vendor Order. You can use the search box to narrow the results, as shown in the screenshot above.
There are two tabs:
Assigned Items tab - These are items filtered by Brand that are assigned to the Vendor via the Brands tab on the Vendor's detail page of the Ultra Commerce admin. You will also find items on this tab that might not have been assigned via Brands but were part of a previous Vendor Order utilizing the All Available Items tab.
All Available Items tab - These are all the items available for the site. If you select items for the vendor order just be sure that they are available from the Vendor.
- Find the skus you would like to add to the vendor order and indicate the Deliver to Location, add the Quantity and the Cost of each sku. You can even add a vendor sku.
- Click Add Item for each sku you would like to add.
The sku you just added will now appear directly below Vendor Order Items.
- Continue to add items by following the steps above until you are finished adding skus to the vendor order.
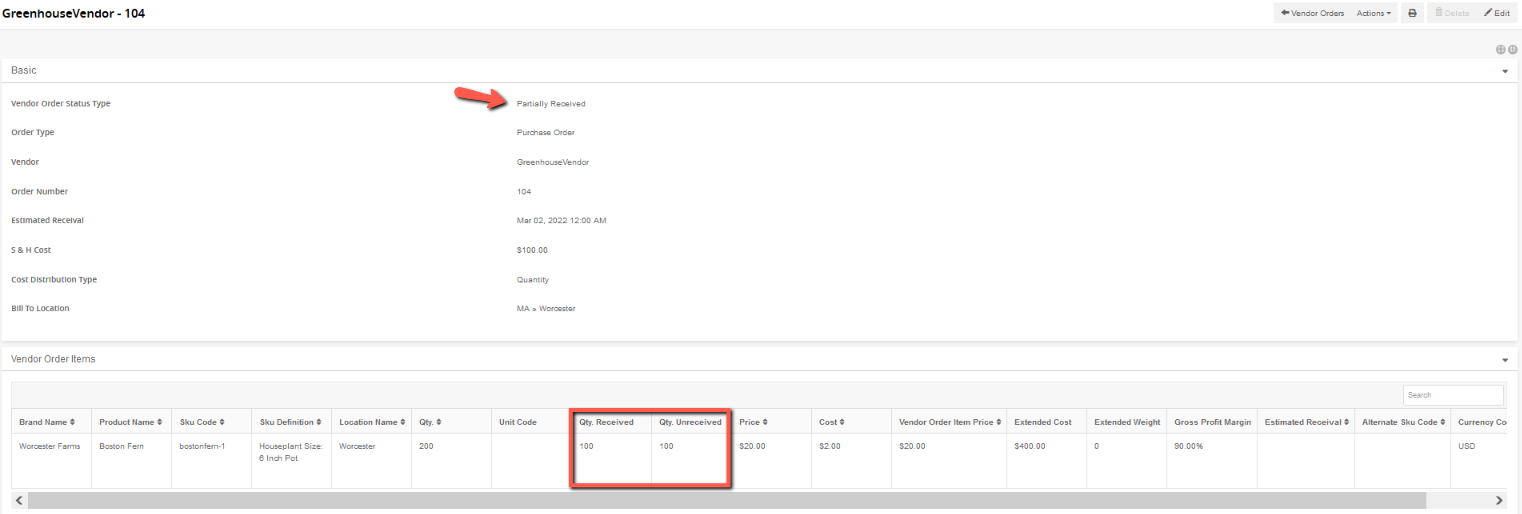
Particularly worth noting are the Qty. Received and Qty.Unreceived columns; these will be your primary reference points for determining what portions of an order you are still waiting for from the vendor. This is also the primary reference point for determining whether the vendor has accidentally sent you too much of a particular sku, which is important if you are expected to return excess stock to the vendor.

The order is saved to the listing, so, you can return to the Vendor Orders listing page, the vendor order will appear in the Vendor Order listing with a status of New since it has not yet been received.

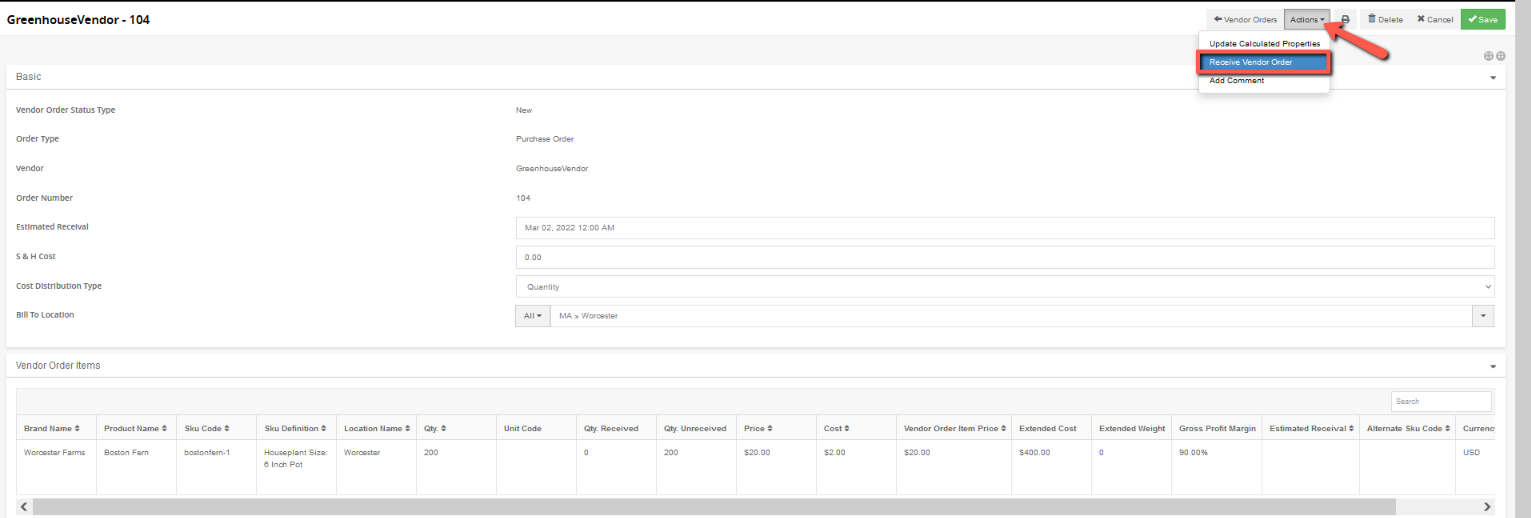
Receiving the Vendor Order
From the Vendor Order detail that you would like to receive the items:
- Click the Actions drop-down and
- Select Receive Vendor Order
The Receive Vendor Order form will appear. You can either receive all the items or you can partially receive the items.
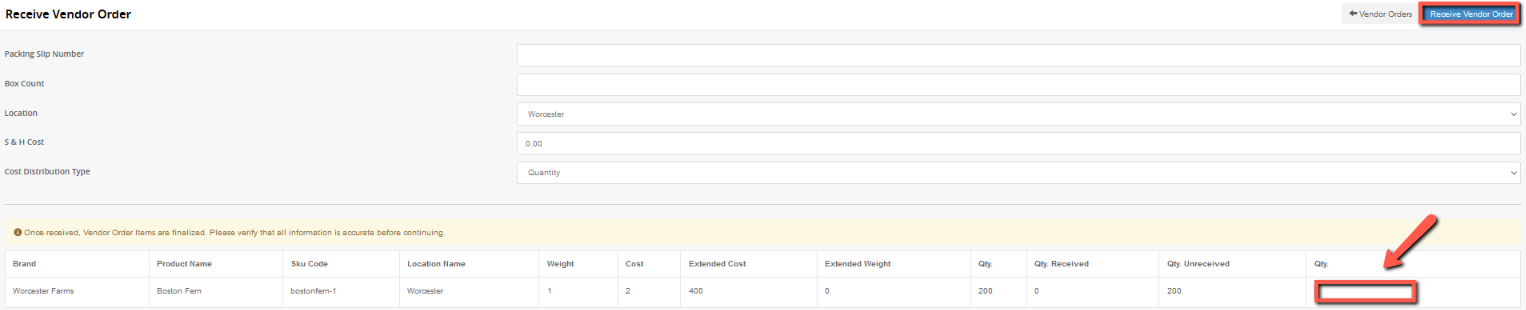
- Enter the Packing Slip Number, if applicable.
- Enter the Box Count (number of boxes), if applicable.
- Select the Location at which the items have been received. This should already be selected but you can confirm.
- Add the S&H Cost if it was not already entered or needs to be corrected.
- Confirm the Cost Distribution Type.
- Enter the Quantity received. This can be the full quantity or a partial quantity.
- Click Receive Vendor Order button when complete.
If the Vendor order was received partially it will have a Partially received status. If it is received in full it will have a Closed status.
If you partially receive, you can go back to the Vendor Order detail at a later date to receive the rest following the previous steps by choosing Actions > Receive Vendor Order.
Create a Return Vendor Order
Sometimes items need to be returned to the Vendor.
To create a Return Vendor Order from the Vendor Order listing screen:
- Select the blue +Add Vendor Order button
The Create Vendor Order modal will appear.
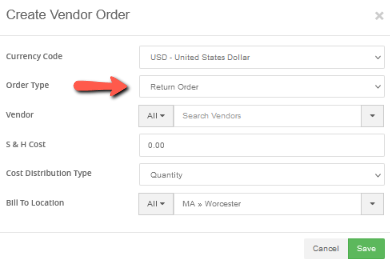
The process is similar as when creating a purchase order, but in this case, you will be choosing Order Type - Return Order.
- Select the Currency Code from the drop-down.
- Choose the Order Type - Return Order
- Start typing in the Vendor text field and select the correct auto-prompted vendor.
- Select Estimated Receival date and time, if known, from the calendar.
- Add in the S & H Cost in the field.
- Choose the Cost Distribution Type: Quantity, Cost or Weight
- Choose the Bill to Location from the drop-down.
- Click Save.
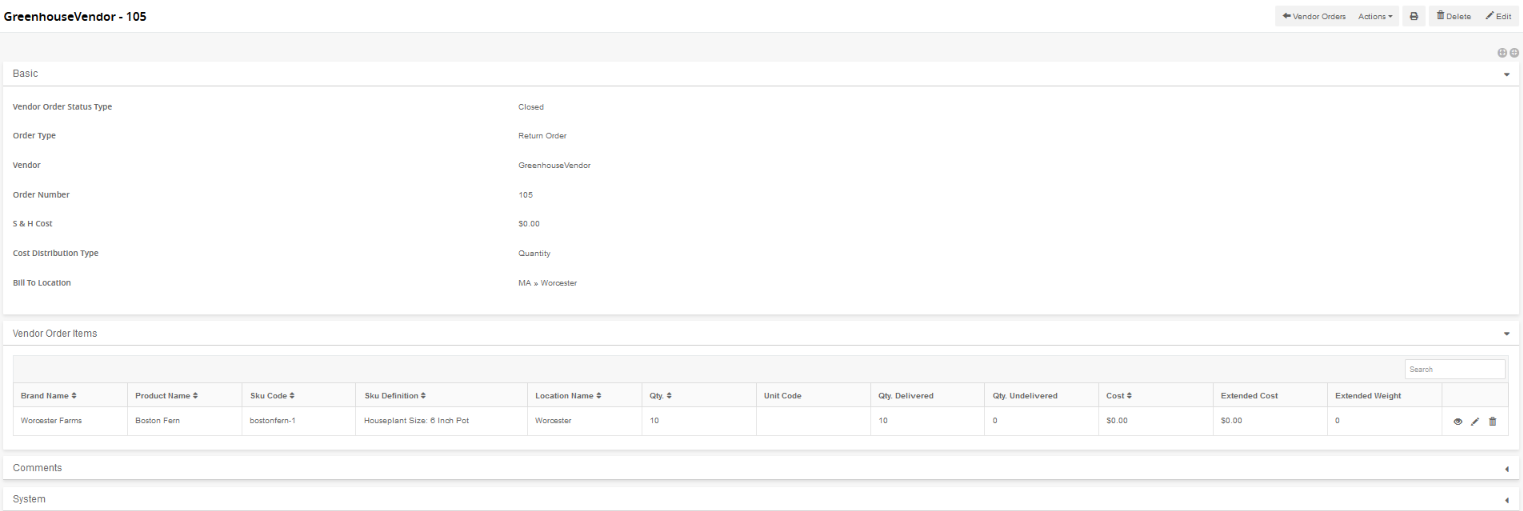
The Vendor Order detail will display. On the Vendor Order Items tab will be previous vendor order items.
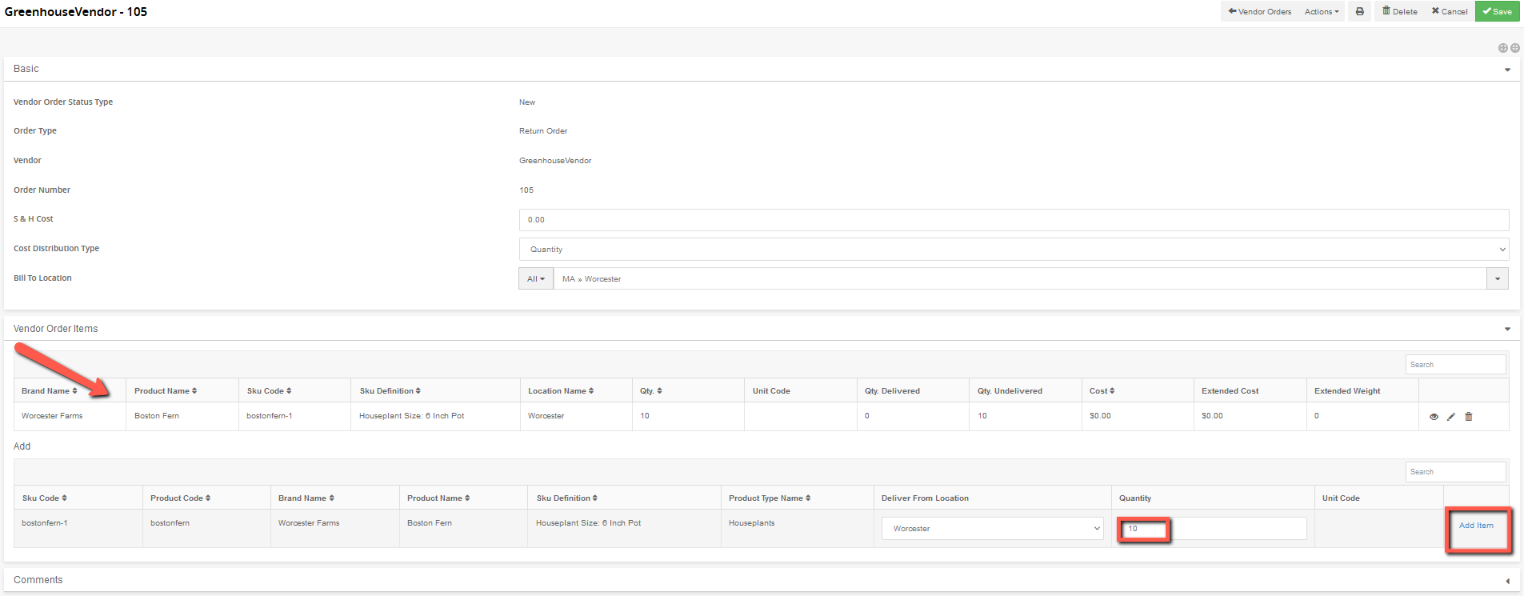
- Add in the quantity near the item that needs to be returned.
- Click Add Item
The Vendor Order Items will now be added to the Vendor Order Items tab.
Fulfill Return Vendor Order
Now it is time to Fulfill the Return Vendor Order.

From the Vendor Order Detail:
- Click Actions
- Select Fulfill
The Fulfill form will appear.

- Fill in the quantity to fulfill.
- Click the blue Fulfill button at the top of the screen.
The fulfill detail will appear with a status of closed (if all items are returned).