Orders Listing
The Orders listing is where any sales, return or exchange Orders that have been placed will be found and can be viewed or edited. You can also Create an order from the Orders listing screen, however, until the order has been placed, the order will appear on the Carts listing page.
- Actions Menu After Order has been Placed
- Order Detail Tabs
Actions Menu - After Order Placed
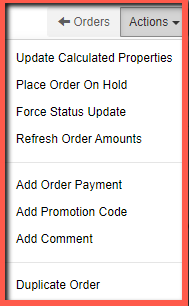
From an order detail screen of an order that has been placed there are a number of actions that can be performed. from the Actions menu. They are explained below.
- Click the Actions button to expand the available actions.
Place Order on Hold
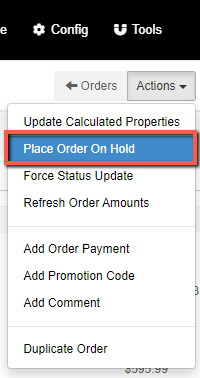
When an order is New or Processing you can place it on hold.
- Click on Actions button
- Select Place Order on Hold from the dropdown.
The Place Order on Hold Modal will display.
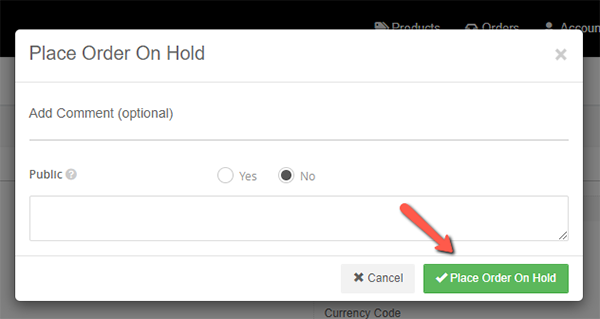
- Click the Place Order on Hold button.
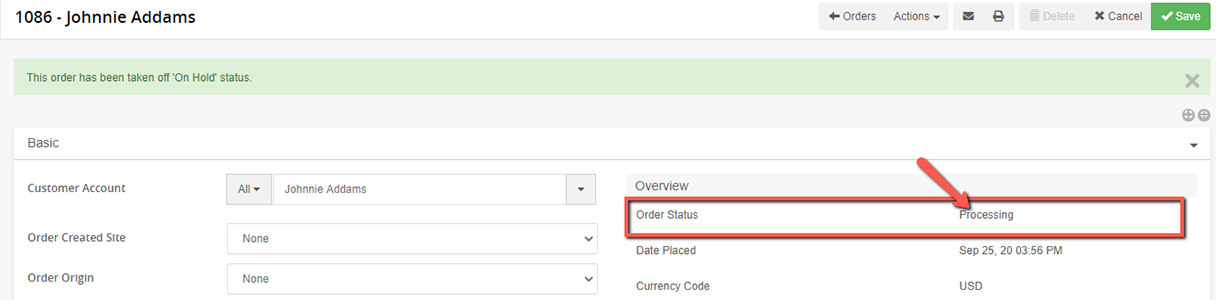
The order will now have a status of On Hold.
.png)
Take Order Off Hold
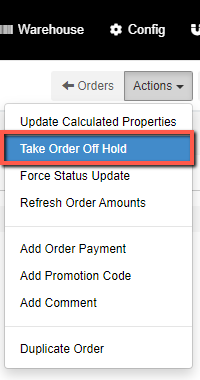
An Order that has a Status of On Hold can be taken off hold.
- Click the Actions button
- Select Take Order Off Hold
The Take Order Off Hold modal will appear.
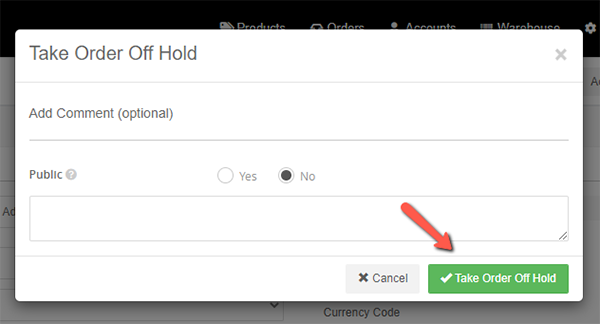
- Click the Take Order off Hold button.
The status of the Order will return to what it was before it was placed on hold, either New or Processing.
Cancel Order
If you have placed an order but have not yet fulfilled the items the order can be canceled.
.png)
- Click the Actions menu at the top of the order detail
- Select Cancel Order from the dropdown.
The Cancel Order modal will open.
- Add a comment if desired and then select the Yes or No to make it public.
- Click Cancel Order
The order will now have a status of closed.
.png)
Reopen a closed Order
When an order has the status of Closed, the order can be reopened.
To Reopen an order, from the Order detail of a closed order:
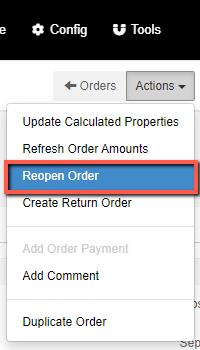
- Click the Actions button.
- Select Reopen Order from the dropdown.
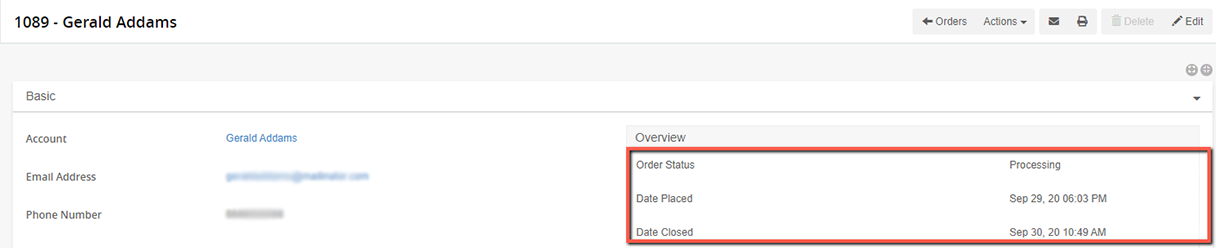
The order will be reopened and have a status of Processing and the order can edited, for example possibly adding more order items.
Create a Return Order
Sometimes all or part of an order must be returned. In such a case, a Return Order should be created. Note: return orders cannot be created until at least part of the order has been shipped/delivered to the customer, unless it is the fulfillment amount being refunded.
Locate an order (processing or closed) in the Orders Listing, which can be found be selecting Orders from the Orders tab on the Ultra Commerce toolbar.
To Create a Return Order from the order detail:
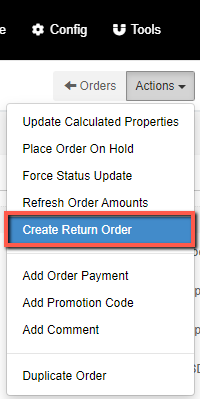
- Click on the Actions button.
- Select Create Return Order from the dropdown.
The Create Return Order modal will display.
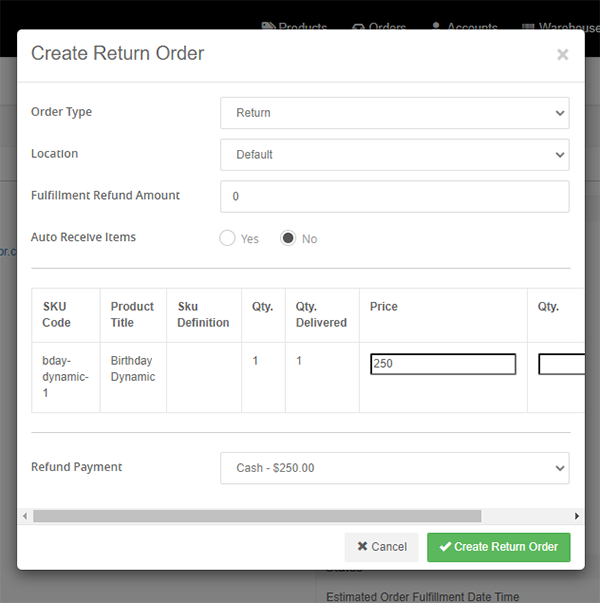
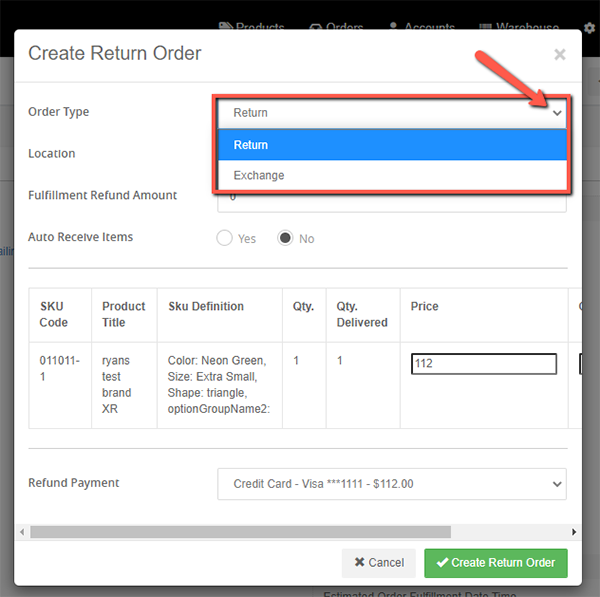
Order Type This just designates the type of order, in this case a return. Exchange will be reviewed in another section.
Location This would be set to the location originally purchased depending on the type of item unless it was going to be returned to another location.
Fulfillment Refunded Amount If there were fulfillment charges they can be entered here for a refund.
Auto Receive Items If this is set to Yes, then there will be no need to do a return fulfillment, that will be done automatically. If it is set to no, then there will be another step in the process of receiving the stock back.
Order item Price and Qty fields Fill in the quantity field and the price field will be filled with the original purchase price.
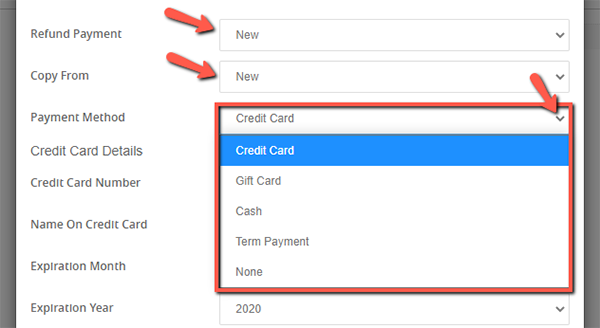
Refund Payment dropdown: This field defaults to the original order payment type.
- Keep the Original payment method selected on the Refund Payment dropdown.
- Click Create Return Order
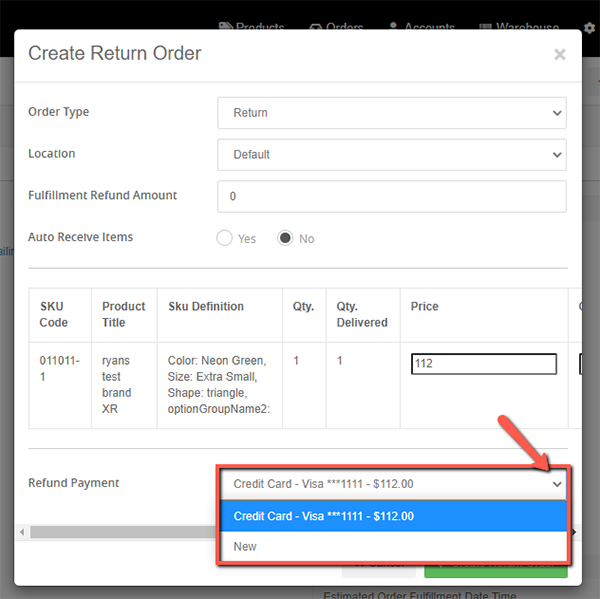
If New is selected, the refund can be returned by another payment method.
- Fill in the fields that appear if you select a different payment method and
- Click Create Return Order.
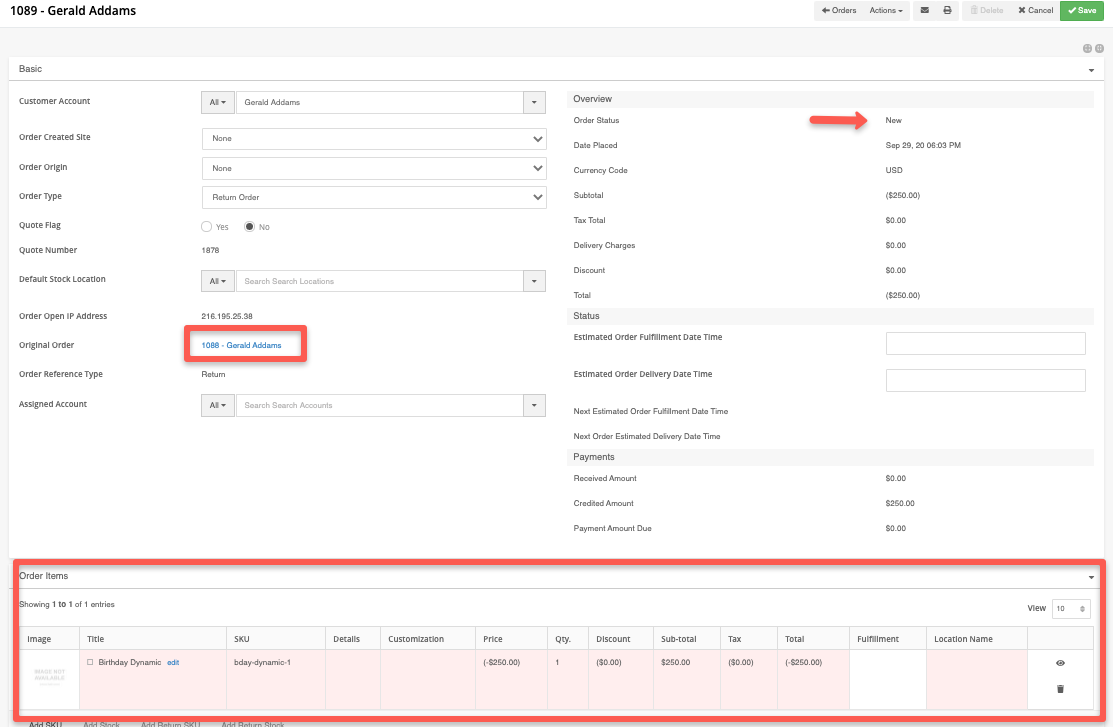
You will be directed to the Return Order Detail. This new Return Order will also appear as an entry on the Order Listing.
On the detail screen the Original Order is referenced, on the Order Items tab, the order item being returned is indicated with a pink background. Also note that the Credited Amount indicates that the refund has been issued.
The Return Order has a status of New if it is a merchandise product or any other product that was not auto-received back in stock. If they were auto received, the Status would be Closed. Because the status of this example return order is New because the item was not auto received, the stock would need to be returned and received. This is explained in the next step.
Receive Returned Order Item via the Order Returns tab of return order.
Below the Order Items tab is the Order Returns tab.
- Expand the tab.
- Click the eye icon to the right of the order fulfillment entry.
.png)
The Edit Order Return detail will open.
- Make sure that the detail is in edit mode by clicking the pencil icon in the upper right-hand corner. You will know it is once there is the green Save button there.
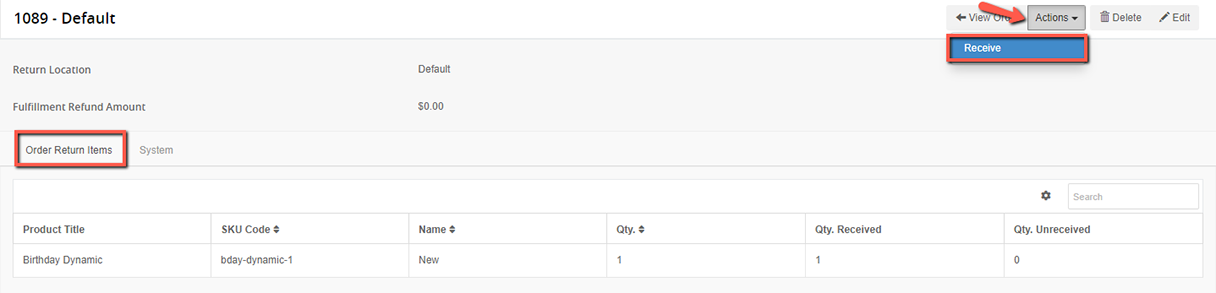
- Click the Order Return Items tab to expand and view the items being received.
- Note the Fulfillment refund amount. If there was no fulfillment charge at the time of the order, this field will be 0.00.
- Click the Actions button.
- Select Receive on the dropdown.
The Receive detail screen will display.
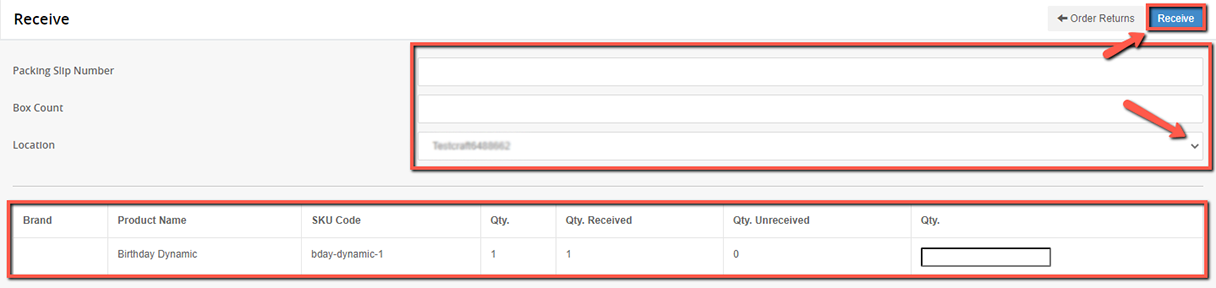
- Fill in the Packing Slip Number field.
- Fill in the Box Count field.
- Set the Location to the correct location that the item has been received.
- Fill in the QTY field.
- Click the Receive button.
If all the items have been received that are being returned, the Return Order will have a closed status. If only a part of the order has been returned, but you are still expecting return items, you can return to the order at a later date to complete it.
.png)
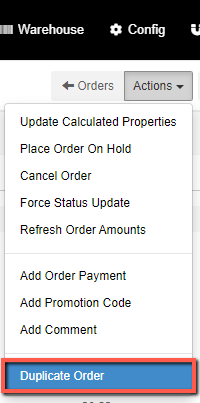
Duplicate Order
From the Actions menu of the Order detail, you can duplicate an order. You might find this handy if a customer is doing a repeat order, however, you have the option of duplicating the order and changing things such as the account associated with the order.
- Click Actions
- Select Duplicate order
The Duplicate Order modal will appear.
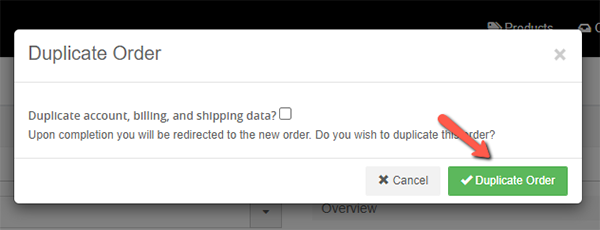
- Check the Duplicate account, billing and shipping data, a new order with the same data but a new order number will be created.
- Click the Duplicate Order button.
Order Detail Tabs
The Basic tabs are displayed below and give an overview of the order such as the customer account, the type of order, the status of the order as well payments received.
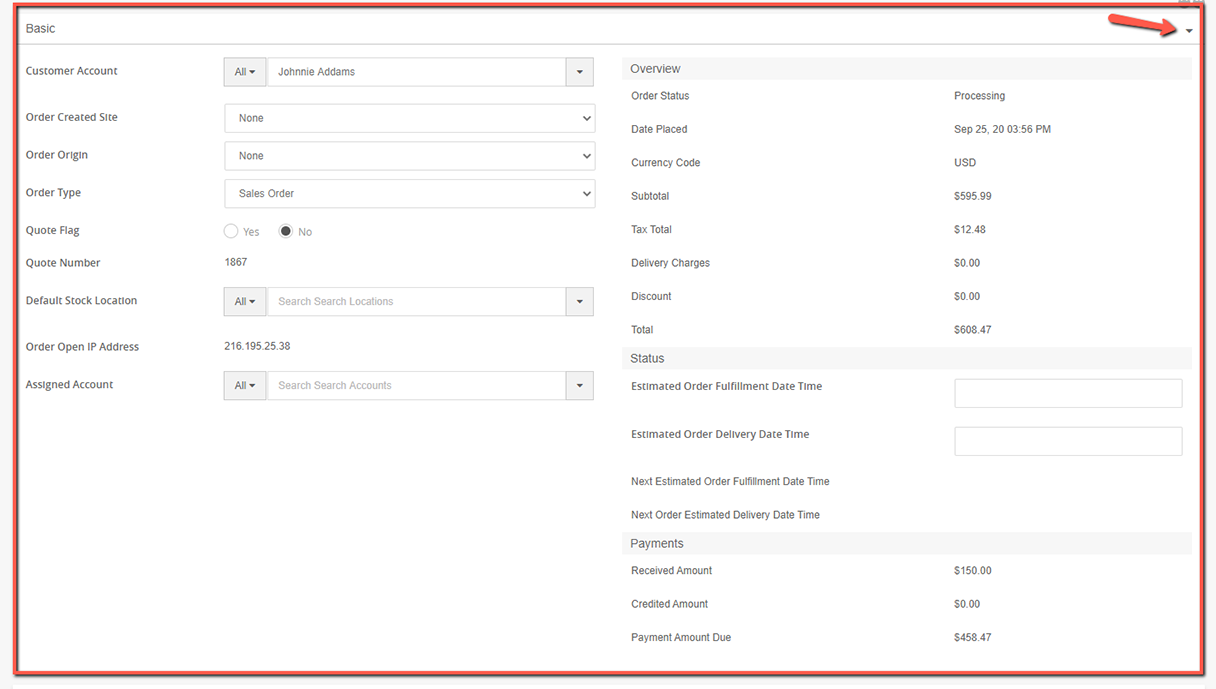
Below the Basic fields shown above are additional tabs explained below:
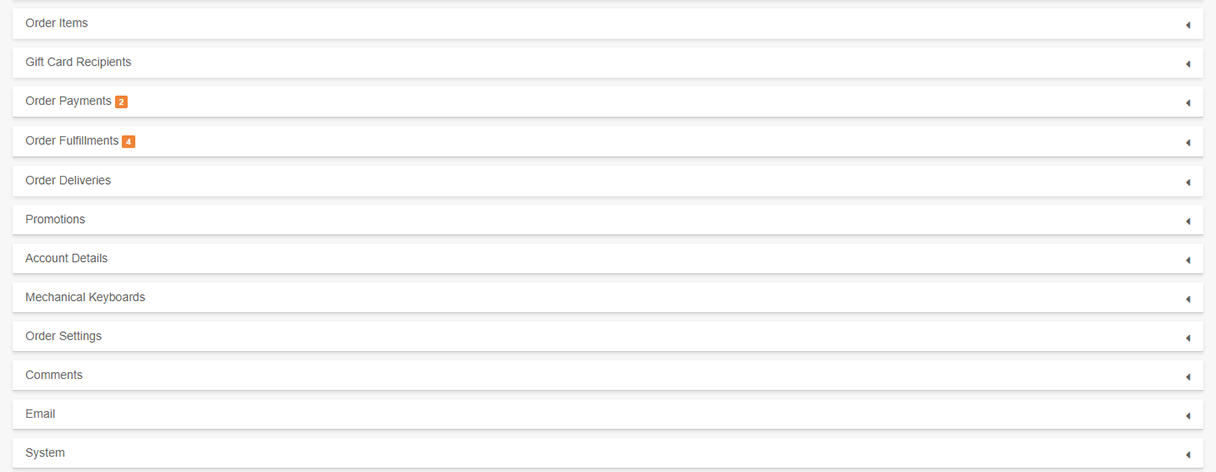
Gift Card Recipients tab
Orders that include gift cards as an order items will have this tab which includes a listing of the gift cards and their recipients. There is also the ability to view the gift card detail page by clicking the eye icon next to the right of the gift card order item.

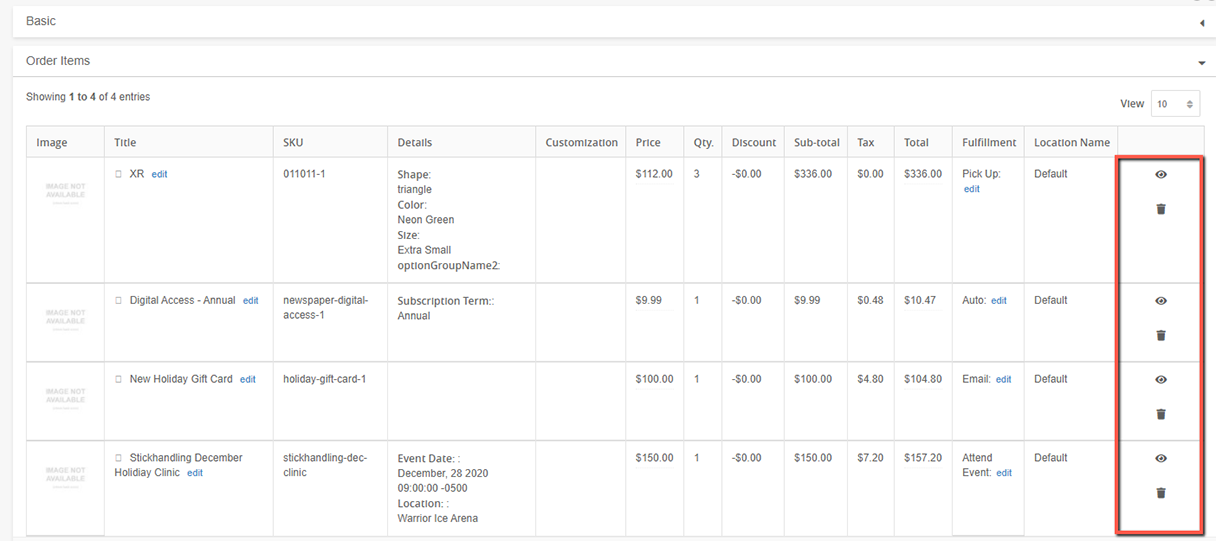
Order Items tab
This tab was explained in the order items section. It is a listing of all products added to a given order. If the order is still open (not closed) and the order screen is in edit mode, you can change quantity of items in the order or add items to an Order that is not closed by selecting from list of skus.
Order Payments tab
This tab lists the Charges, Credits, and any invalid or removed payments on an order. If the Order is still in an open status and there is a balance due on the order and order payment can be added. Once an order is in a closed status, the ability to add an order payment is disabled.
.png)
Add Order Payment from Order Payments tab
If the Order has a balance due payments can be made from this tab.
- Click the + Add Order Payment button .
The Add Order Payment modal will appear. If there is a charge card payment method on file, by default it will be pre-selected for use. If you would like to see other payment options:
- Select New for the Account Payment Method dropdown ton the Order Payment modal additional fields will appear.
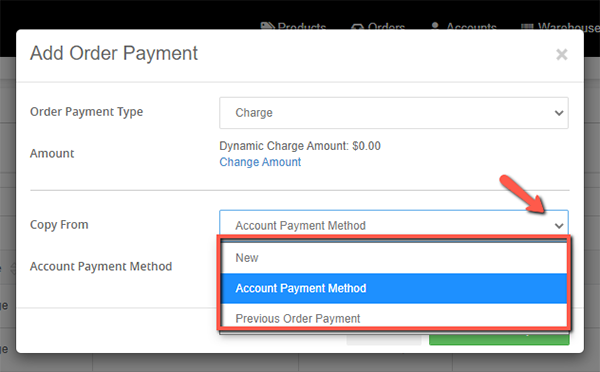
The available payment methods that are active for the order available for selection will appear as additional fields on the Add Order Payment modal in the Payment Method dropdown as shown in the screenshot below.
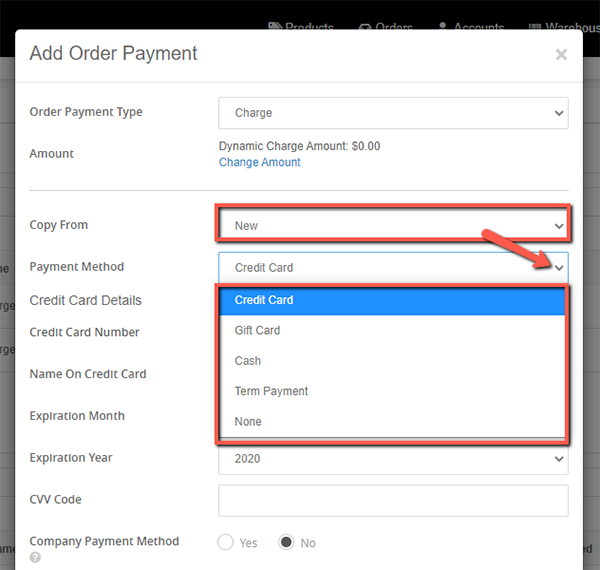
Review the Place Order section of the Carts & Quotes section for an explanation on applying different payment method types to the order, such as cash, credit card, term payment and gift card.
Order Fulfillments tab
Shows fulfillment(s) of the order (see Fulfillment Methods for more information), including the method of fulfillment, the charge for fulfillment (before and after applicable discounts), quantity delivered, and any quantity remaining to be fulfilled.
From this tab you can fulfill any items not yet fulfilled. They will be indicated by the looking at the Quantity Undelivered field in the list of order items.

.png)
Fulfill order items from the order fulfillments tab
From the expanded order fulfillments tab
- Click the pencil icon to the right of an order item from the list on the Order Fulfillments tab that has a Quantity Delivered of 0. You will need to repeat the following steps for each order item.

The Order Item Fulfillment detail will open.
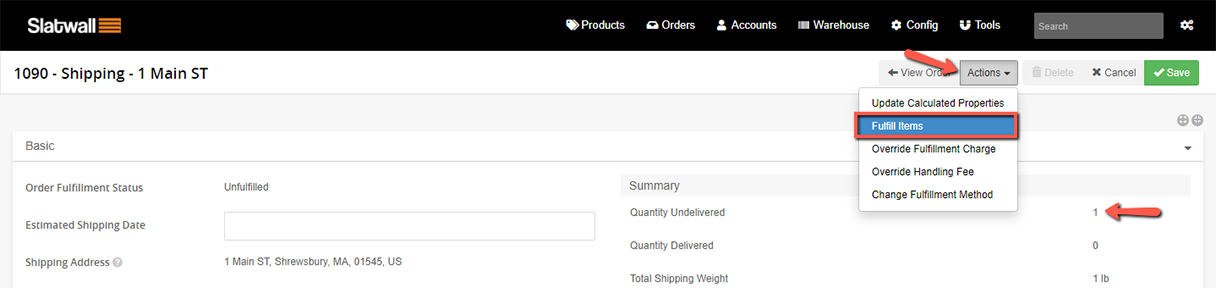
- Click on the Actions button.
- Select Fulfill Items from the dropdown.
The Fulfill Items detail will appear.

- Add in the Quantity of items to fulfill in the Quantity field. If only some of the order items can be fulfilled (partial fulfillment) put that quantity in the field. You would need to return later to fulfill the rest of the items.
- Click the Fulfill Items button on the top right.
The Create Order Delivery detail will appear.

Look over all the fields and make sure that any fields that need to be are filled in such as:
- Location fill in the location that the delivery will be coming from (or if this is a pickup that requires manual fulfillment, the location where the customer is taking possession of the item).
In the print-label section:
- Fill in the all the dimensions fields Height, Width, Depth and Weight.
- Tracking Number insert any tracking number if the item is being shipped.
- Check the QTY field for the sku.
- If an additional box is needed for the order item(s) click the +Add Box button.

When all fields are satisfactorily filled in:
- Click Create Order Delivery.
The Order Fulfillment detail will display an Order Fulfillment Status of Fulfilled and the summary will show the quantity delivered and undelivered if this was a partial fulfillment.
If all the items have been fulfilled, the Order will now have a Status of Closed.

Override Handling Fee

Override Fulfillment Charge via the Fulfillments detail screen
From the fulfillments tab, if you open a specific fulfillment detail screen you can override the fulfillment charge via the actions menu of the Fulfillment detail screen.
- Click on Actions menu
- Select Override Fulfillment Charge
.png)
The Override Fulfillment Charge modal will appear.
.png)
- Fill in the Fulfillment Charge field with the desired amount.
- Click the Override Fulfillment Charge.
The fulfillment detail will be appear and fulfillment charge field will be updated.
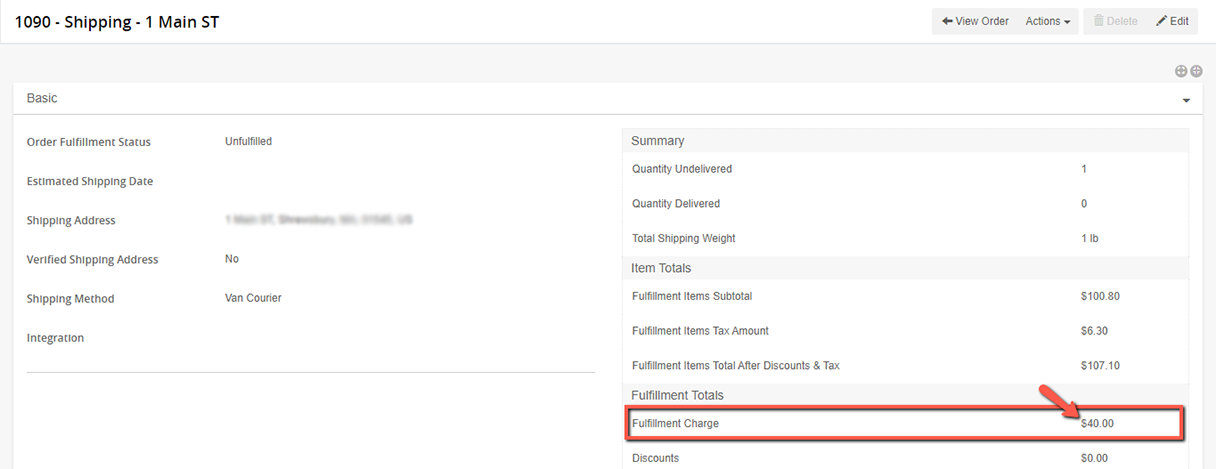
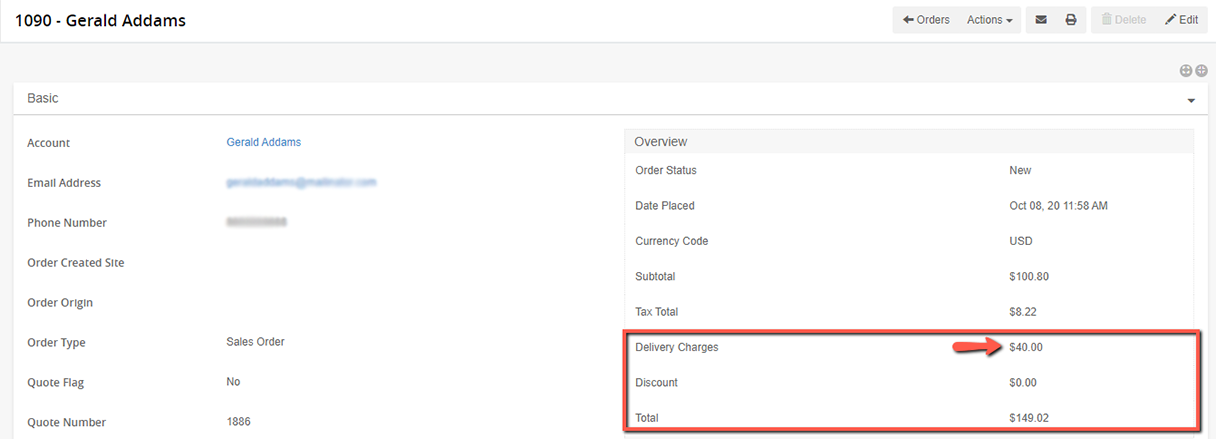
The Order detail screen, the total amount due will be adjusted based on the override as well.
Change Fulfillment Method from the fulfillment detail screen
From the fulfillment detail screen:
- Click the Actions menu.
- Select Change Fulfillment Method from the dropdown.
.png)
The Change Fulfillment Method modal will appear.
Promotions tab
Any promotions that have been applied to the order. Promotion codes can be applied here by clicking +Add Promotion Code. (See Promotions for more information on creating promotions.)
.png)
Add Promotion Code via the Promotions tab
To add a promotion to the order:
- Click the gray Add Promotion Code button on the tab.
.png)
The Add Promotion Code modal will appear.
.png)
- Fill in the Promotion Code field.
- Click the green Add Promotion Code button.
Order Deliveries tab
This tab lists fulfillment(s) of the order which have been delivered (for automatic fulfillments, this will update simultaneously with order fulfillment), including the date of delivery and the quantity delivered.
.png)

Account Details tab
This is where the basics details such as email, payment methods phone numbers, price groups that account has been assigned to, etc. are detailed. To edit details of the account tied to the order, see Accounts.
.png)
Comments tab
The comments tab shows any comments attached to the order. They can be visible or hidden from the account holder.
.png)
In order to create a new comment:
- Click the
 +Add Comment button.
The Create Comment modal will appear.
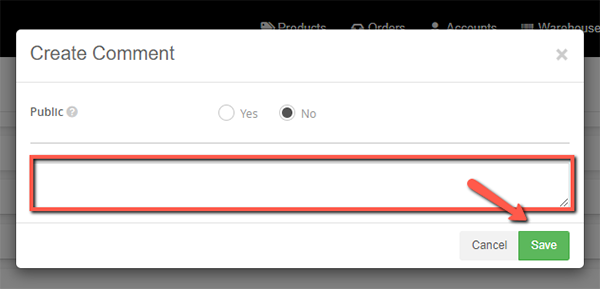
- Set the Public radio button to Yes or No. This allows you to create a new comment and toggle whether you want it to be public or not. If you click Yes for public this means the comment will be visible to the frontend user when they view orders placed from their account.
- Fill in the text box with your comment.
- Click Save.
The comment will now appear on the Comments tab. The Account holder may or may not be able to see the comment.