Categories
Ultra Commerce offers the ability to create Categories that can then be assigned to products if desired.
Navigate to the Categories listing
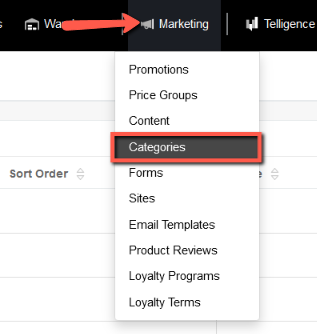
- Click on Marketing from the Ultra Commerce toolbar.
- Select Categories from the drop-down.

The Categories listing screen will appear.

Each entry in the Category Listing consists of three parts: a Name, Restrict Access, and Allow Product Assignment.
Add a Category
If you would like to add a category to the listing:
- Click the blue +Add Category button in the upper right corner of the listing
The Create Category page will appear.

Below are the fields to set:
- Category Name - Add a name for your category
- Restrict Access (Yes/No) - In order to make portions of your site subscription-only, you must restrict access to them. One way to do this is by category. Restricting Access to a category makes it available for inclusion in subscriptions; if it is not restricted, subscription is unneeded to access the content and thus it will automatically be included in all subscriptions unless manually excluded. Note: all Categories automatically are available for exclusion from subscription benefits regardless of their restriction settings.
- Allow Product Assignment (Yes/No)
In order to attach a product to a category select Yes or select No if you don't want to allow product assignment.
- Active Yes or No - setting to yes allows it to be used on the back-end.
- Published - Yes or No This will determine if shows up on the front-end.
- Parent Category - If the Category should nest below another category, you can select it from here.
- Click Save.
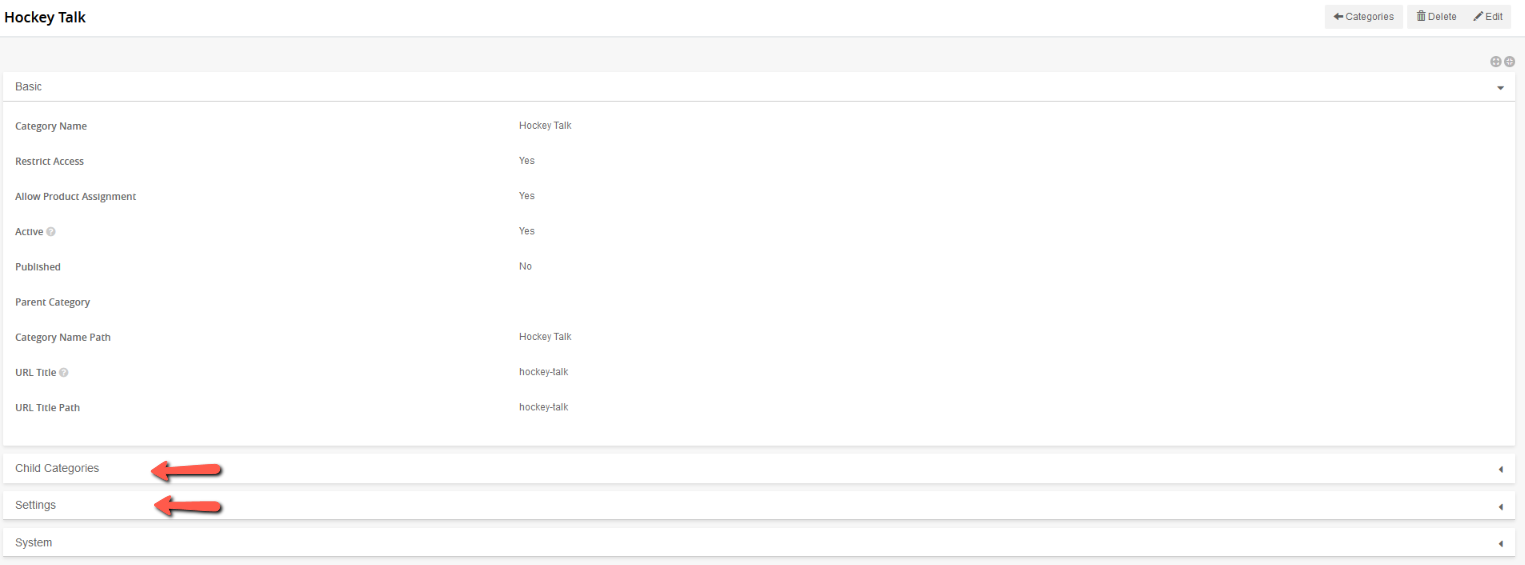
Now you can see your Category detail page with some additional tabs for more information about the category.

Child Categories tab
This is a place where you can quickly add categories that should nest below the category you are viewing. Just click the +Add Category button and follow the instructions above for creating a category.

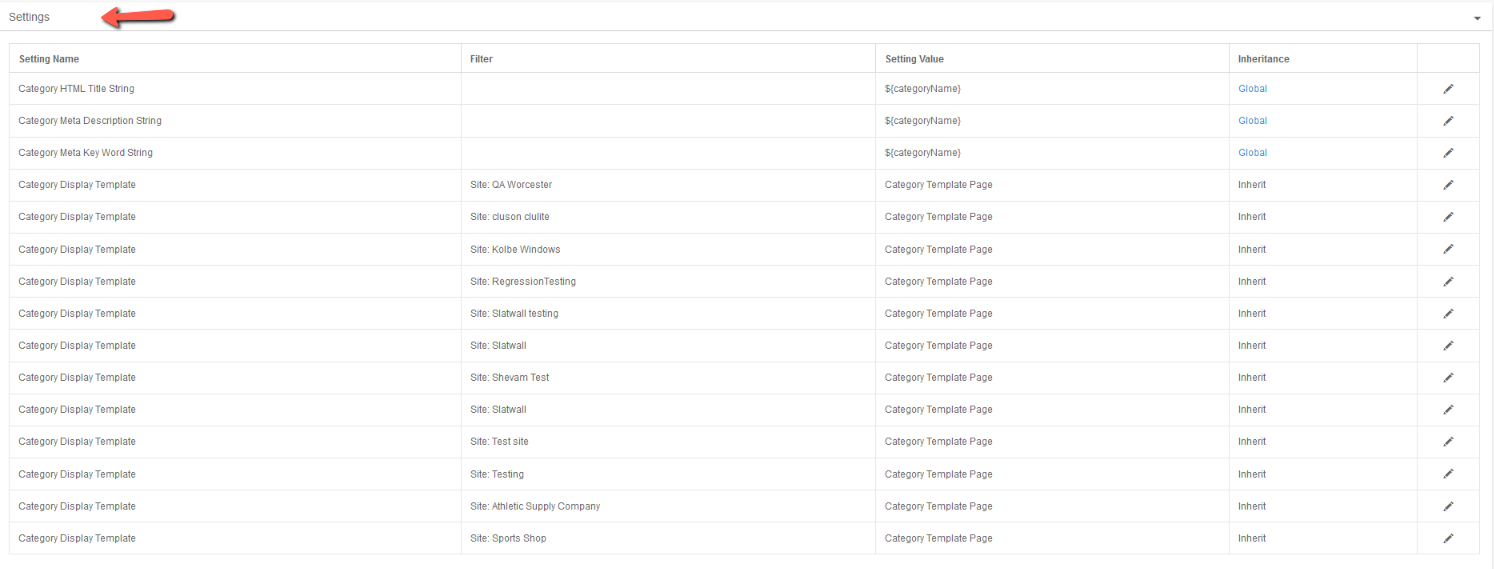
Settings tab
The settings tab has many settings that can be managed for the Category.

